# Account settings
The **Account settings** section allows you to manage your login and security settings, time zone, and notification settings, and get an overview of your Pushwoosh usage metrics. To access it, navigate to **My Account > Account settings**.
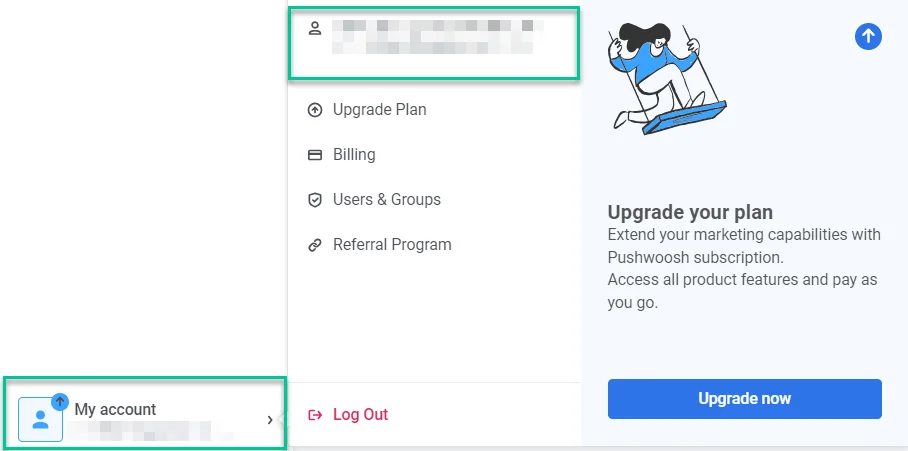 Below is a breakdown of each subsection and its functionalities.
## Account settings
### Login and security
#### Email login
The email address you registered with is displayed here. To update it, click **CHANGE EMAIL**.
Below is a breakdown of each subsection and its functionalities.
## Account settings
### Login and security
#### Email login
The email address you registered with is displayed here. To update it, click **CHANGE EMAIL**.
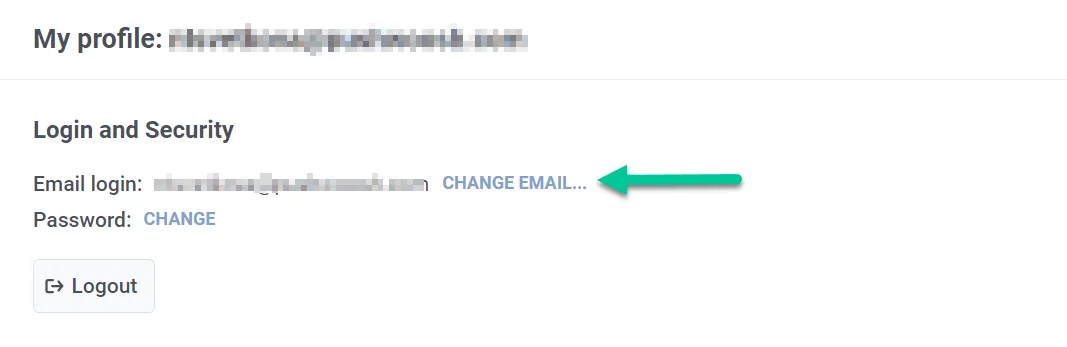 In the pop-up window, enter the new email address you wish to use and your current password to confirm the change. Then click the **Get link** button.
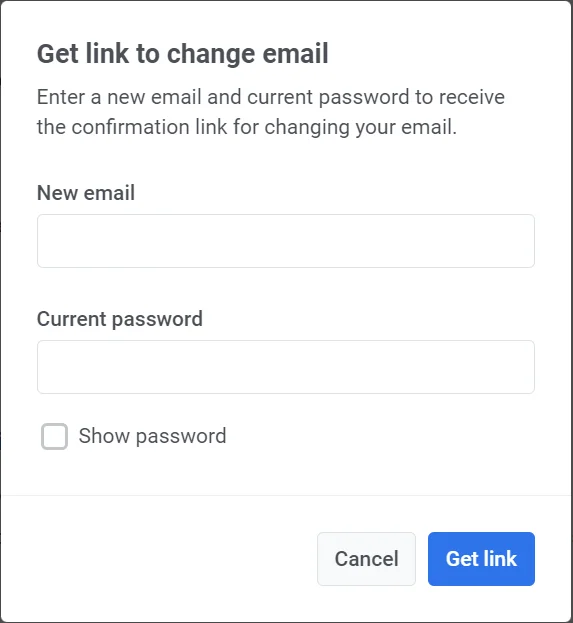 We will then send a verification link to your current email address to confirm the change.
#### Password
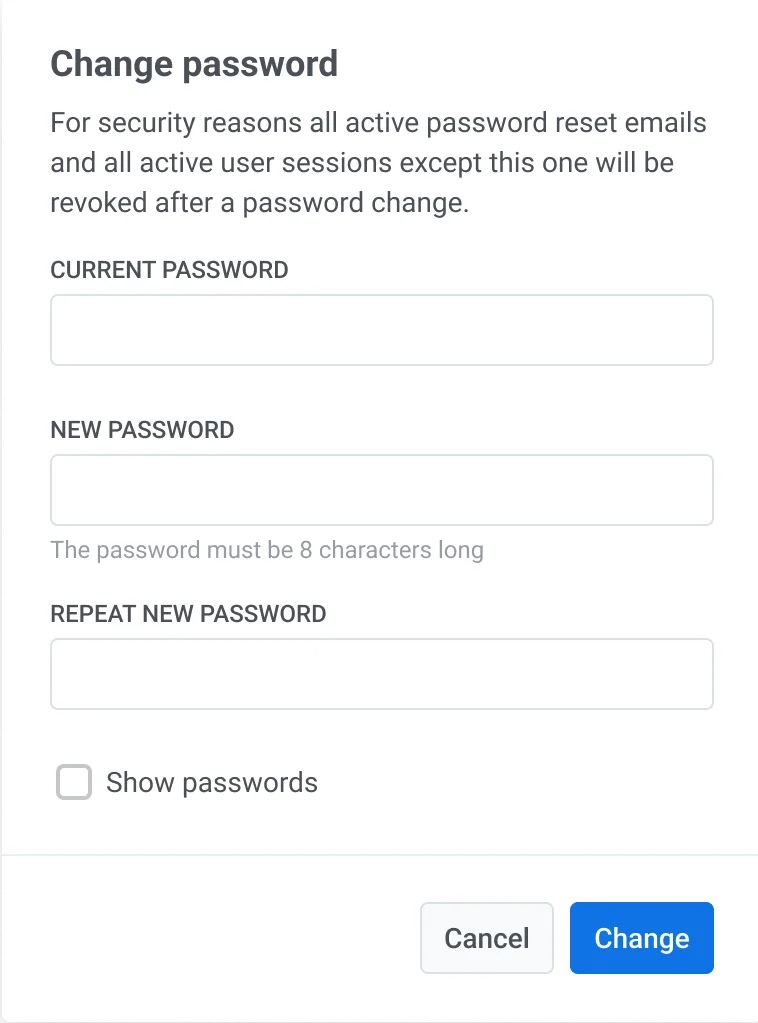
To update your password, click the **CHANGE** link.
In the new window, type your current password and your new password, then click **Change**. Please note that for security reasons, all active password reset emails and user sessions (except this one) will be revoked after the password change.
We will then send a verification link to your current email address to confirm the change.
#### Password
To update your password, click the **CHANGE** link.
In the new window, type your current password and your new password, then click **Change**. Please note that for security reasons, all active password reset emails and user sessions (except this one) will be revoked after the password change.
 If you wish to sign out of your account, you can do so by clicking on the **Logout** button in this section.
### Two-factor authentication
You can turn on two-factor authentication (2FA) to add another layer of security to your account. Pushwoosh provides two options for two-factor authentication: email verification and an authentication app (e.g., Google Authenticator).
You have the flexibility to enable both email verification and the authentication app. This allows you to choose either method when logging in, and ensures you have a backup option in case there are issues with receiving codes.
To set up two-factor authentication, click **Get started**.
Then select the authentication method.
If you wish to sign out of your account, you can do so by clicking on the **Logout** button in this section.
### Two-factor authentication
You can turn on two-factor authentication (2FA) to add another layer of security to your account. Pushwoosh provides two options for two-factor authentication: email verification and an authentication app (e.g., Google Authenticator).
You have the flexibility to enable both email verification and the authentication app. This allows you to choose either method when logging in, and ensures you have a backup option in case there are issues with receiving codes.
To set up two-factor authentication, click **Get started**.
Then select the authentication method.
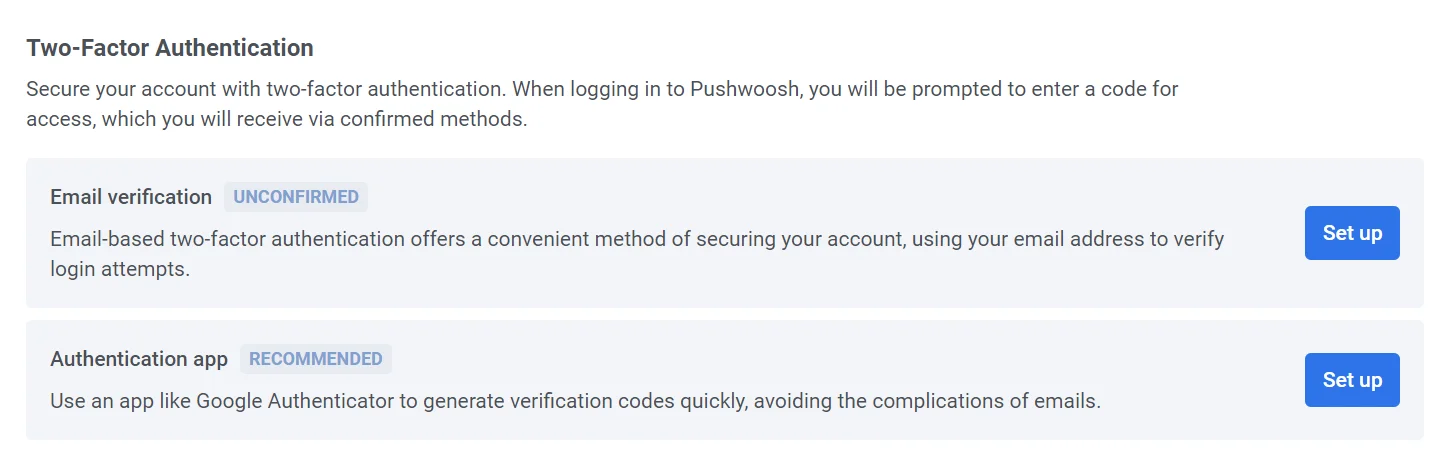 #### Email verification
Click **Set up** to receive a verification code. Enter the code sent to your email in the provided field to activate two-factor authentication.
#### Email verification
Click **Set up** to receive a verification code. Enter the code sent to your email in the provided field to activate two-factor authentication.
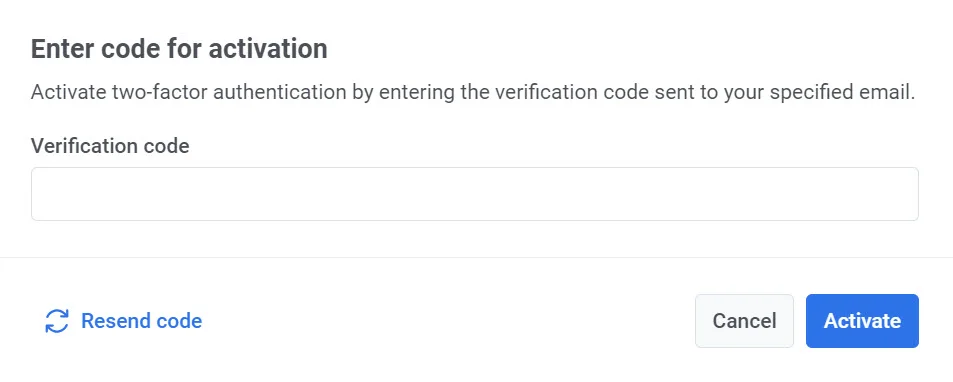 If two-factor authentication is enabled on your account, you will see a **Your account is protected** message along with a green **Email Confirmed** badge. To log in to Pushwoosh, you will need to enter a verification code that will be sent to your registered email.
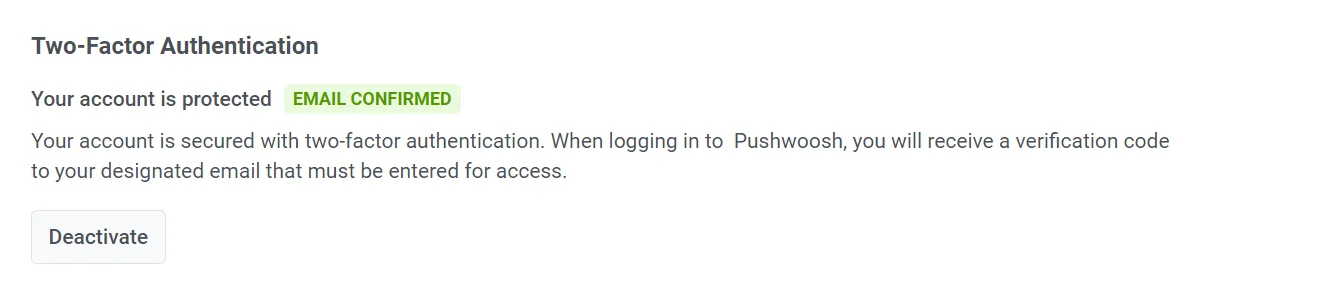 To turn off two-factor authentication, click the **Deactivate** button and enter the verification code sent to your email in the pop-up window that appears.
#### Authentication app
To quickly and securely generate verification codes, use an app like Google Authenticator. Click **Set up** next to the **Authentication app** to configure this option.
To turn off two-factor authentication, click the **Deactivate** button and enter the verification code sent to your email in the pop-up window that appears.
#### Authentication app
To quickly and securely generate verification codes, use an app like Google Authenticator. Click **Set up** next to the **Authentication app** to configure this option.
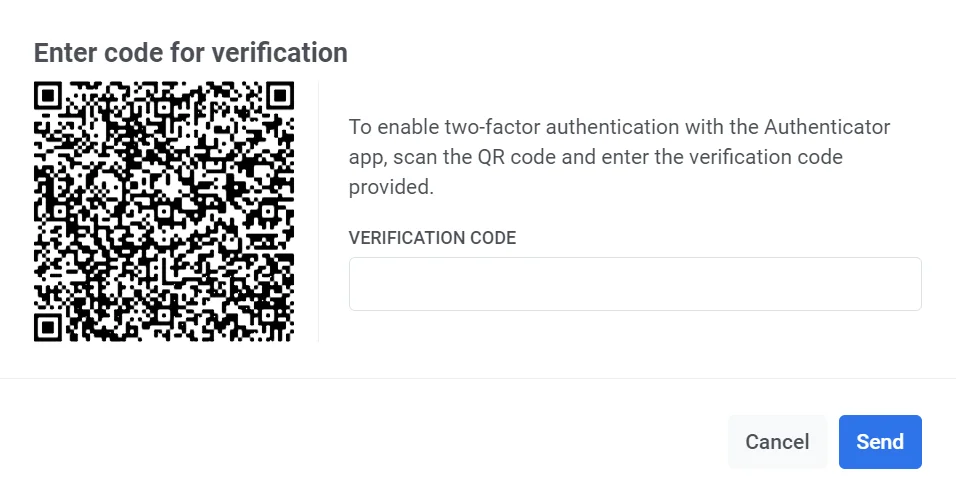
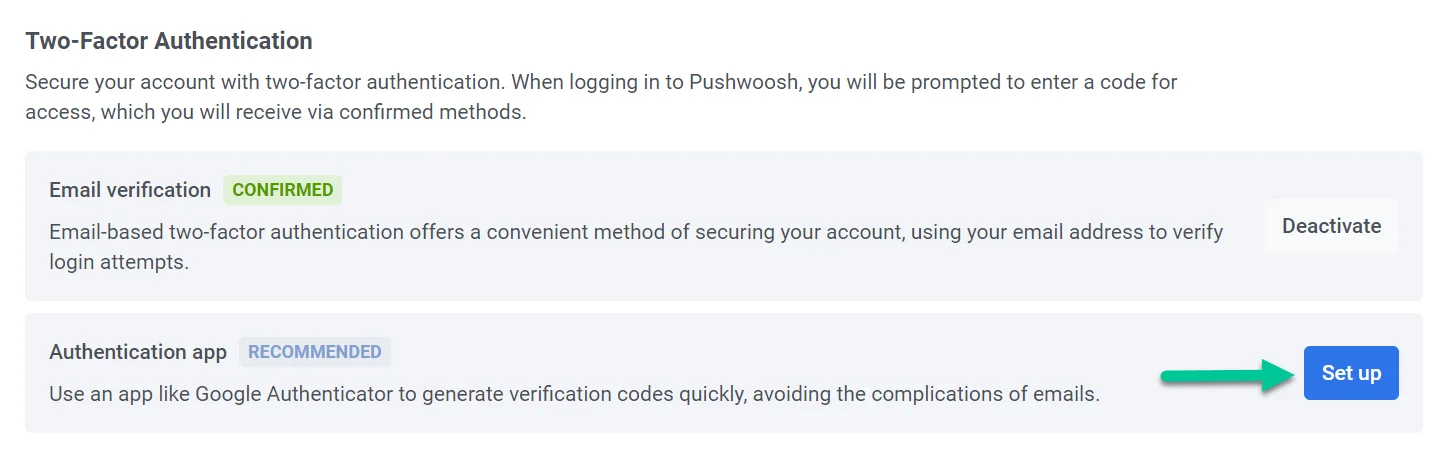 Open your authentication app and scan the QR code that appears. Then enter the verification code provided by the app.
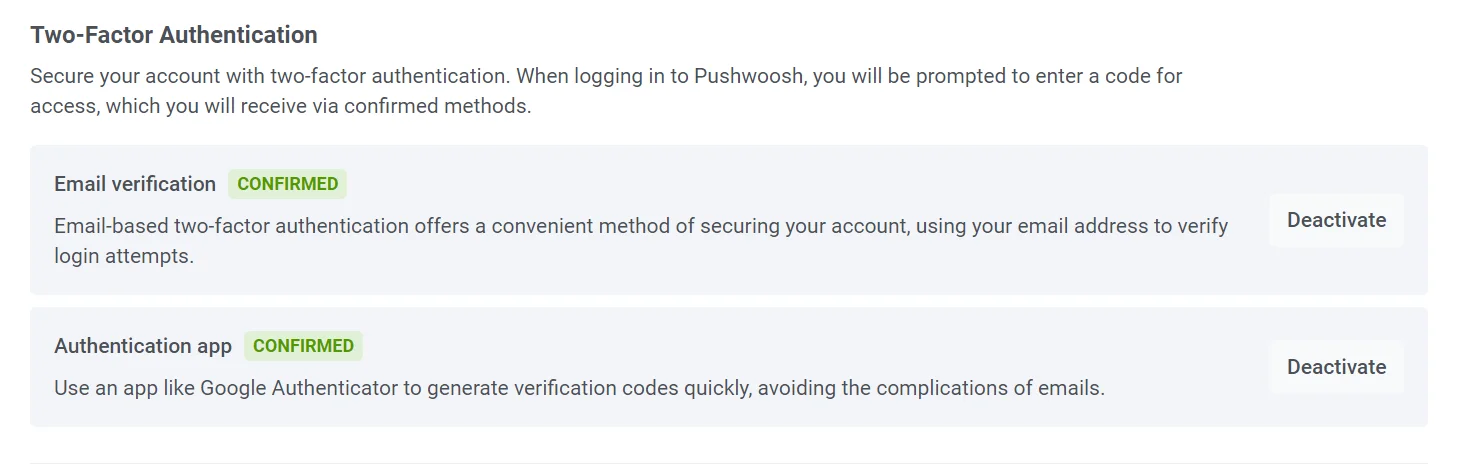
 Once the setup process is complete, you will see the **Confirmed** status next to the **Authentication app** option.
 ### Default timezone
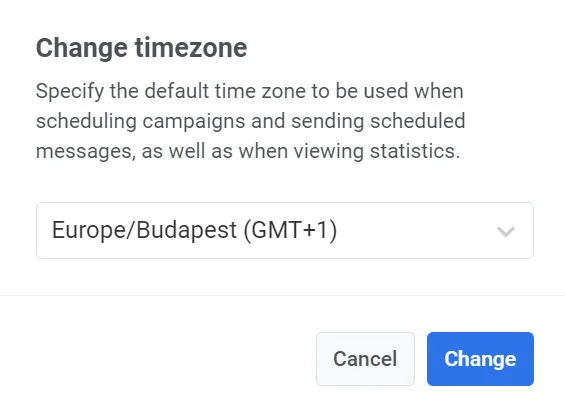
By default, your account uses Coordinated Universal Time (UTC) as your time zone. To change your preferred time zone, click **CHANGE**.
This opens a pop-up window where you can select your desired default time zone. Once selected, click the **Change** button to confirm. Your selected time zone will be used for scheduling campaigns, sending scheduled messages, and viewing statistics.
### Default timezone
By default, your account uses Coordinated Universal Time (UTC) as your time zone. To change your preferred time zone, click **CHANGE**.
This opens a pop-up window where you can select your desired default time zone. Once selected, click the **Change** button to confirm. Your selected time zone will be used for scheduling campaigns, sending scheduled messages, and viewing statistics.
 ### Interface language
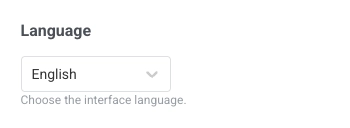
Change the language of the Pushwoosh interface. To switch the language, select it from the drop-down.
### Interface language
Change the language of the Pushwoosh interface. To switch the language, select it from the drop-down.
 ### Notification settings
Turn on the toggle to subscribe to our newsletter and receive updates about Pushwoosh.
### Notification settings
Turn on the toggle to subscribe to our newsletter and receive updates about Pushwoosh.
 ## Workspace
This section provides an overview of your current workspace activity. **Only users with administrator rights can view and manage this section.**
## Workspace
This section provides an overview of your current workspace activity. **Only users with administrator rights can view and manage this section.**
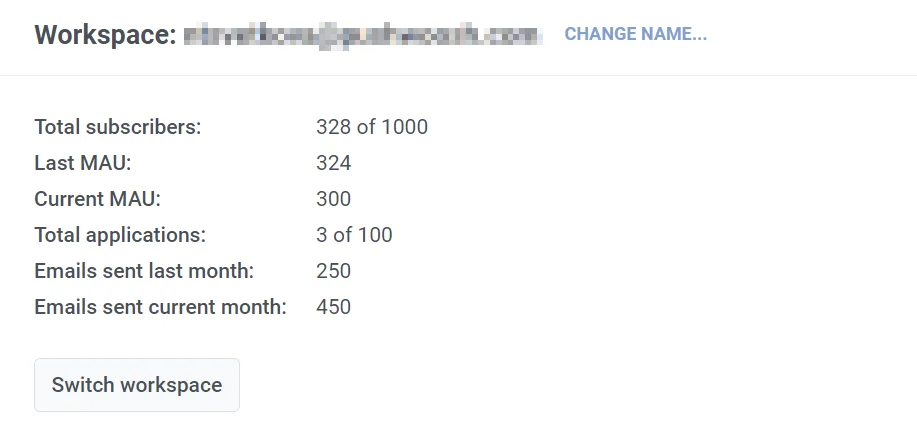 The name of your current workspace is displayed at the top of the section. To change it, click the **CHANGE NAME** link. In the pop-up window, enter a new name and click Change to confirm the change.
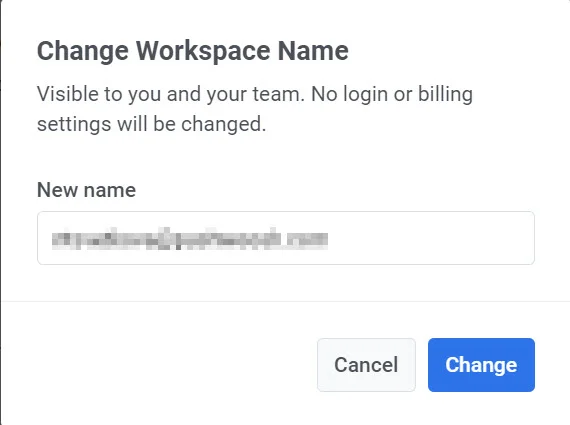 Note that this won't affect any login or billing settings and will only be visible to you and your team.
#### Usage metrics
In this section, you will also find a detailed summary of your Pushwoosh usage statistics, which include:
| Total subscribers | The number of subscribers out of a maximum allowed. |
| ------------------------- | --------------------------------------------------------------------------------------- |
| Last MAU | The number of Monthly Active Users (MAU) from the previous month |
| Current MAU | The number of Monthly Active Users for the current month |
| Total applications | The number of applications registered with the workspace out of a total allowed number. |
| Emails sent last month | The number of total emails sent from the workspace in the last month |
| Emails sent current month | The number of emails sent in the current month |
#### Switching between workspaces
If you manage multiple workspaces, you can easily switch between them using the **Switch workspace** button.
Note that this won't affect any login or billing settings and will only be visible to you and your team.
#### Usage metrics
In this section, you will also find a detailed summary of your Pushwoosh usage statistics, which include:
| Total subscribers | The number of subscribers out of a maximum allowed. |
| ------------------------- | --------------------------------------------------------------------------------------- |
| Last MAU | The number of Monthly Active Users (MAU) from the previous month |
| Current MAU | The number of Monthly Active Users for the current month |
| Total applications | The number of applications registered with the workspace out of a total allowed number. |
| Emails sent last month | The number of total emails sent from the workspace in the last month |
| Emails sent current month | The number of emails sent in the current month |
#### Switching between workspaces
If you manage multiple workspaces, you can easily switch between them using the **Switch workspace** button.