Send emails
Prerequisites
Anchor link toBefore you can begin sending emails, ensure that you have completed the following steps:
- Configured your project and verified your email and domain
- Added subscribers to your project by using the API or importing the mailing list.
How to send a one-time email
Anchor link toTo send a one-time email in Pushwoosh, navigate to the Campaigns section, select One-time messaging, and click Send message > Email.

Select or create email content
Anchor link toYou can use pre-existing email content or create a new one:
- To use pre-existing content, open the dropdown menu and select the desired email content.
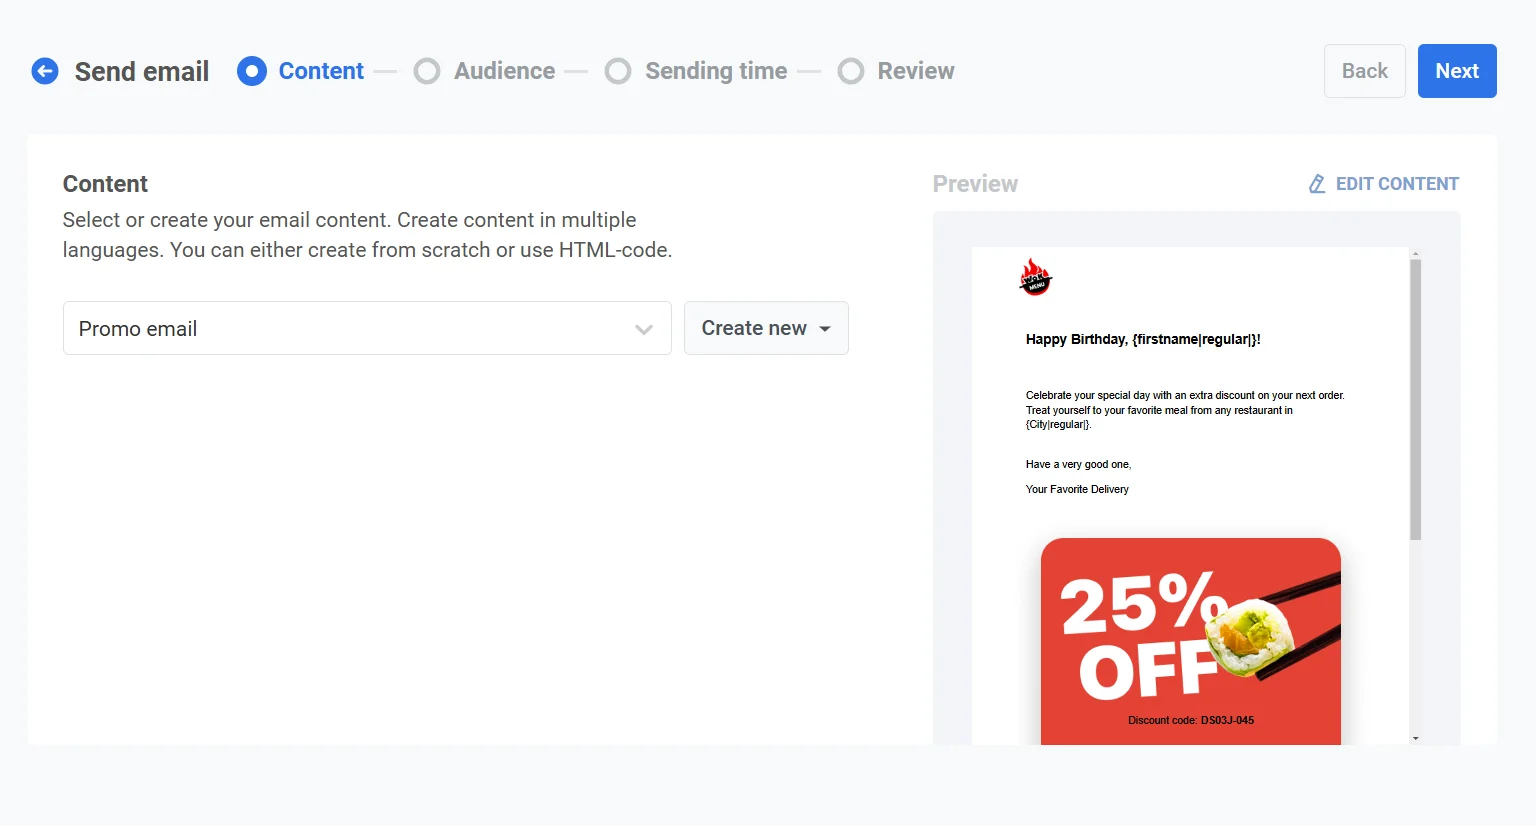
- If you need to create new content, you can either build it from scratch using the Drag and Drop Editor or use HTML code. To do this, click Create new and select the option that best suits your requirements. Learn more about creating email content
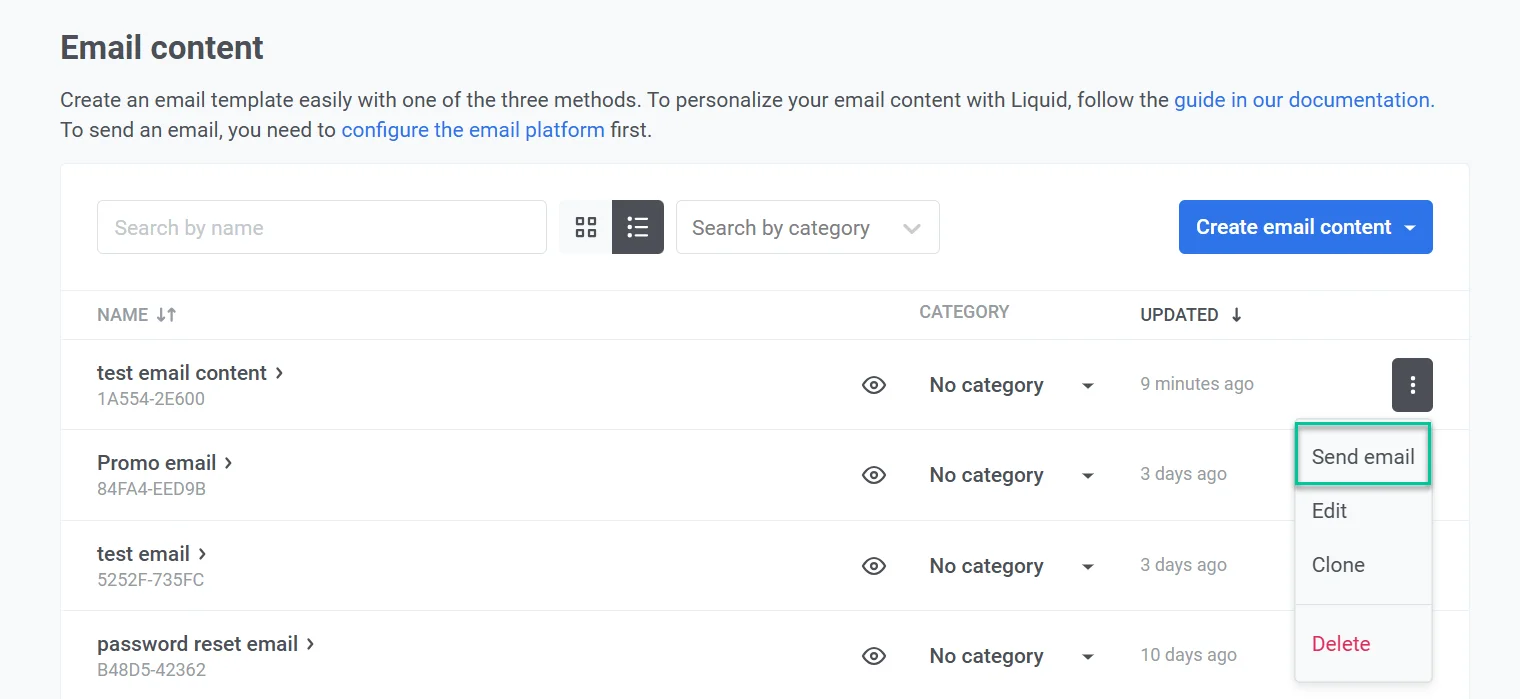
Select the audience for your email campaign
Anchor link toIn the Audience step, define who will receive your email. Pushwoosh offers several targeting options to match your campaign goals:
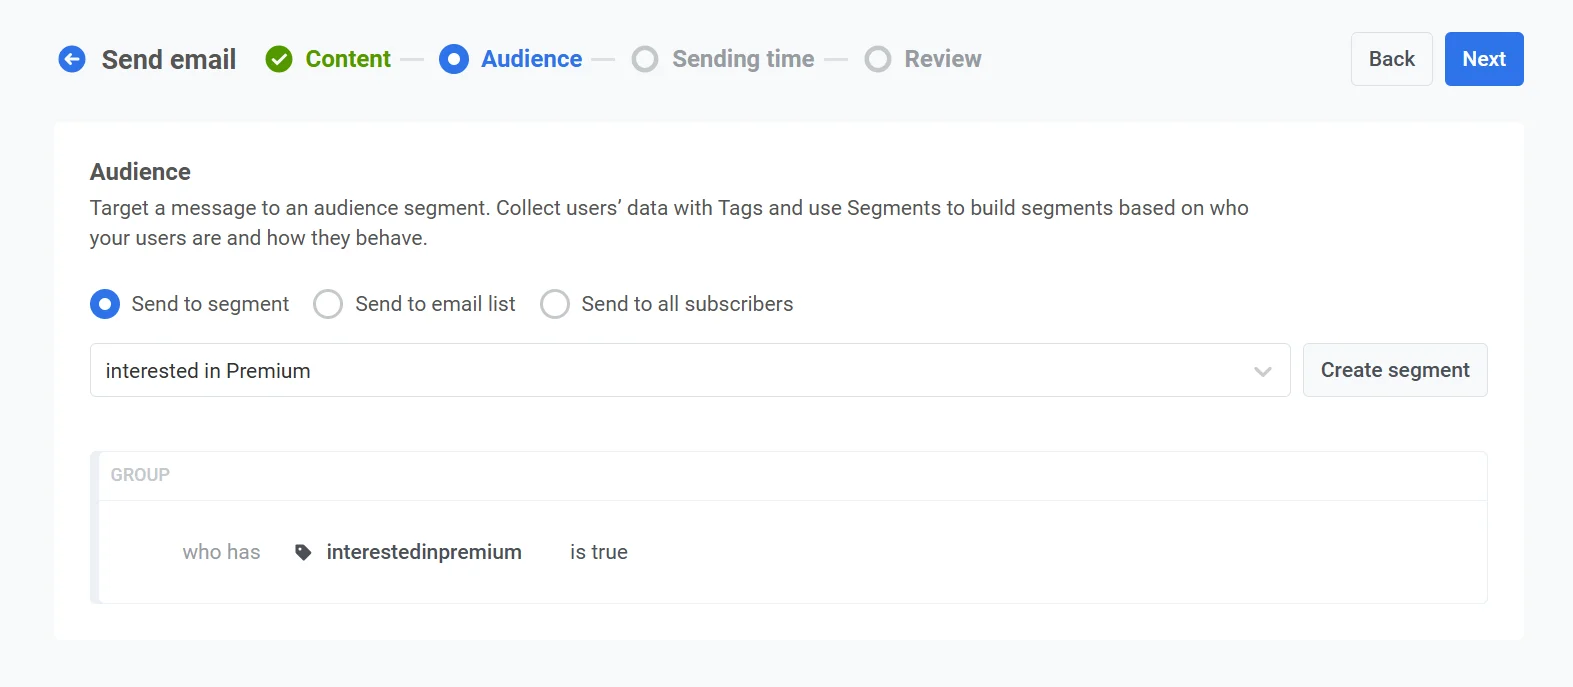
Send to segment
Anchor link toChoose this option to target a predefined segment of your audience. This allows you to focus on specific groups based on their actions, behavior, or attributes. There are two options:
- Select a segment from the drop-down list of pre-built options.
-
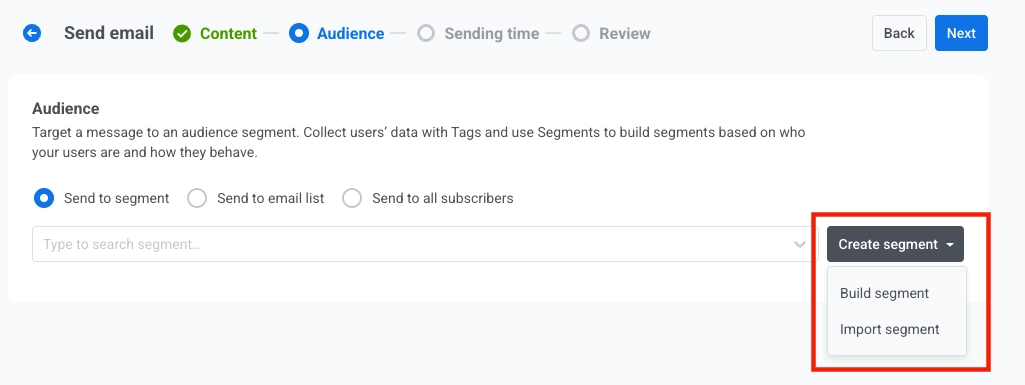
To create a new segment, click Create segment. Then select one of the following actions from the dropdown menu:
- Build segment: Create a new segment using the Segment builder. Learn more
- Import segment: Import a segment from a CSV file. Learn more.
Send to list of addresses
Anchor link toUse this option to send the email to a specific list of email addresses. Enter the email addresses as a list, separated by commas. This is ideal for one-time or special communications that don’t fit into a predefined segment.
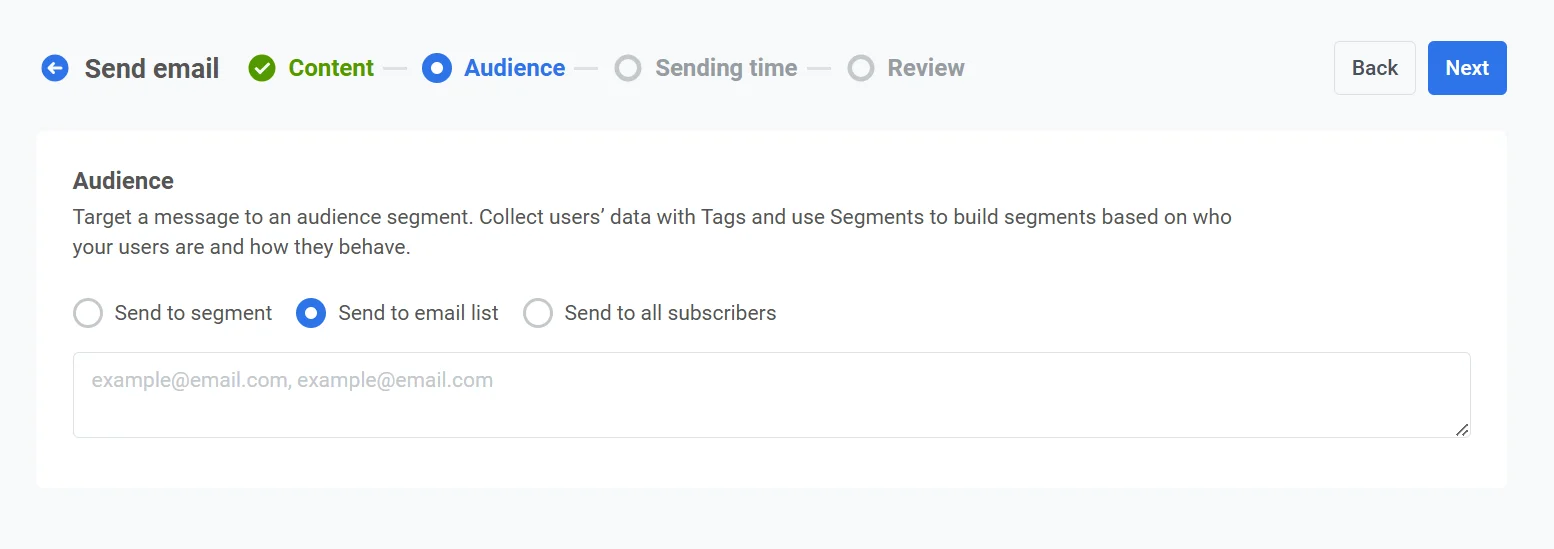
Send to all users
Anchor link toSelect this option to target your entire subscriber base, regardless of their segment or behavior.

Once you’ve set your audience, click Next to proceed to the scheduling step of your email campaign.
Schedule email
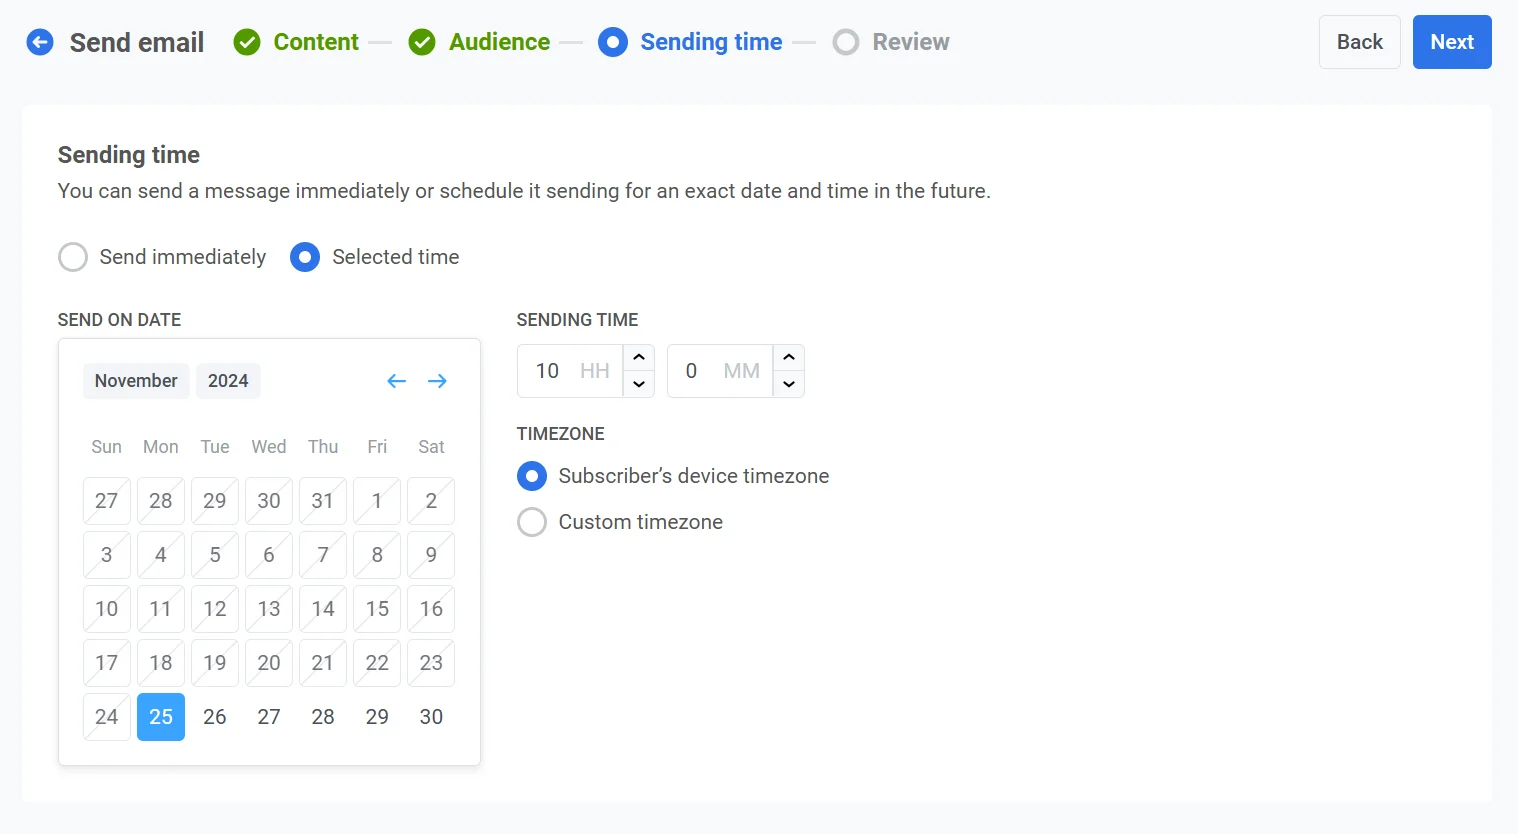
Anchor link toThen, choose when to send your email. You have several options:
- send it immediately
- schedule it for a specific date and time
Send immediately
Anchor link toChoose this option if you want to send the email as soon as the campaign setup is complete. This is ideal for urgent or time-sensitive messages that require immediate delivery.

Selected time
Anchor link toChoose this option to schedule your email for a specific date and time.
Set the date and time
Anchor link toUse the calendar to pick the exact date for your email. Then, specify the time in hours and minutes (using the 24-hour format).
Select the timezone
Anchor link to- Subscriber’s device timezone. The email will be sent based on each recipient’s local timezone, ensuring delivery at the specified time in their location.
- Custom timezone. Set a specific timezone to send the email at the same time for all recipients. This is useful for targeting users in a particular region.
Configure message delivery settings
Anchor link toSet frequency capping
Anchor link toUse Frequency capping to limit how often users receive email messages, preventing over-messaging and reducing churn. Choose one of the following options:
-
Use Global frequency capping settings
Apply the project-wide limits configured in your Global frequency capping settings.
For example, if the global limit is set to 3 messages in 9 days, additional messages exceeding this limit will be skipped.

-
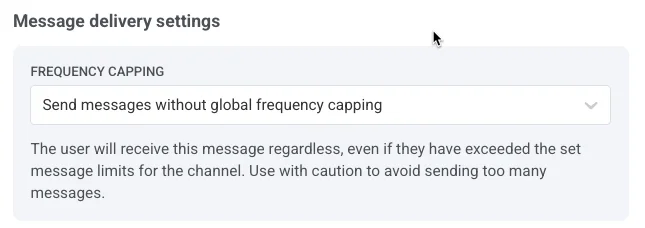
Ignore Global frequency capping
The user will receive this message even if they’ve exceeded the channel’s message limits. Use this option with caution to avoid over-messaging.
-
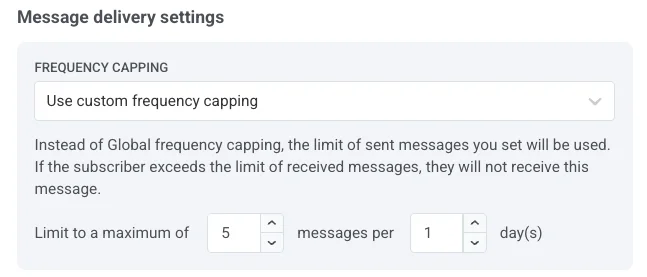
Use custom frequency capping
Set a custom message limit for this message. If the user exceeds this custom cap, the message will be skipped, and the user will proceed to the next step.
Set send rate limits
Anchor link toThe Send rate setting controls how quickly messages are delivered to your audience. Adjusting the send rate helps you manage delivery speed, prevent backend overload, and improve overall deliverability.
Choose one of the following options:
- Use global send rate settings
Applies the send rate limits configured in your project’s message delivery settings. If no limits are set, all messages will be sent immediately. Use this option when you want delivery speed to follow your project’s default rules. Learn more about global send rate limits

- Send messages without send rate
Sends messages as fast as possible, ignoring any global send rate limits. Use with caution to avoid overloading your backend or creating delivery spikes.

- Use custom send rate
Overrides the global send rate for this message only. Allows you to specify the number of messages sent per minute, giving you full control over delivery speed. Messages will be sent at the custom rate you define in the message element.
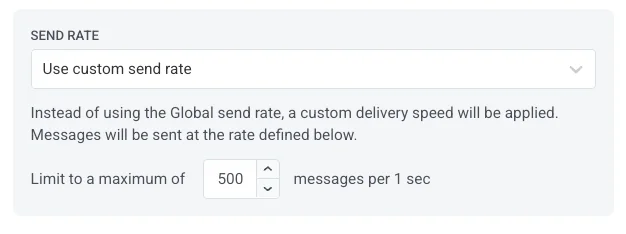
Once you’ve configured the desired options, click Next to proceed to the confirmation step.
Review and edit your content
Anchor link toThe final step is to review your email content and campaign settings, including the audience and sending time. You’ll also see a preview of your email in each selected language. Review all the details carefully before finalizing the campaign to ensure it aligns with your goals. You can adjust any settings as needed.
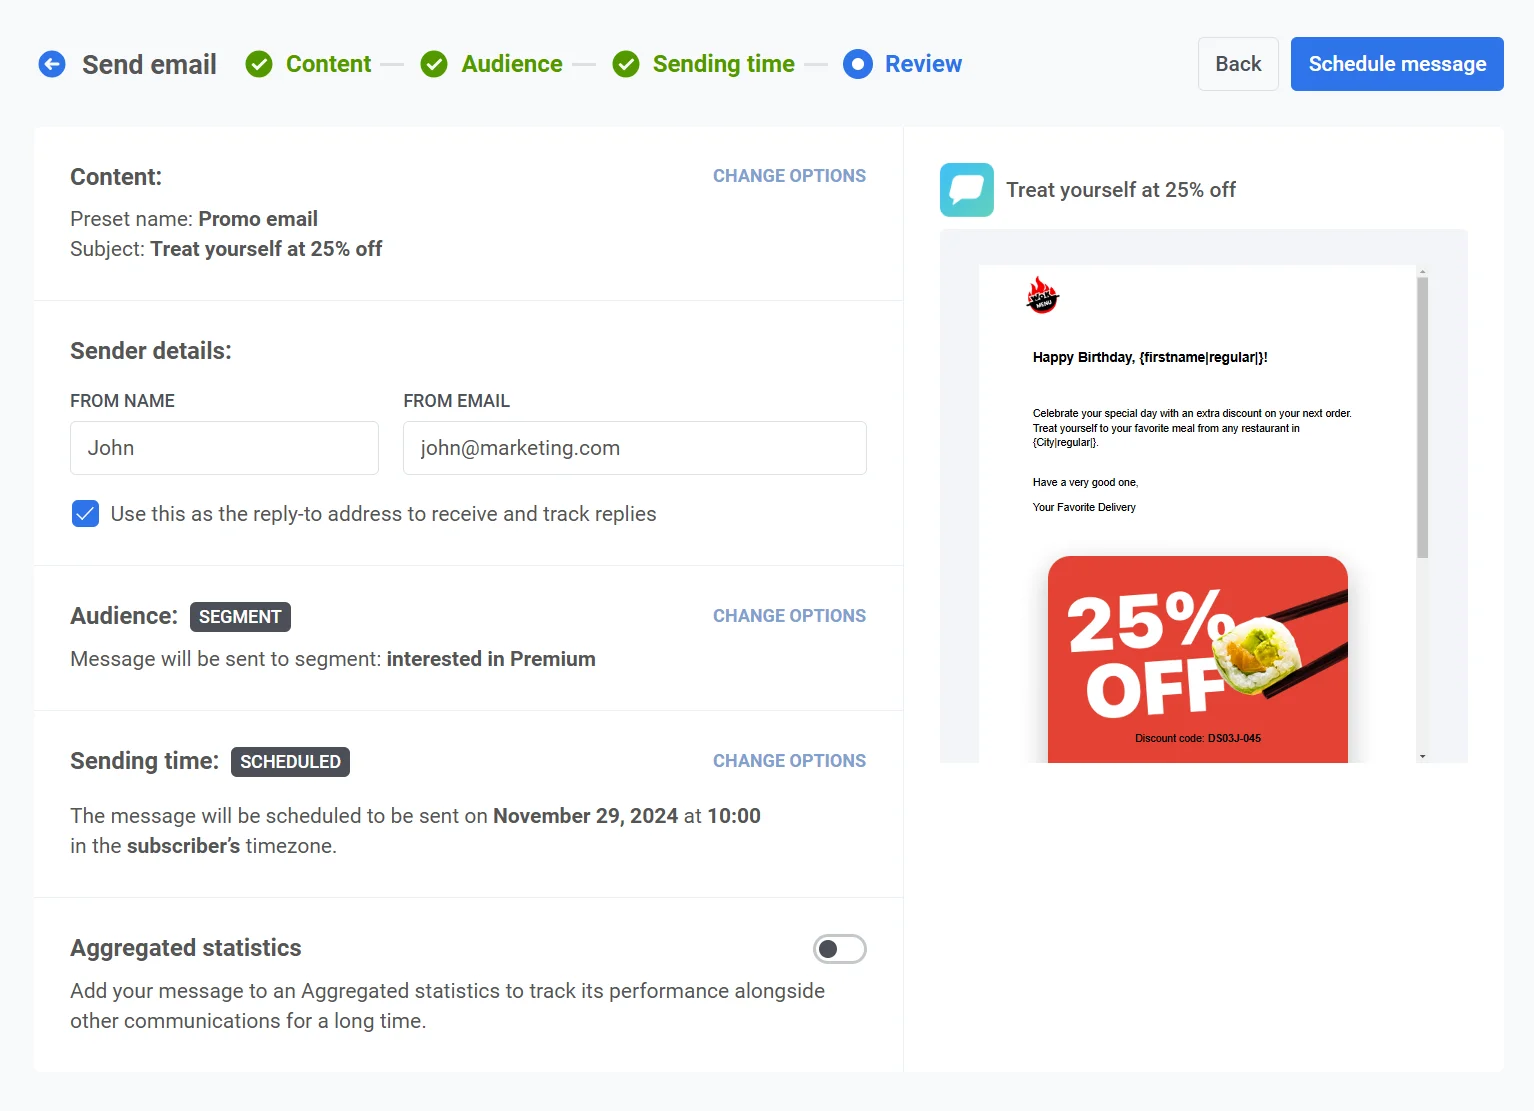
Link to Aggregated Messages
Anchor link toOptionally, you can link your email to an Aggregated messages campaign. This allows you to group the email with related messages and track their combined performance over time in the Aggregated Messages section. Use this feature to monitor message effectiveness as part of a broader communication strategy.
Once everything is confirmed, click Schedule to set it for later delivery or Send Now to send it immediately, depending on your selected scheduling options.
Example scenario
Anchor link toImagine you are the marketing manager of an e-commerce platform, and you want to send an email promoting an upcoming New Year Sale to a targeted group of users who have previously made purchases. The email should be delivered at a specific date and time, right before the sale begins. Here’s how you can set up this campaign in Pushwoosh:
1. First, navigate to Campaigns, and select One-time messaging. Click on Send message, then choose Send email to start setting up your one-time email campaign.
2. You decide to use existing email content for this campaign. In the Content step, open the dropdown menu and select the pre-built email content titled New Year Sale Promo.
Review the email content:
“Our New Year Sale is just around the corner! 🎉 Get ready to enjoy up to 50% off on your favorite products. The sale kicks off on January 1st, so mark your calendars and make sure you don’t miss out! 🛍️✨”
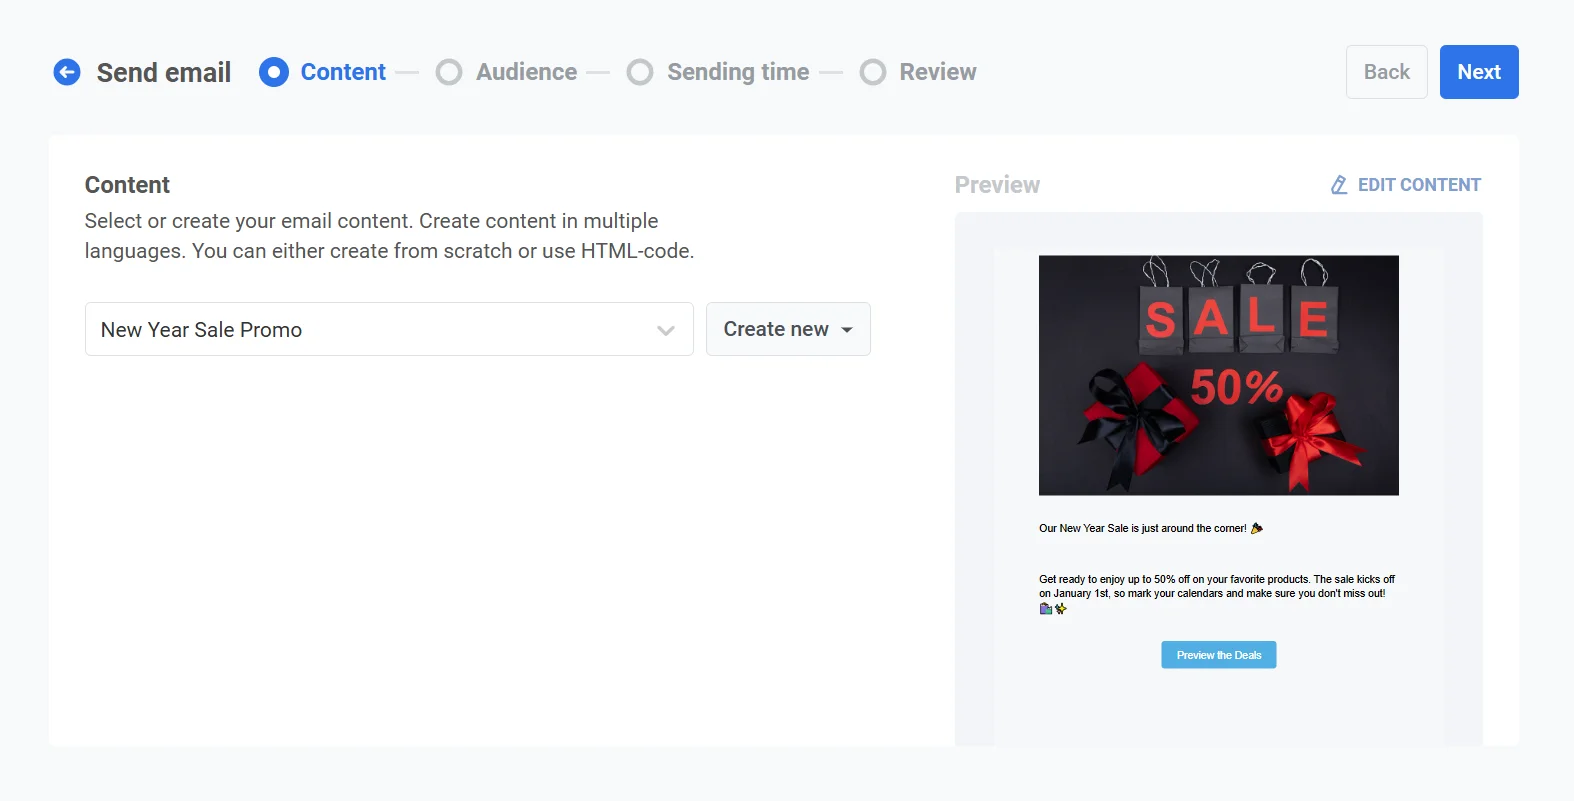
Once you’re satisfied with the content, click Next to move to the audience selection step.
3. Since you want to target users who have made previous purchases, choose Send to segment. From the dropdown menu, select the segment Returning customers, which is based on users who made purchases within the past year.
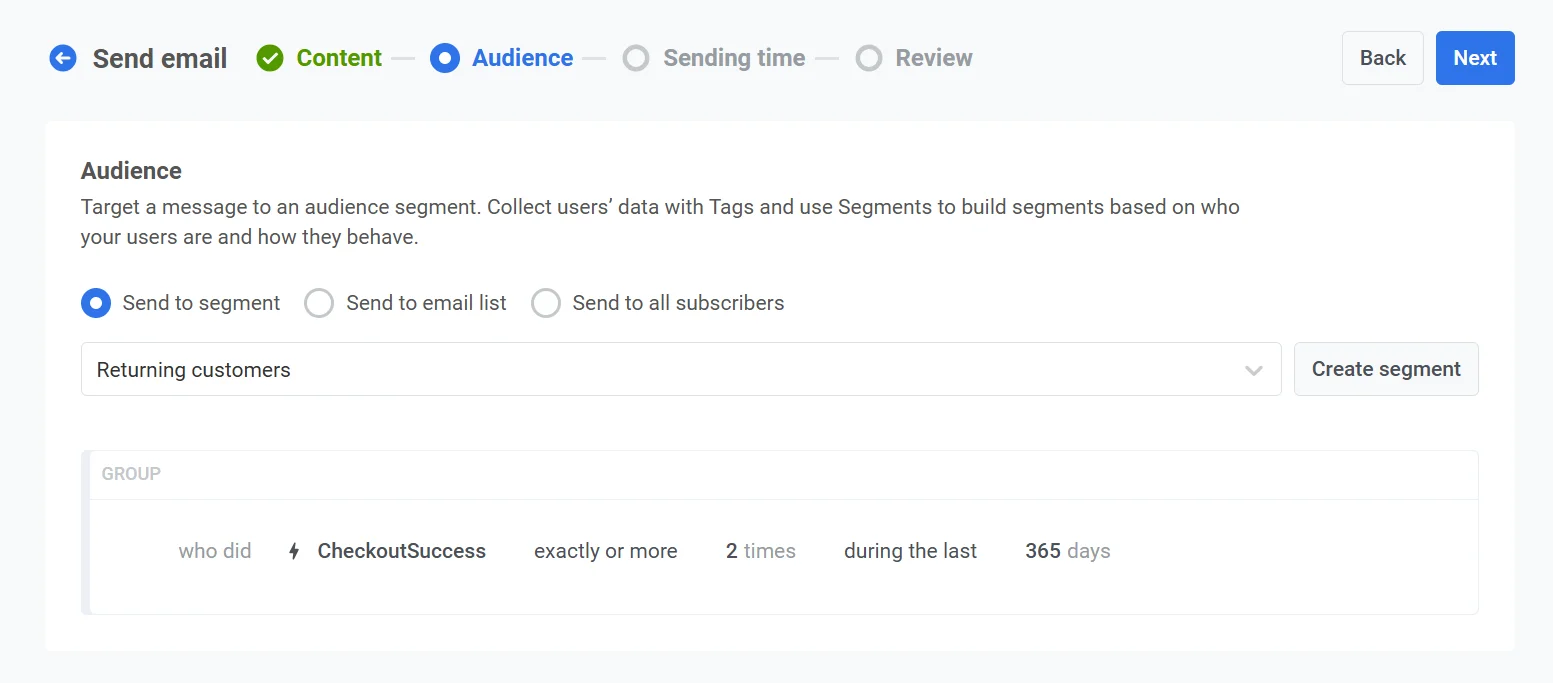
After confirming the audience, click Next to proceed to the scheduling step.
4. To ensure the email is sent at the right time, select Selected time in the scheduling options.
- Set the date to December 30, 2024, and the time to 10:00 AM using the 24-hour format.
- Choose Subscriber’s device timezone so the email is sent at 10:00 AM in each recipient’s local timezone, regardless of their location.
5. Review all the campaign details, including the audience, schedule, and email content. Use the Preview feature to see how the email will appear in recipients’ inboxes.
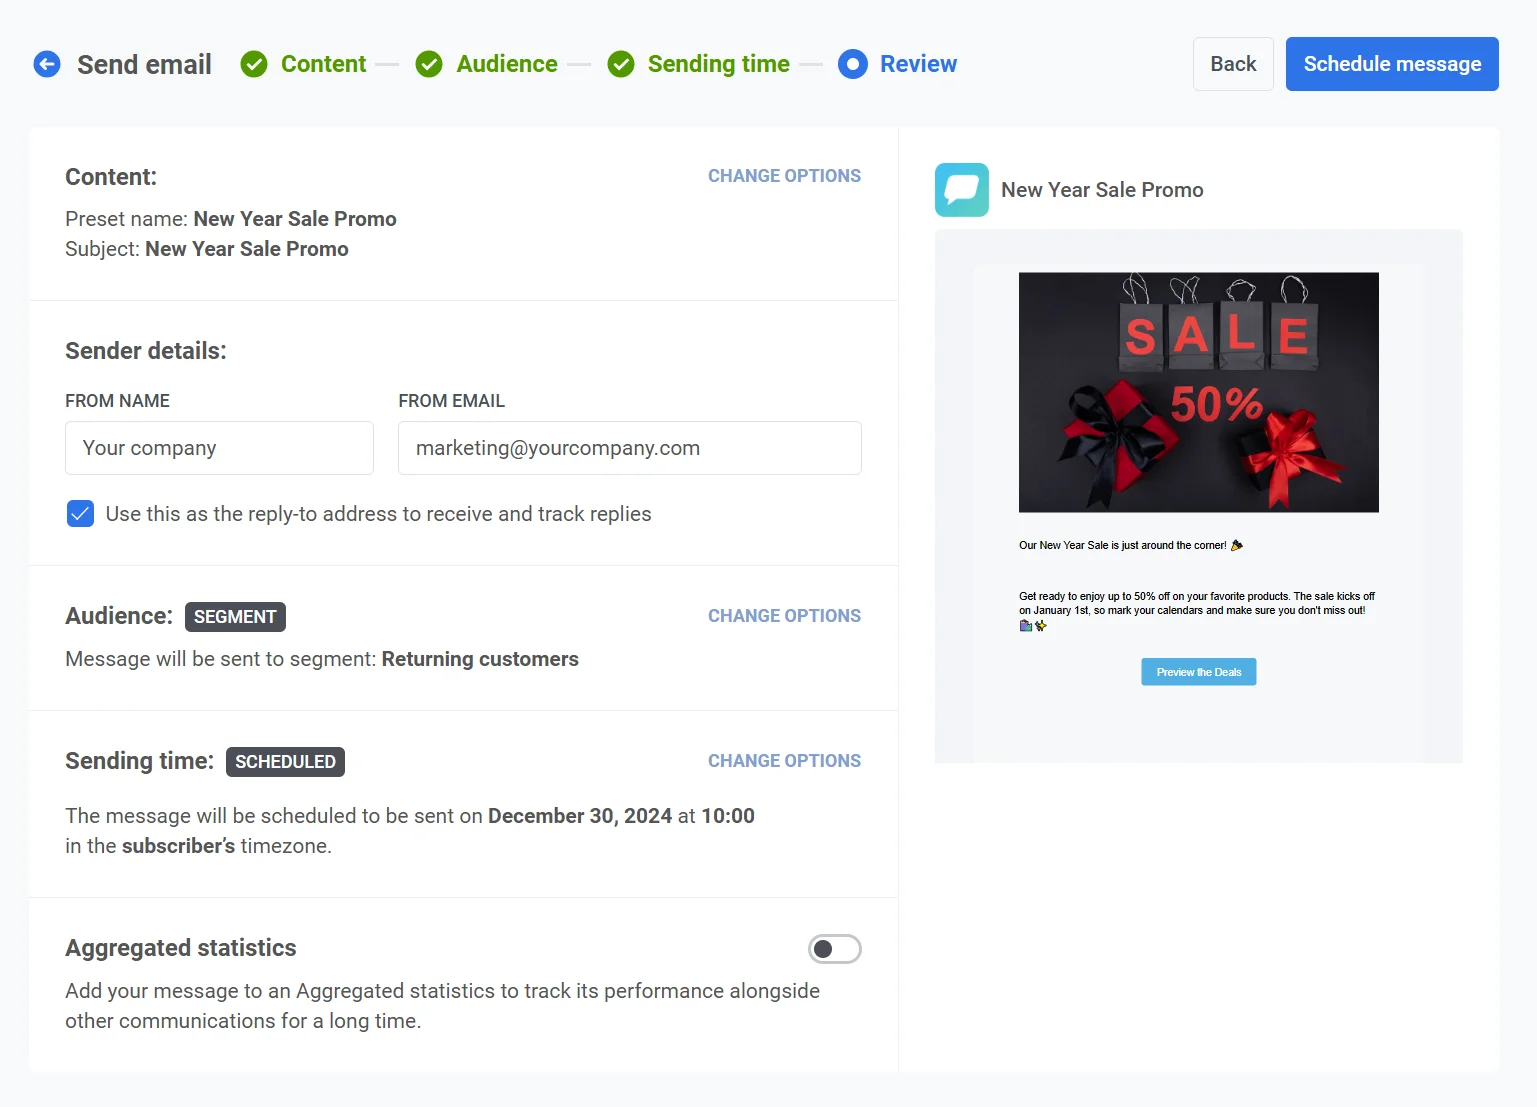
Once everything is verified, click Schedule message to finalize and schedule the email for delivery at the specified time.
Send emails with Pushwoosh Customer Journey Builder
Anchor link toSending emails with Pushwoosh is a straightforward process, and this guide will walk you through the steps using an example scenario.
Imagine you have a coffee-selling shopping app, and you’d like to send out a promotional email for an upcoming sale. Your conversion goal in this case is purchase completion.
The steps below describe creating a customer journey for our example case.
- Log in to your Pushwoosh account and navigate to Customer Journey Builder. Click on Create Campaign to begin.
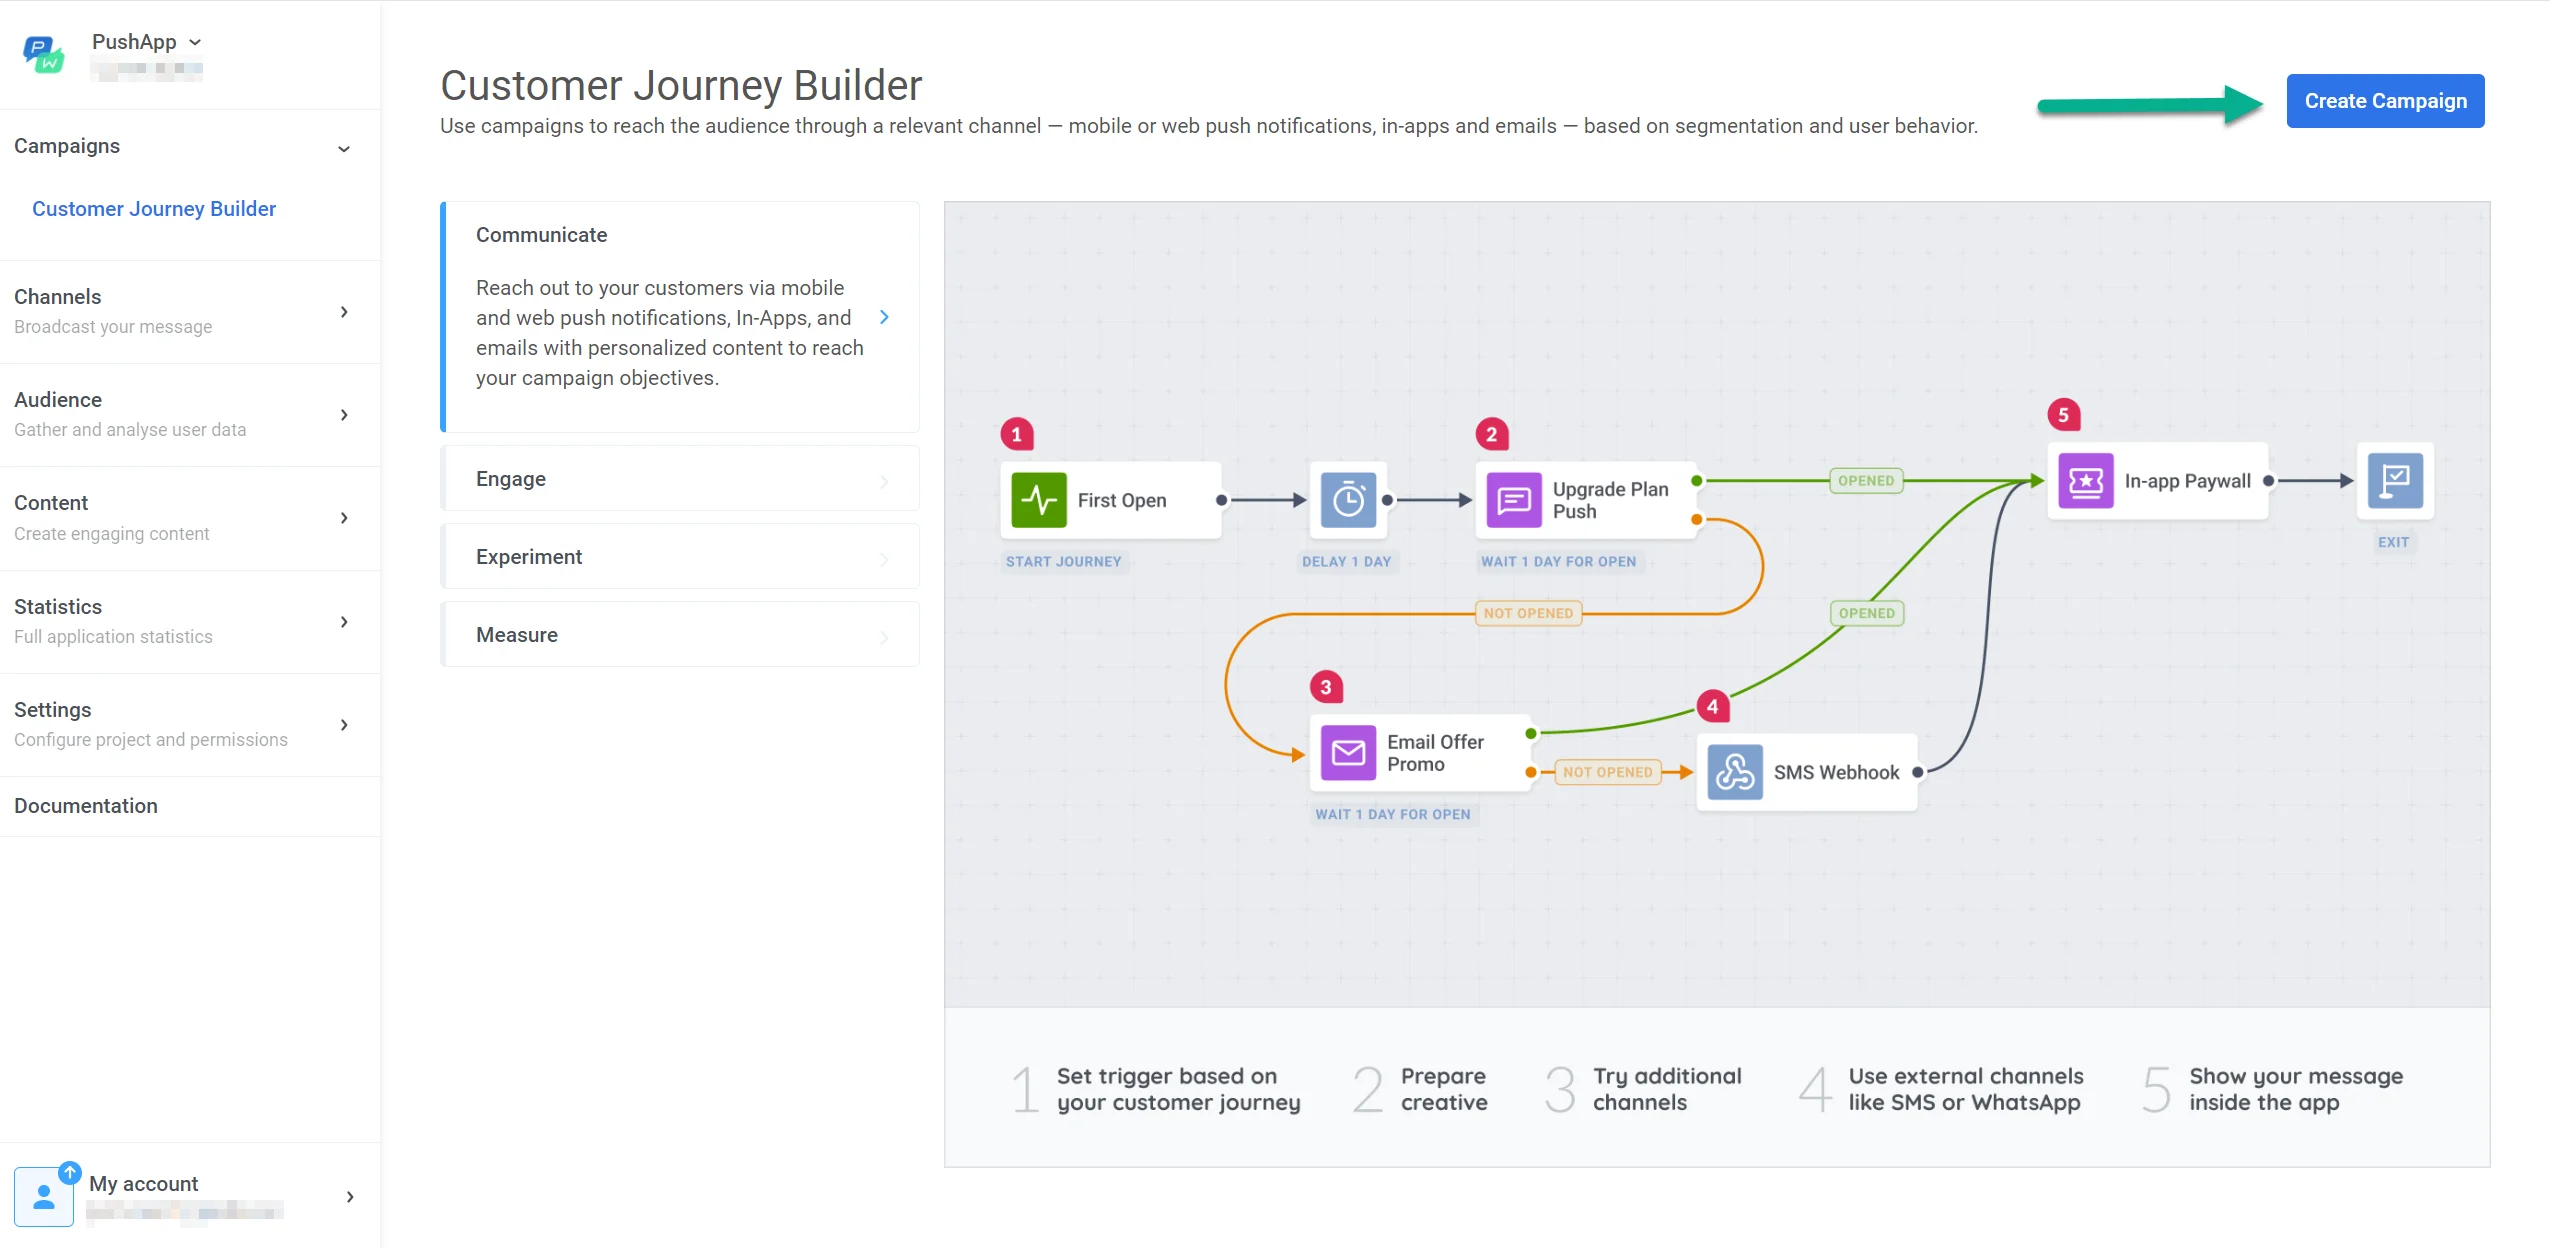
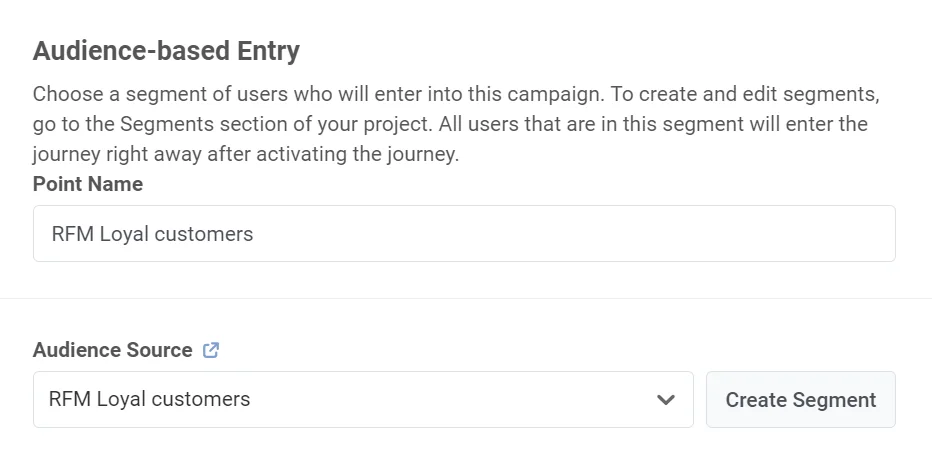
- Add an entry element to the canvas. We want to target a specific group of loyal customers who have made purchases during past sales events and are likely to be interested in the current promotion. To target the segment, drag and drop Audience-based Entry as the first element of your journey.
- Double-click on the Entry element to configure your audience. You can choose an existing segment or create a new one based on your criteria. For step-by-step guidance on how to create Segments, check out this guide.
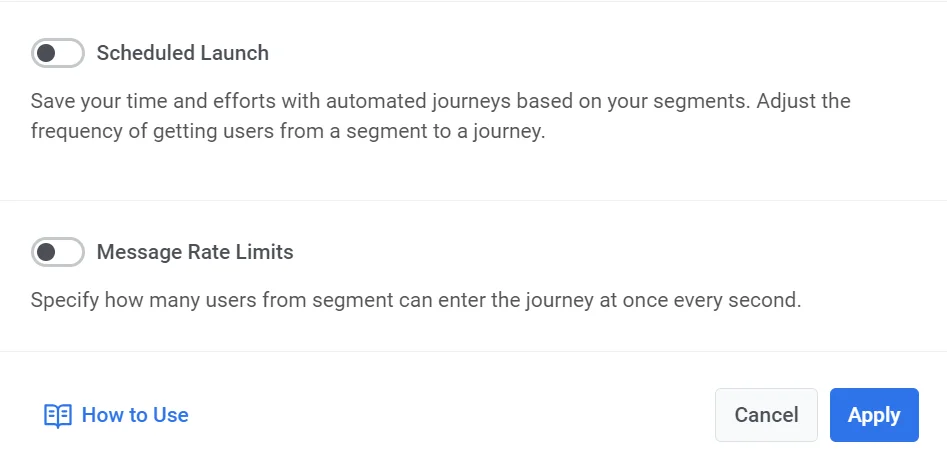
4. Set the launch schedule (optional). In our example, we use the Audience-based Entry, so by default, users from the segment enter the journey only once – at its activation.
However, you can schedule your journey launch to repeat automatically at custom intervals or specific dates or start it at a specific time and date. Learn more about how to do it
- Add an email message point to the journey. For this, drag and drop the Email element onto the canvas and double-click to open its settings. In the pop-up window, start setting up your email.
6. Give your journey point a descriptive name, such as Black Friday Promo Email.

- Next, select Email content. If you’ve already created content, you can simply pick from the existing options listed in the drop-down menu.
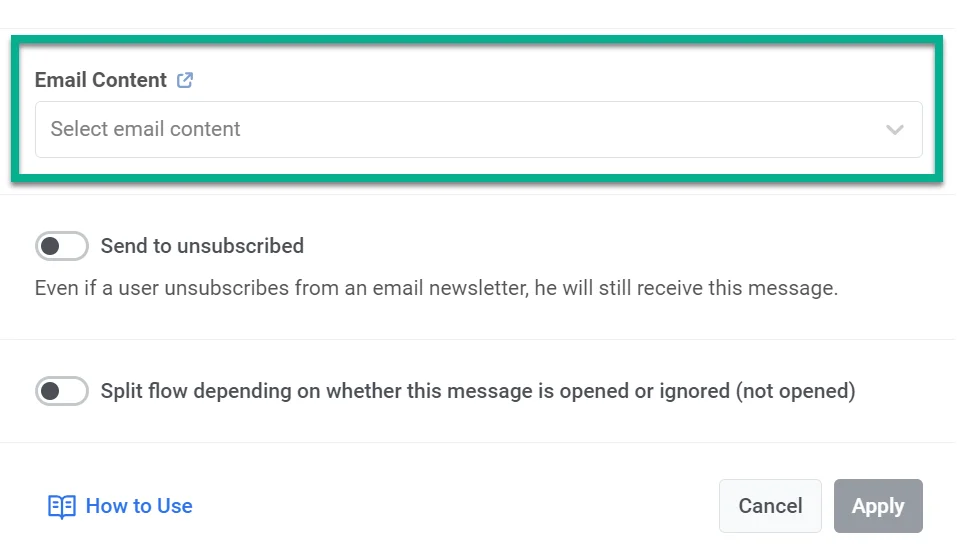
However, if you haven’t created any content yet or wish to create new content, click on the link next to Email content and then click the Create email content button located at the top of the window that opens.
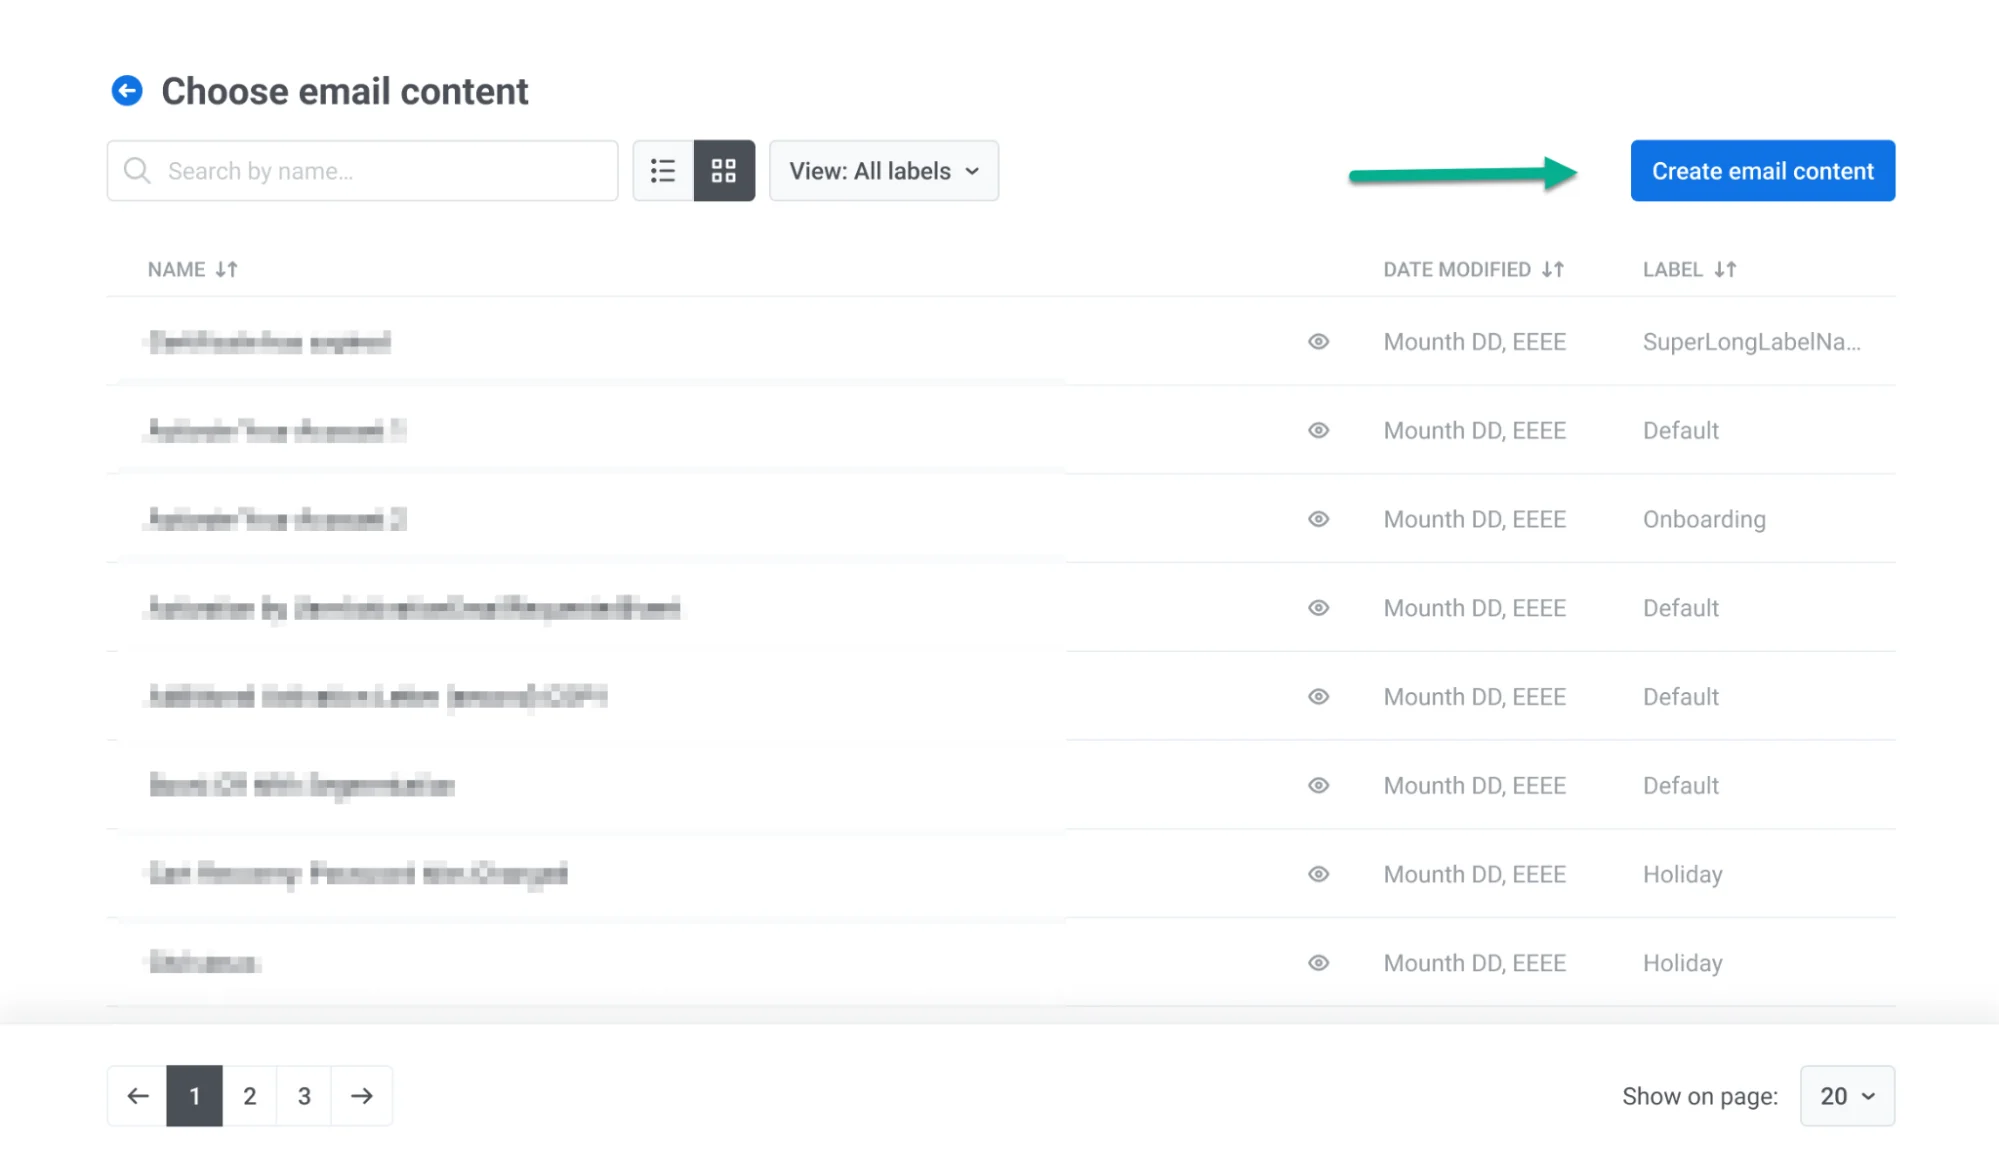
Pushwoosh offers two options for creating email content:
- The no-code Drag & drop email editor that enables you to build emails from scratch in a user-friendly interface. This option is ideal for marketers with no coding skills who want to create beautiful emails on their own. Learn how to use the editor
- The HTML code editor that allows you to generate emails using code, providing HTML-proficient users with more control over email customization. Learn how to use the editor
Choose the option that best suits your needs.
Once you save the email content you’ve created, it will be added to the list of available email content. Simply select the content you wish to use in your journey from there.
- After selecting your content, decide if you want to send the email only to users who are subscribed. Pushwoosh keeps track of unsubscribes and adjusts segments accordingly. However, you can also choose to include unsubscribed users by toggling the Send to unsubscribed option.

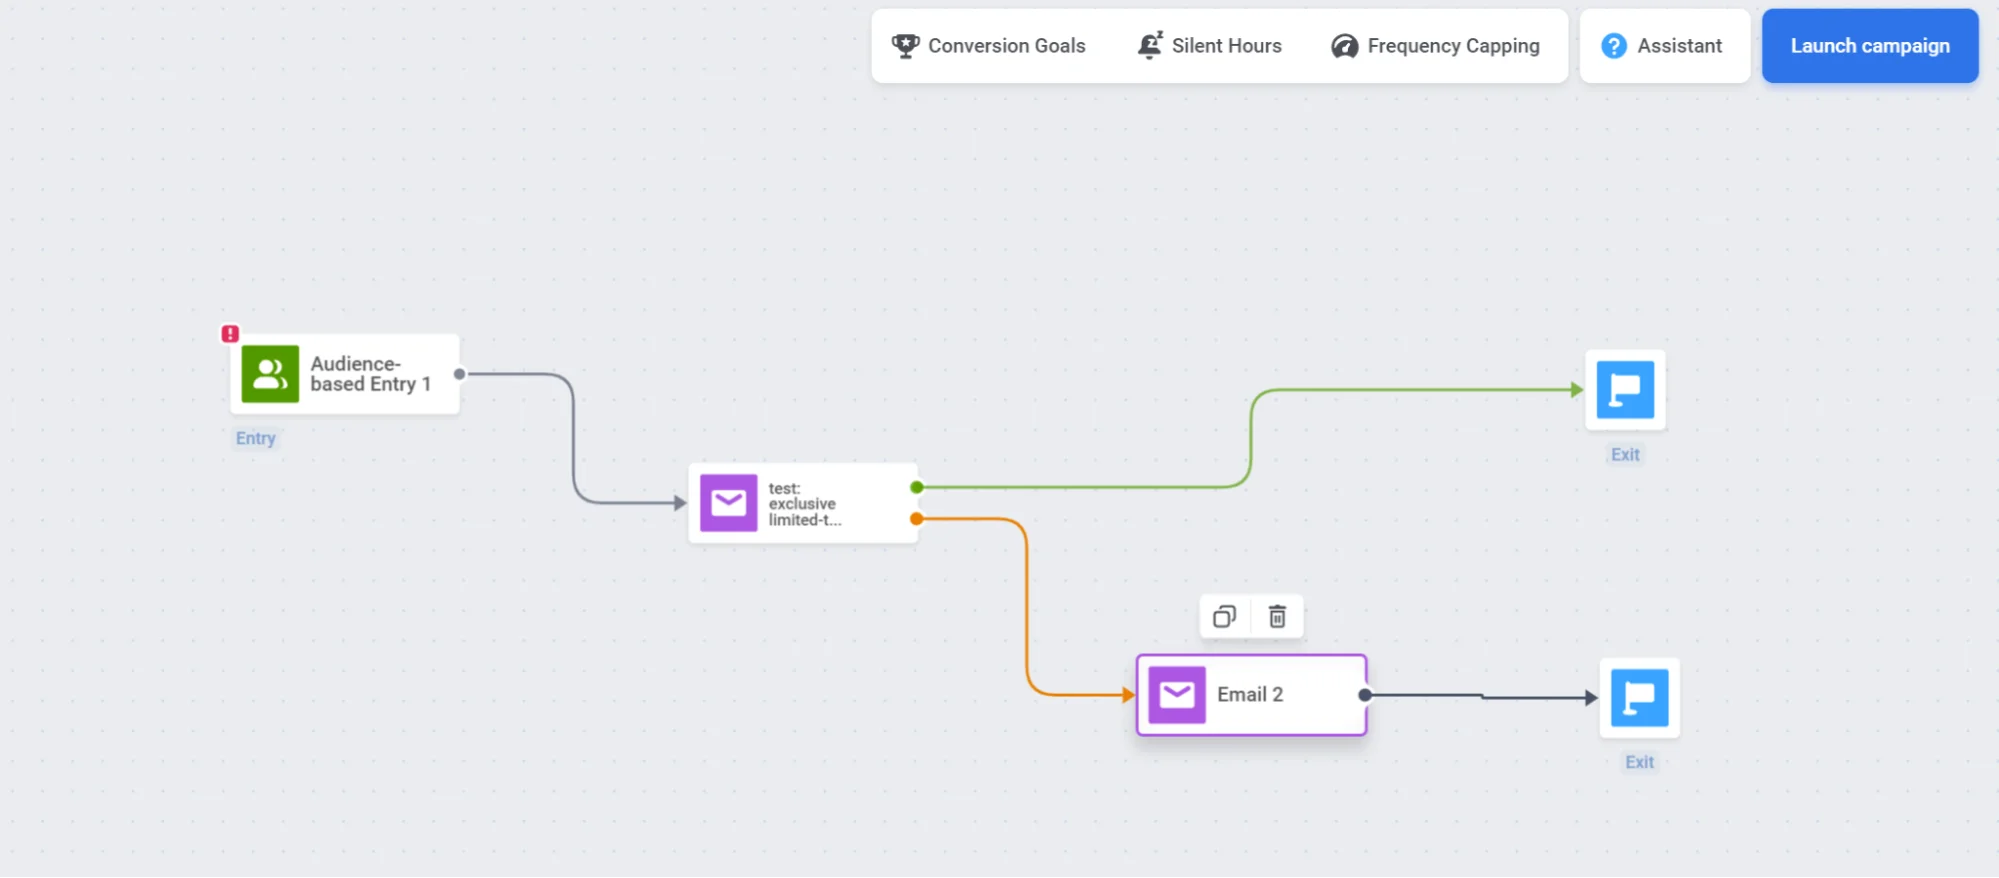
- Decide if you want to split users based on whether they open your email or not (optional). You can specify how long to wait for the email to be opened, with a maximum waiting period of 7 days.
For example, if a user doesn’t open the email, consider following up with them after 2 days through push notifications, in-app messages, or by sending another email with extra value or incentives.

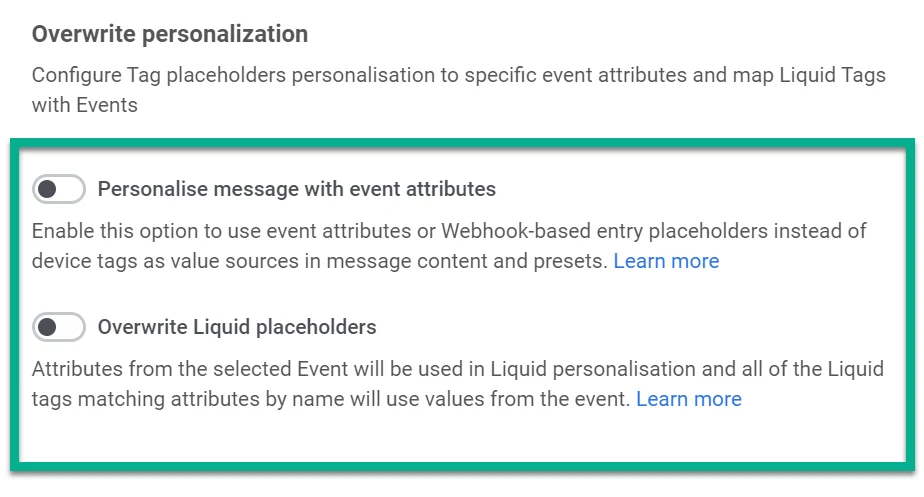
- Personalize the email message (optional). For this, you can use event attributes or Liquid Templates. Learn more
- Once your email is configured, complete the journey by adding an Exit element. If you chose to split the flow, set up actions for users who ignore the email.
12. Next, configure Journey settings (optional):
- Set Silent Hours during which messages will not be sent to users
- Define how many times a particular person can enter the journey within a specified period with Frequency Capping.
13. Set Conversion Goals to track the success of your journey. In our example, you can set up the CheckoutSuccess Event as a Conversion Goal and monitor how many users achieve it within the journey. Learn more about Conversion Goals in Journeys
14. Before launching the campaign, consult the Journey Assistant to ensure everything is set up correctly. When you’re ready, click Launch Campaign to start sending out your promotional email.
Bulk Emails
Anchor link toPlease note that each recipient email address should be valid. Even if one of recipient email addresses is invalid, it might result in the whole delivery rejection and an increase in hard bounce rate.
A recipient email address is the one specified in any destination field (To, Cc, Bcc).
To help you avoid a significant increase in hard bounce rate and spam filtering, Pushwoosh does not send out bulk emails. When you target an audience segment (or your entire audience), we send a separate message to each recipient in this segment. Still, each email address you are sending to must be valid. Otherwise, your email deliverability can be affected, and sending suspension may come as a result.
Routing Information
Anchor link toUnsubscription header
Anchor link toWe always add List-Unsubscribe: header to an email message to manage customer subscription status, and also to avoid receiving complaints or getting a sender email address, server, or domain marked as a spamming one.
Sending suspension
Anchor link toPushwoosh always provides you with clean and trusted IP addresses, but in some cases, we can suspend your email delivery.
If the complaint rate exceeds the acceptable level, we will stop sending messages from your account and suggest that you check email content and template. Note: Complaint rate should always remain below 0.1% of emails sent.
If the hard bounce rate exceeds the acceptable level, we will stop sending messages from your account and check your email database manually. Note: Bounce rate should always remain below 5% of emails sent.