Outsystems
Installing the Pushwoosh plugin
Anchor link toStart by installing the Pushwoosh plugin from the OutSystems Forge. The fastest way to do this is to go to the OutSystems tab in your development environment and install it from there.
Configuring Pushwoosh
Anchor link toYou’ll need to configure Pushwoosh for each of the platforms you will be supporting. Once your configuration is done, you’ll have an Application Code from Pushwoosh that will be used with your plugin.
For iOS
Anchor link toLearn how to configure Pushwoosh for iOS.
For Android
Anchor link toLearn how to configure Pushwoosh for Android.
Adding the Pushwoosh plugin to your application
Anchor link to- In your application, use “Manage Dependencies…” to add a reference to the Pushwoosh plugin.
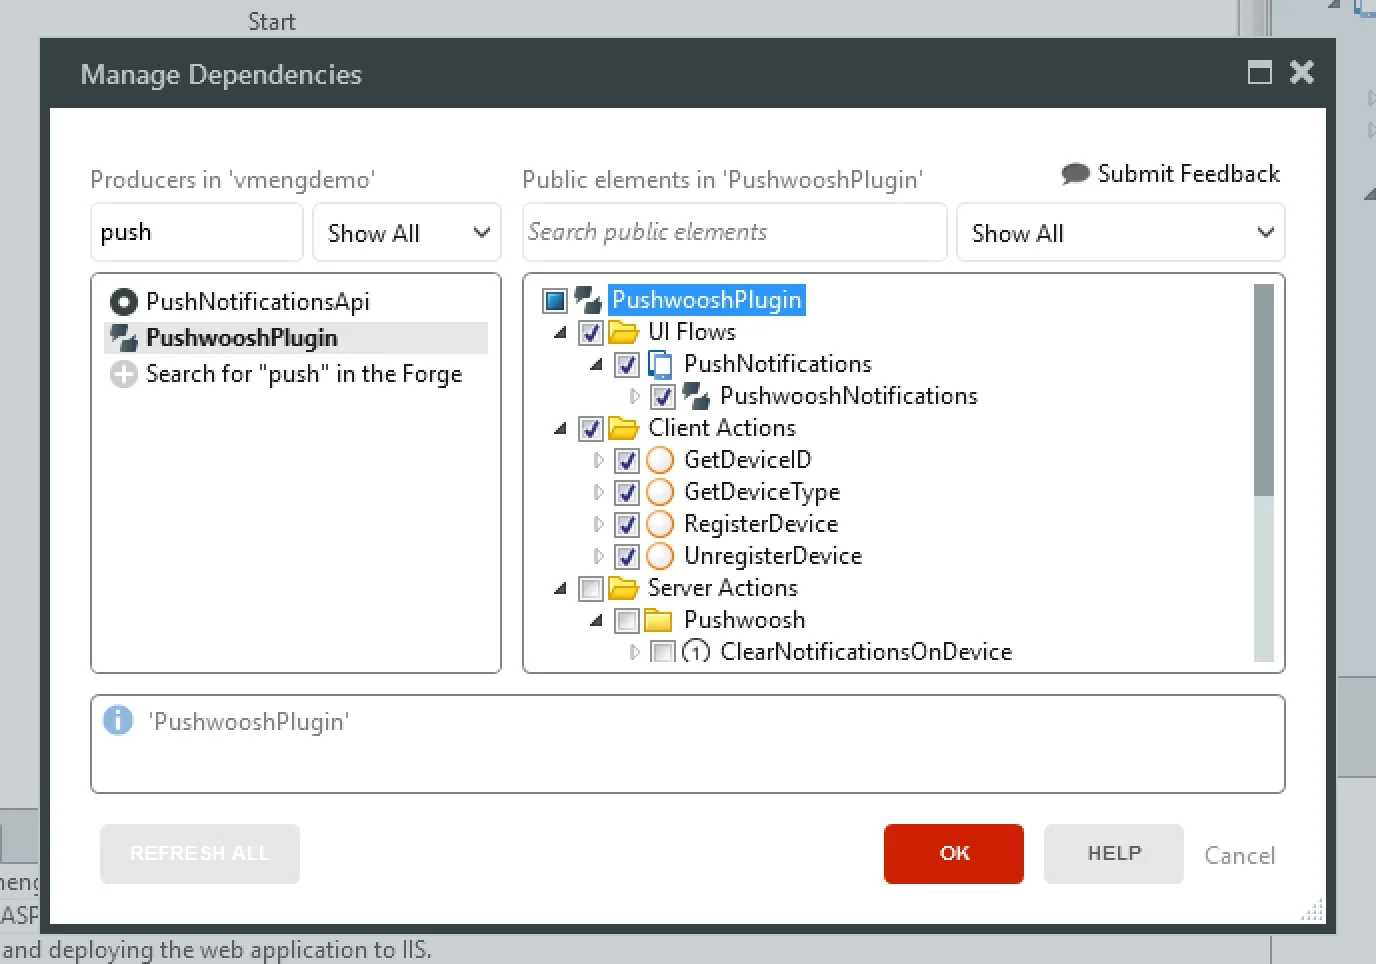
-
Add the “PushwooshNotifications” block to:
- The “Layout” block if your application has no login
- The “LayoutBlank” block if your application has login
When adding the “PushwooshNotifications” block, avoid adding it inside placeholders, because some are only available at design time and, at runtime, Pushwoosh won’t work.
-
Set the following parameters in the PushwooshNotifications:
- PushwooshApplicationCode: The Pushwoosh Code that you obtained after creating the application in Pushwoosh.
- FCMSenderId: The identification number you obtained while configuring Android. You can leave this empty if your application is only available for iOS.
- NotificationReceivedEvent (Optional): An event that is called when a notification is received while the application is in the foreground state.
- NotificationOpenedEvent (Optional): An event that is called when a user clicks a notification on their device.
If you’re using the Pushwoosh plugin in your Android app, do the following:
- Obtain the
google-services.jsonfrom Firebase. The package name from the Google services must match the app identifier of the OutSystems application being built. - Create a zip file containing the
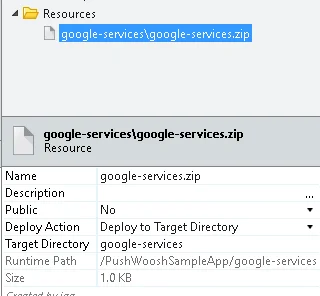
google-services.jsonin the root. - Upload the “google-services.zip” file from the previous step to your OutSystems application and make sure to:
- Set the “Name” as “google-services.zip”
- Set “Deploy to Target Directory” as “google-services”
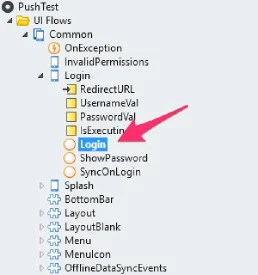
For your device to receive push notifications, you’ll need to register it. If your users need to log in to use the application, go to the “Login” screen and edit the “Login” action.
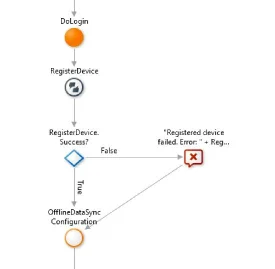
Add the code to register the device after the “DoLogin” action. It should look something like this:
If your application does not have a login, you can add this code to the OnInitializeOver event in the PushwooshNotifications block.
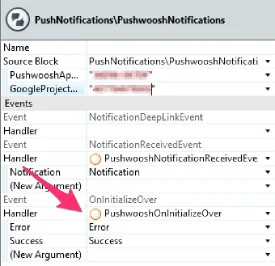
In this event handler, call the RegisterDevice action.
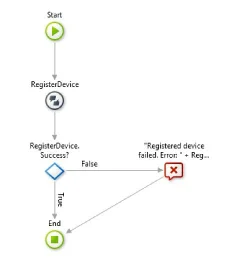
If you’re generating an iOS mobile app using a developer certificate, you will need to add a preference to the Extensibility Configurations property of your OutSystems module:
{ "preferences": { "global": [ { "name": "aps-environment", "value": "development" } ] }}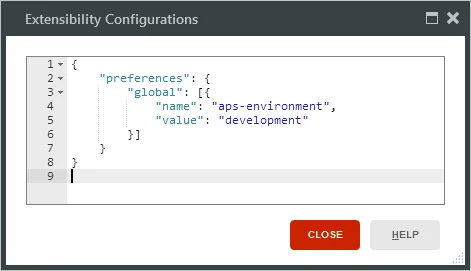
This preference will be added to your entitlements file (learn more about entitlements in the Apple Developer documentation).
If you’re generating an iOS mobile app using a production certificate, you won’t need to specify any preference, since the default value of the aps-environment preference in OutSystems is production.
Your application is now ready to receive push notifications. Configure and generate your mobile app and install it on your device. At this point, you can use the Pushwoosh interface to send notifications to your app and make sure that everything is properly configured. Note that you will not see a notification if the app is running. Instead, the event NotificationReceivedEvent is raised immediately.
Sending notifications
Anchor link toTo send notifications, you need a Pushwoosh API Access Token. Create one by accessing the Pushwoosh console, go to “API Access,” and click “Generate new access token.”
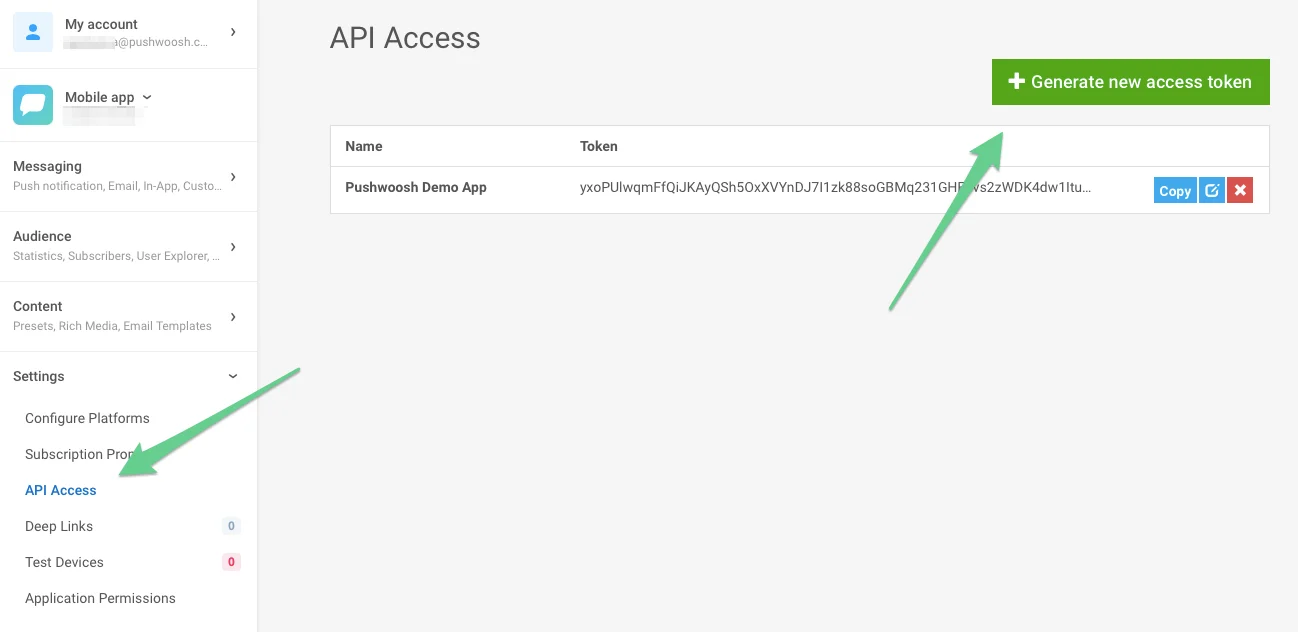
To send a notification to all devices, use the SendPushNotificationToAll action.
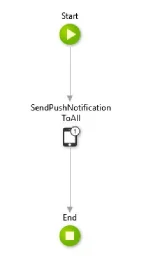
This action takes the following parameters:
- PushwooshApplicationCode: The Pushwoosh Code that you obtained after creating the application in Pushwoosh.
- ApiAccessToken: The Pushwoosh API Access Token obtained earlier.
- Message: The message text you wish to send.
- Badge: A number that is displayed on the iOS application icon.
- Deeplink: A deep link to send with the notification. Learn how to define deep links.
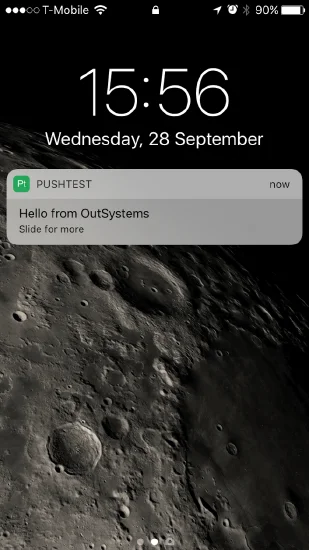
For instance, if you use this action to send the message “Hello from OutSystems” to an application called “PushTest,” the following would be shown in iOS:
Additional information
Anchor link to- If your app is running, the notification doesn’t show on the device. Instead, it is sent to the app, and the event
NotificationReceivedEventis raised. You’ll need to define what you want the app to do in that situation. - Push notifications may take a while to become active. If you don’t see the notifications coming through, wait a few minutes before further troubleshooting.
Share your feedback with us
Anchor link toYour feedback helps us create a better experience, so we would love to hear from you if you have any issues during the SDK integration process. If you face any difficulties, please do not hesitate to share your thoughts with us via this form.