 ### Pushwoosh 제어판
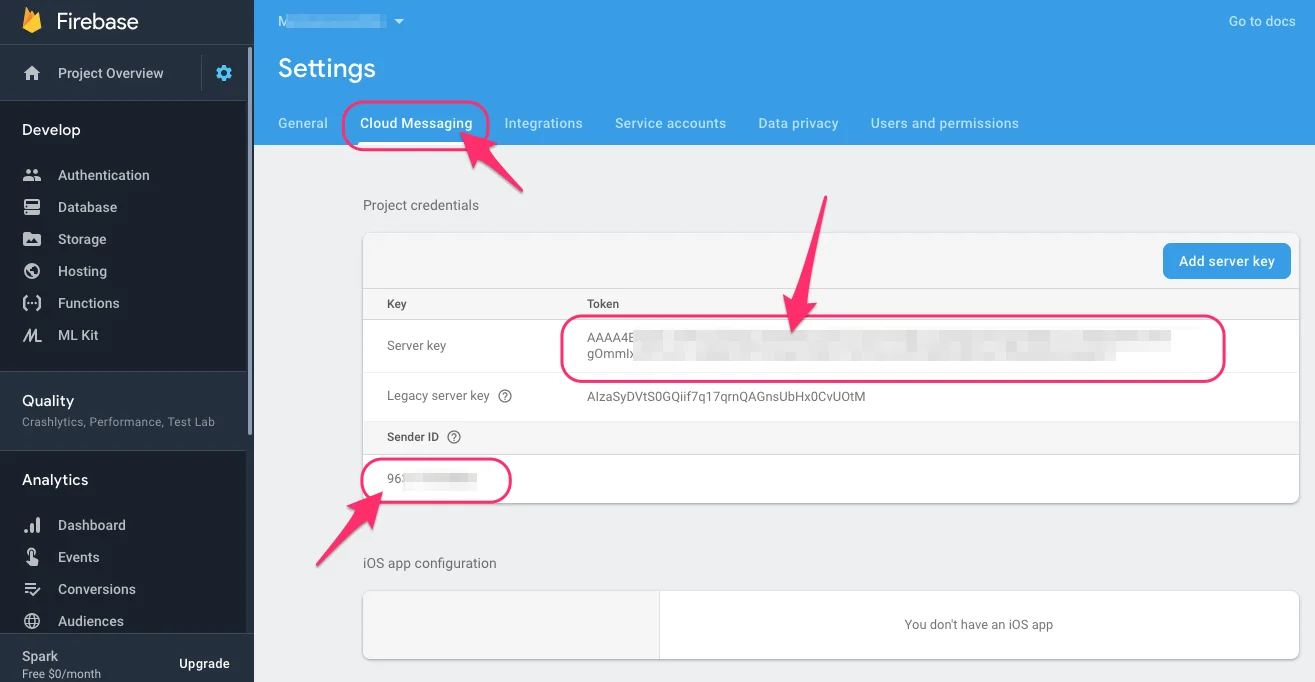
Pushwoosh [**제어판**](https://go.pushwoosh.com/v2/applications)으로 이동하여 새 앱을 추가하세요. 열린 페이지에서 해당 행의 **Configure** 버튼을 클릭하여 Chrome 또는 Firefox 플랫폼을 구성하세요. 양식을 작성하세요:
* Firebase Console의 **Server Key**를 **API key** 필드에 입력합니다.
* Firebase Console의 **Sender ID**를 **FCM Sender ID** 필드에 입력합니다.
* 웹사이트의 정확한 주소를 **Website Name** 필드에 입력합니다.
### Pushwoosh 제어판
Pushwoosh [**제어판**](https://go.pushwoosh.com/v2/applications)으로 이동하여 새 앱을 추가하세요. 열린 페이지에서 해당 행의 **Configure** 버튼을 클릭하여 Chrome 또는 Firefox 플랫폼을 구성하세요. 양식을 작성하세요:
* Firebase Console의 **Server Key**를 **API key** 필드에 입력합니다.
* Firebase Console의 **Sender ID**를 **FCM Sender ID** 필드에 입력합니다.
* 웹사이트의 정확한 주소를 **Website Name** 필드에 입력합니다.
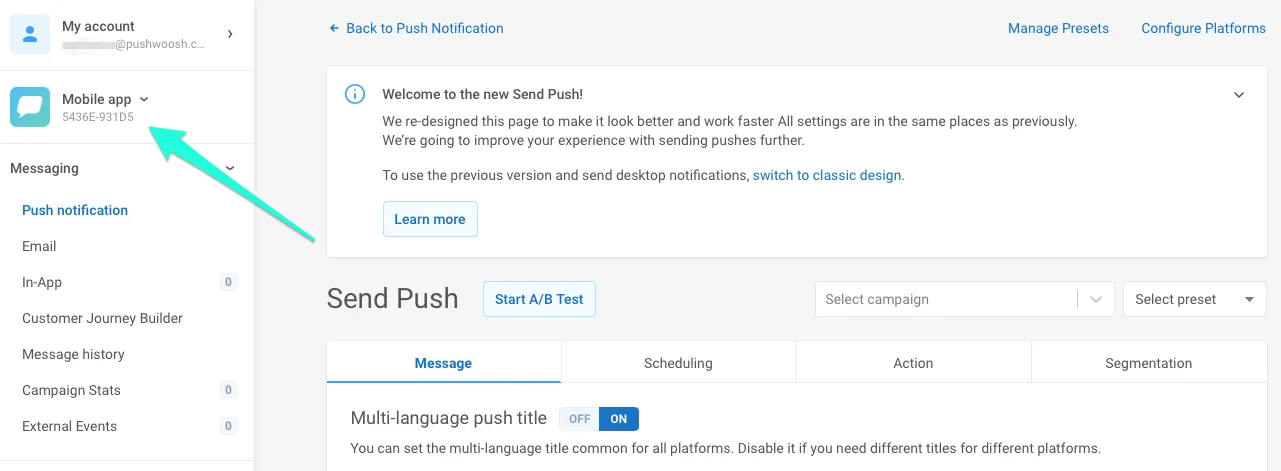 새로 생성된 앱의 Application Code를 복사해 두세요. 나중에 필요합니다. 앱 코드는 아래에 강조 표시되어 있습니다:
 ### Google 태그 관리자
**1.** Google 태그 관리자에서 컨테이너를 선택하거나 새로 만듭니다.
### Google 태그 관리자
**1.** Google 태그 관리자에서 컨테이너를 선택하거나 새로 만듭니다.
 **2.** 새 태그를 만들고 태그 구성에서 **Custom HTML**을 선택합니다.
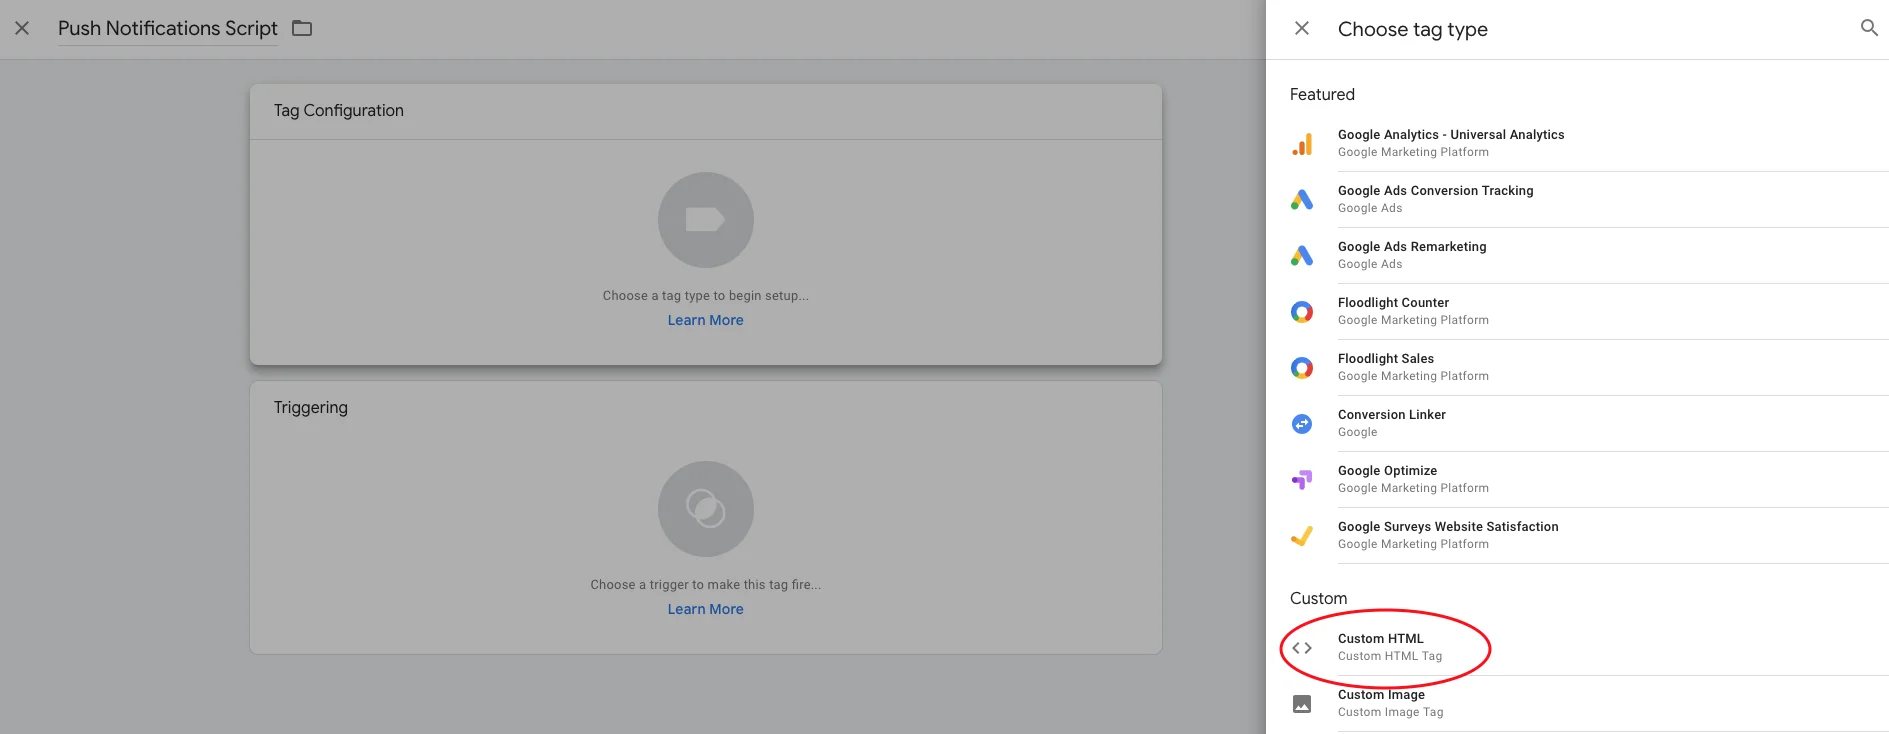 **3.** 아래 스크립트를 복사하여 HTML 필드에 붙여넣습니다.
```txt
```
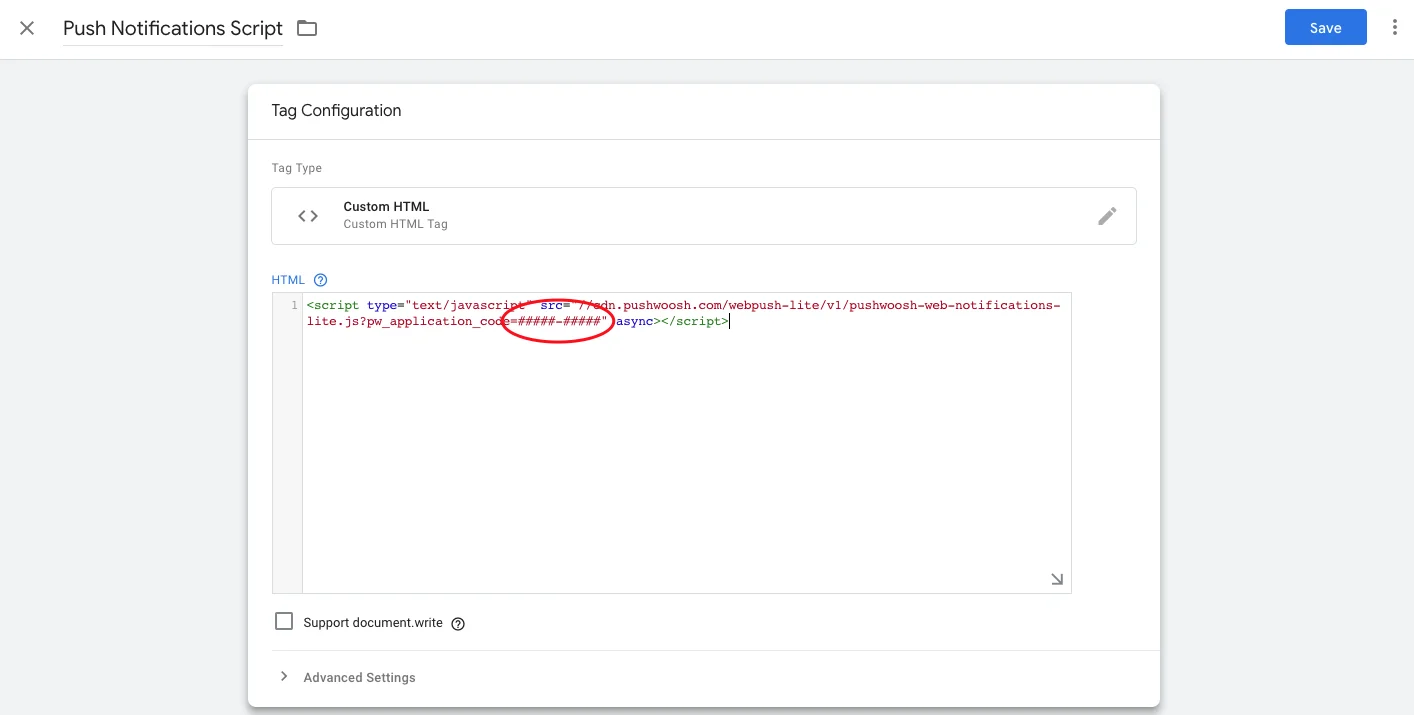
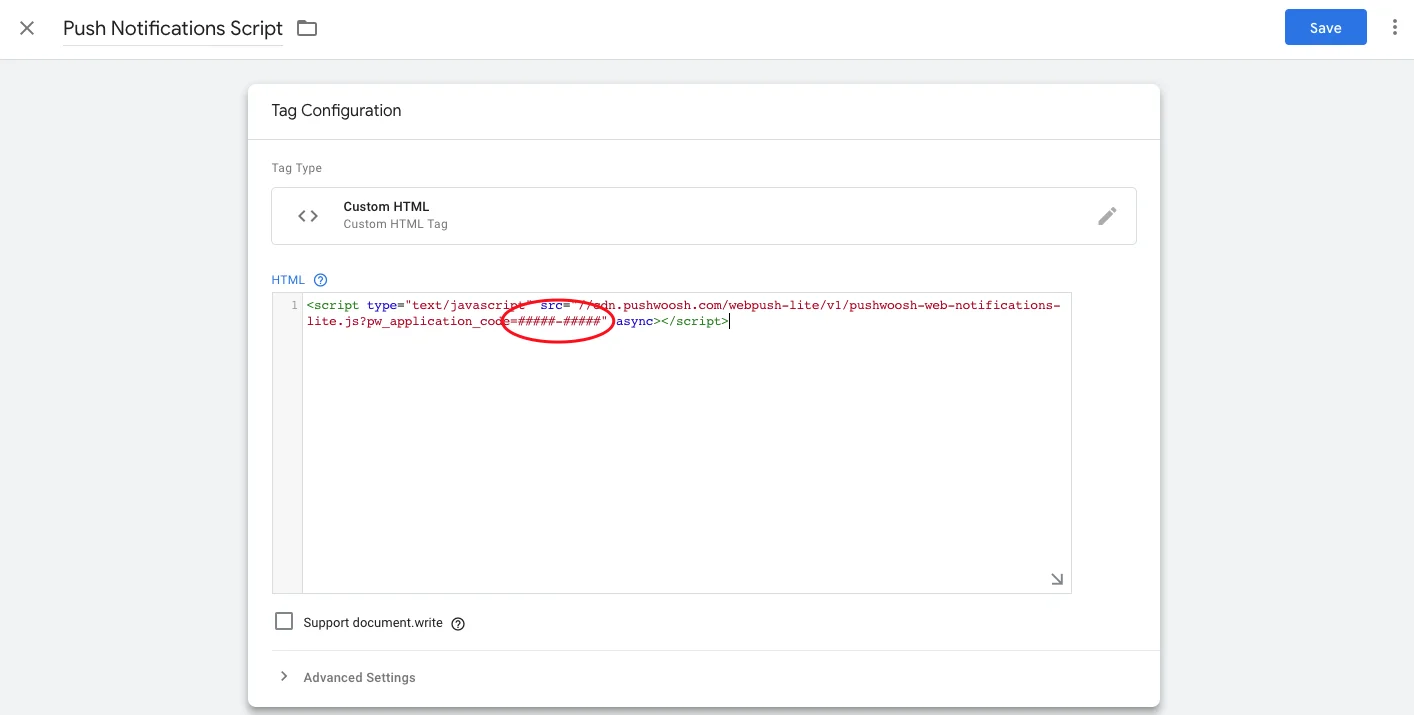
**4.** 스크립트의 숫자 기호 `#####-#####`(아래 그림에서 강조 표시됨)를 2단계에서 얻은 Pushwoosh Application Code로 변경합니다.
**3.** 아래 스크립트를 복사하여 HTML 필드에 붙여넣습니다.
```txt
```
**4.** 스크립트의 숫자 기호 `#####-#####`(아래 그림에서 강조 표시됨)를 2단계에서 얻은 Pushwoosh Application Code로 변경합니다.
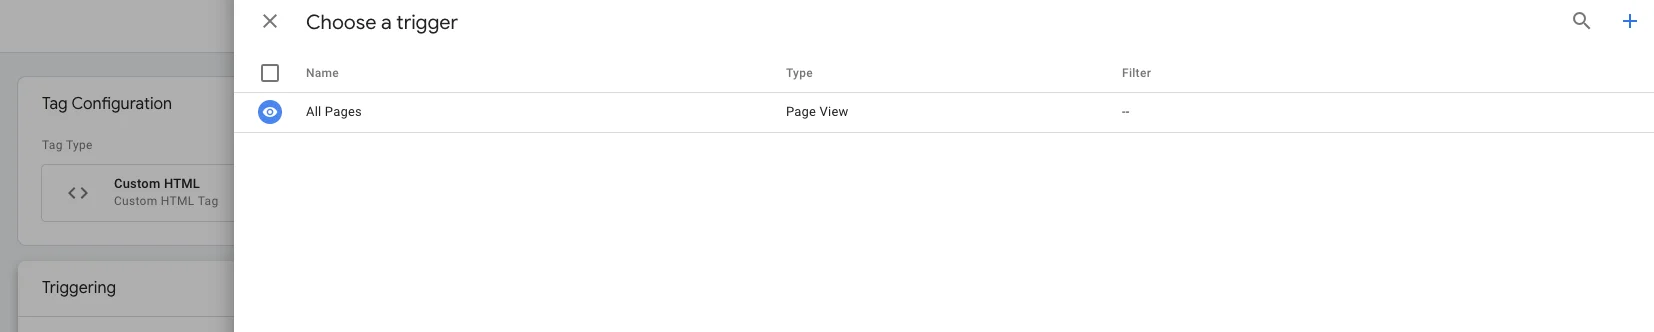
 **5.** 트리거 옵션으로 스크롤을 내려 **All Pages**를 선택합니다.
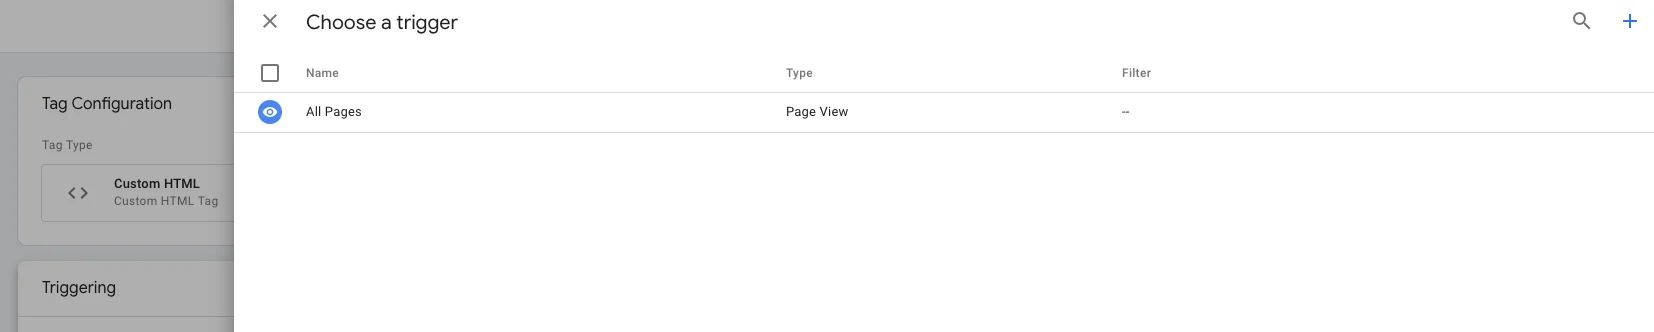 **6.** "저장"을 클릭합니다. 태그가 준비되었습니다!
### 푸시 구독 버튼
푸시 구독 버튼을 사용하여 사용자가 푸시 알림을 구독하도록 하세요. 버튼을 설정하려면 Google 태그 관리자를 통해 다음 스크립트를 추가하기만 하면 됩니다.
```txt
**6.** "저장"을 클릭합니다. 태그가 준비되었습니다!
### 푸시 구독 버튼
푸시 구독 버튼을 사용하여 사용자가 푸시 알림을 구독하도록 하세요. 버튼을 설정하려면 Google 태그 관리자를 통해 다음 스크립트를 추가하기만 하면 됩니다.
```txt