# iOS 앱 클립
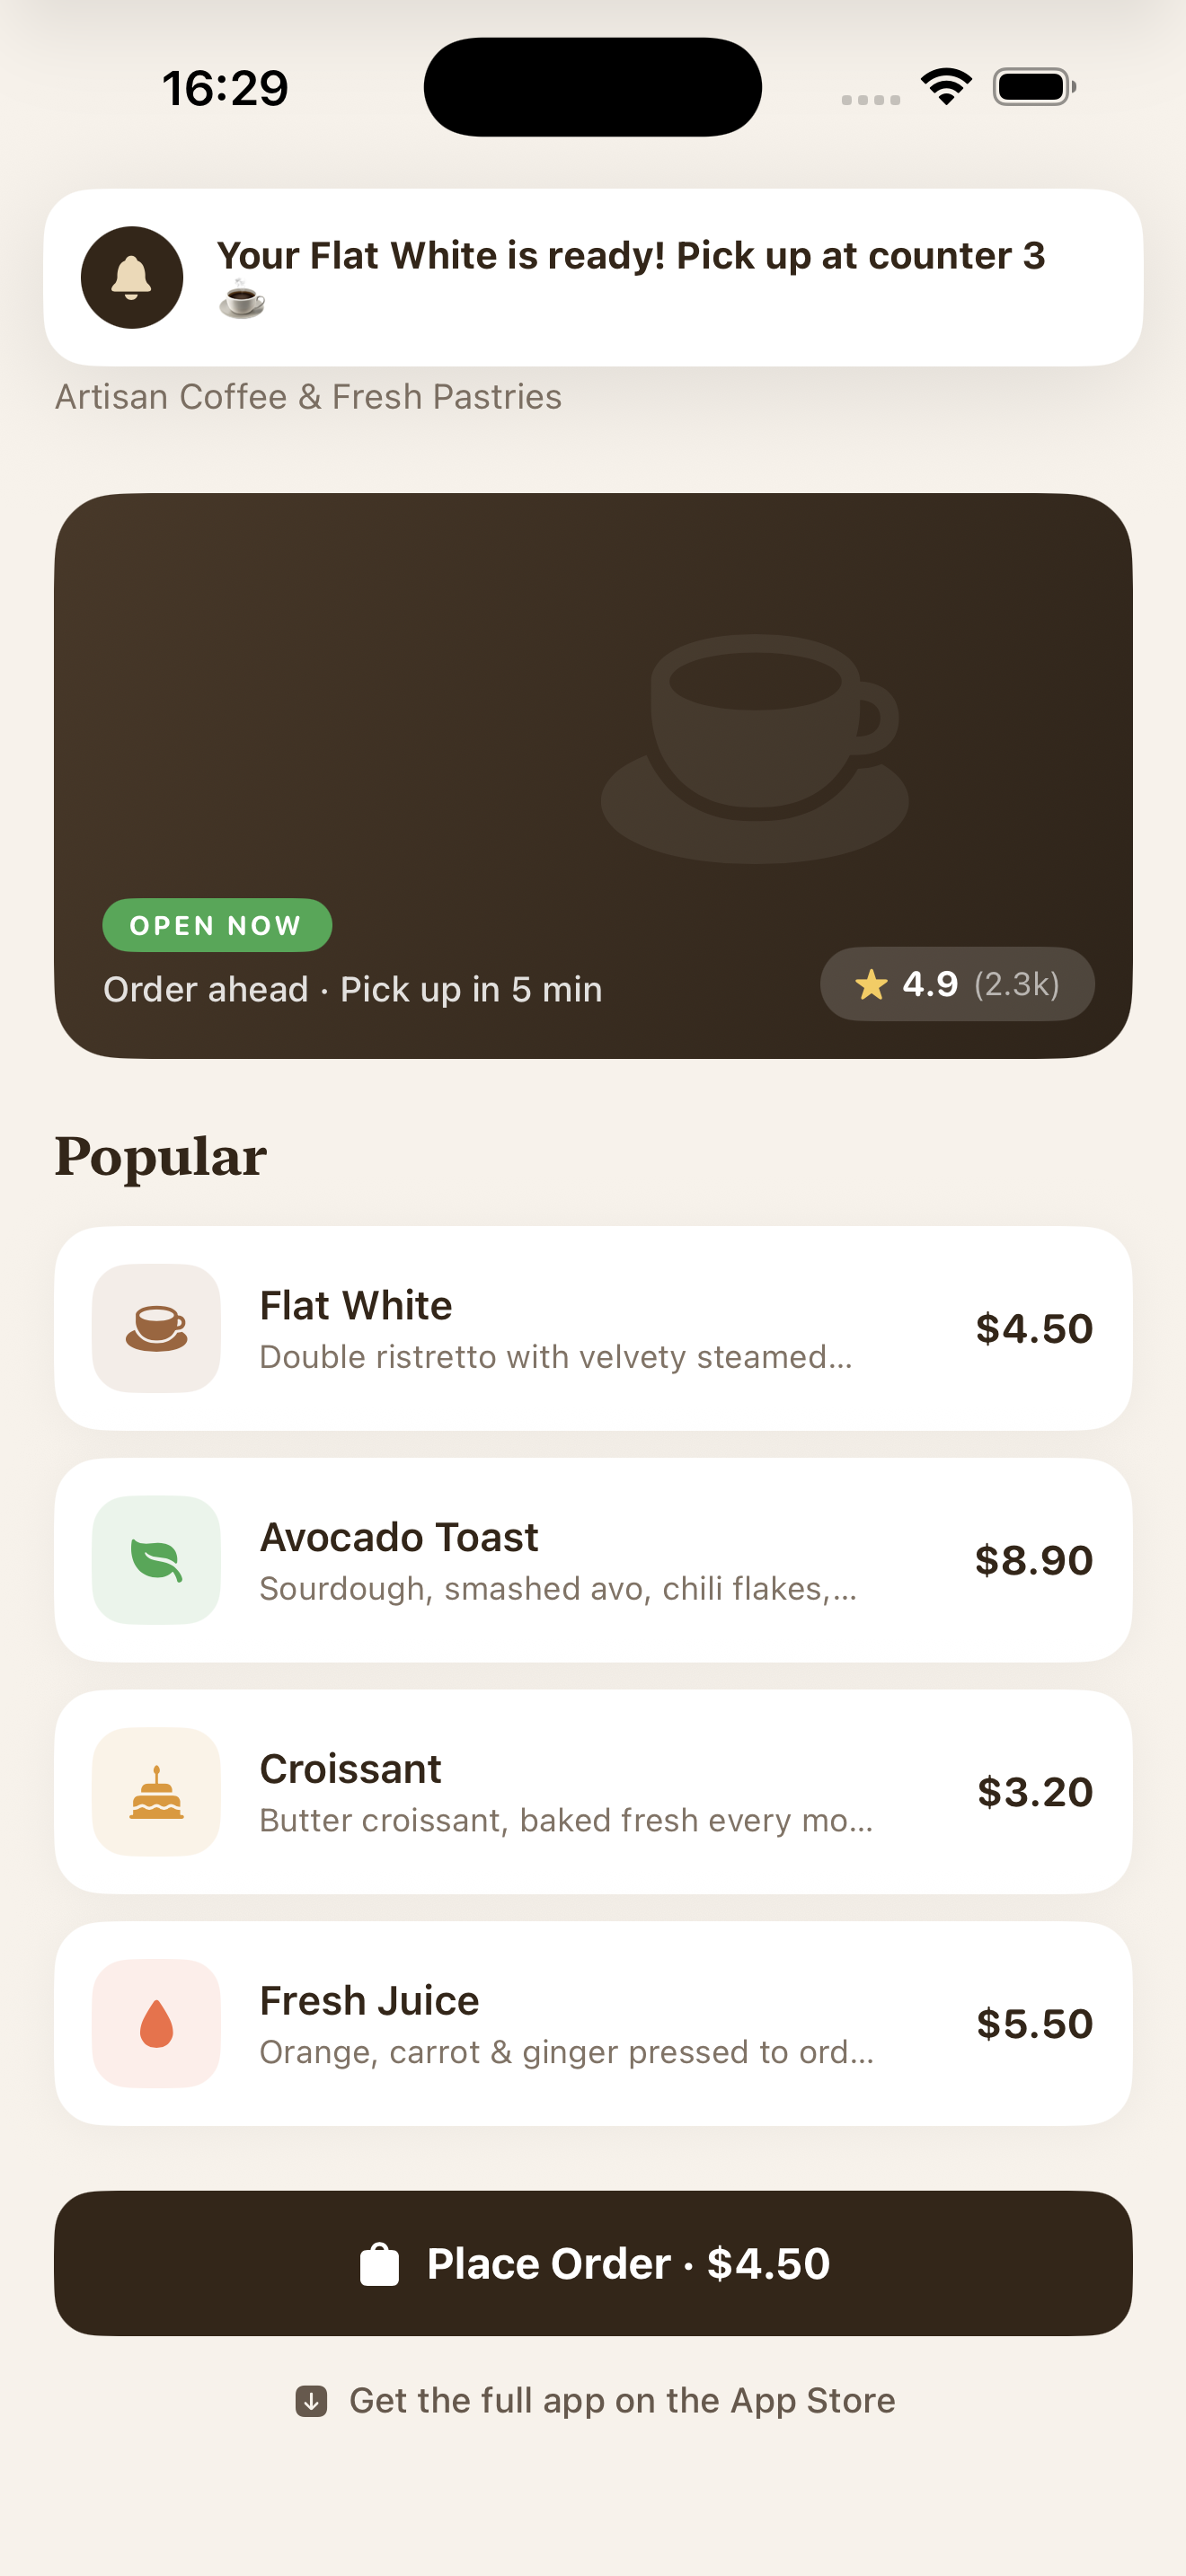
앱 클립을 사용하면 전체 앱을 다운로드하지 않고도 작업을 빠르게 완료할 수 있습니다. Pushwoosh를 사용하면 앱 클립 사용자에게 푸시 알림을 보낼 수 있습니다. iOS는 앱 클립이 열릴 때 자동으로 **8시간 동안 알림 액세스 권한**을 부여합니다.
## 필요한 것
- Pushwoosh iOS SDK **7.0.33+**
- Xcode 15+
- 앱 클립을 위한 **별도의 Pushwoosh 애플리케이션** (다른 번들 ID = 별도의 앱)
- 테스트용 실제 기기 (푸시 토큰은 시뮬레이터에서 작동하지 않음)
## 1. Pushwoosh 애플리케이션 생성
앱 클립은 다른 번들 ID(예: `com.yourapp.Clip`)를 가지므로 자체 APNs 키가 있는 **별도의 Pushwoosh 앱**이 필요합니다.
1. [Pushwoosh Control Panel](https://app.pushwoosh.com/)로 이동합니다
2. 앱 클립 번들 ID로 새 애플리케이션을 생성합니다
3. APNs 인증 키를 업로드합니다
4. **Application Code**와 **API Token**을 복사합니다
## 2. 앱 클립 타겟 생성
1. Xcode에서: **File → New → Target → App Clip**
2. 앱 클립 타겟에 **Push Notifications** 기능을 추가합니다
기능 추가에 대한 자세한 스크린샷은 [기본 통합 가이드](/ko/developer/pushwoosh-sdk/ios-sdk/setting-up-pushwoosh-ios-sdk-7-0/basic-integration-guide/)를 참조하세요.
## 3. Pushwoosh 프레임워크 추가
앱 클립 타겟의 **Build Phases → Link Binary With Libraries**에 다음을 추가합니다:
- `PushwooshFramework.framework`
- `PushwooshCore.framework`
- `PushwooshBridge.framework`
## 4. Info.plist 구성
```xml
Pushwoosh_APPID
XXXXX-XXXXX
Pushwoosh_API_TOKEN
YOUR_API_TOKEN
NSAppClip
NSAppClipRequestEphemeralUserNotification
NSAppClipRequestLocationConfirmation
UIBackgroundModes
remote-notification
```
## 5. SDK 초기화
```swift
import SwiftUI
import PushwooshFramework
class AppClipDelegate: NSObject, UIApplicationDelegate, PWMessagingDelegate {
func application(_ application: UIApplication,
didFinishLaunchingWithOptions launchOptions: [UIApplication.LaunchOptionsKey: Any]? = nil) -> Bool {
Pushwoosh.configure.delegate = self
Pushwoosh.configure.registerForPushNotifications()
return true
}
func application(_ application: UIApplication,
didRegisterForRemoteNotificationsWithDeviceToken deviceToken: Data) {
Pushwoosh.configure.handlePushRegistration(deviceToken)
}
func application(_ application: UIApplication,
didFailToRegisterForRemoteNotificationsWithError error: Error) {
Pushwoosh.configure.handlePushRegistrationFailure(error as NSError)
}
func application(_ application: UIApplication,
didReceiveRemoteNotification userInfo: [AnyHashable: Any],
fetchCompletionHandler completionHandler: @escaping (UIBackgroundFetchResult) -> Void) {
Pushwoosh.configure.handlePushReceived(userInfo)
completionHandler(.noData)
}
func pushwoosh(_ pushwoosh: Pushwoosh, onMessageOpened message: PWMessage) {
print("푸시 열림: \(message.payload ?? [:])")
}
}
@main
struct YourAppClip: App {
@UIApplicationDelegateAdaptor(AppClipDelegate.self) var appDelegate
var body: some Scene {
WindowGroup {
ContentView()
}
}
}
```
```swift
import UIKit
import PushwooshFramework
@main
class AppDelegate: UIResponder, UIApplicationDelegate, PWMessagingDelegate {
func application(_ application: UIApplication,
didFinishLaunchingWithOptions launchOptions: [UIApplication.LaunchOptionsKey: Any]?) -> Bool {
Pushwoosh.configure.delegate = self
Pushwoosh.configure.registerForPushNotifications()
return true
}
func application(_ application: UIApplication,
didRegisterForRemoteNotificationsWithDeviceToken deviceToken: Data) {
Pushwoosh.configure.handlePushRegistration(deviceToken)
}
func application(_ application: UIApplication,
didFailToRegisterForRemoteNotificationsWithError error: Error) {
Pushwoosh.configure.handlePushRegistrationFailure(error as NSError)
}
func application(_ application: UIApplication,
didReceiveRemoteNotification userInfo: [AnyHashable: Any],
fetchCompletionHandler completionHandler: @escaping (UIBackgroundFetchResult) -> Void) {
Pushwoosh.configure.handlePushReceived(userInfo)
completionHandler(.noData)
}
func pushwoosh(_ pushwoosh: Pushwoosh, onMessageOpened message: PWMessage) {
print("푸시 열림: \(message.payload ?? [:])")
}
}
```
임시 권한을 사용하면 iOS는 8시간 동안 자동으로 푸시 액세스 권한을 부여합니다. 권한 대화 상자를 표시하지 않고 임시 모드를 사용하려면 `Pushwoosh.configure.registerForPushNotifications()` 대신 `UIApplication.shared.registerForRemoteNotifications()`를 직접 호출하세요.
**영구적인** 푸시 권한(표준 대화 상자)을 요청하려면 위와 같이 `Pushwoosh.configure.registerForPushNotifications()`를 사용하세요.
## 임시 푸시 권한
사용자가 앱 클립을 열면 iOS는 묻지 않고 **8시간** 동안 푸시 알림 액세스 권한을 부여합니다. 8시간이 지나면 권한이 만료됩니다. 사용자는 다시 8시간의 권한을 얻으려면 앱 클립을 다시 열어야 합니다.
**권한 대화 상자를 표시하지 않고** 8시간 동안 푸시 토큰을 얻으려면:
```swift
UIApplication.shared.registerForRemoteNotifications()
```
**영구적인** 푸시 토큰(표준 권한 대화 상자 표시)을 얻으려면:
```swift
Pushwoosh.configure.registerForPushNotifications()
```
## 제한 사항
| 제한 사항 | 세부 정보 |
|---|---|
| **리치 알림 없음** | 앱 클립은 Notification Service Extension을 포함할 수 없습니다 — 이미지 없음, 커뮤니케이션 알림 없음 |
| **크기 제한** | 15MB (iOS 16) / 50MB (iOS 17+) |
| **8시간 푸시 창** | 임시 권한은 8시간 후에 만료됩니다 |
| **백그라운드 처리 없음** | 사일런트 푸시는 기능이 제한됩니다 |
| **기기 ID** | `identifierForVendor`가 0을 반환합니다 — SDK가 자동으로 처리합니다 (7.0.33+) |
## 예시 화면
 *임시 권한이 있는 앱 클립에서 수신된 푸시 알림*