# MAUI Dotnet
* [**모듈 소스**](https://github.com/Pushwoosh/pushwoosh-dotnet)
* [**샘플 다운로드**](https://github.com/Pushwoosh/pushwoosh-dotnet/tree/main/Sample)
### SDK 통합
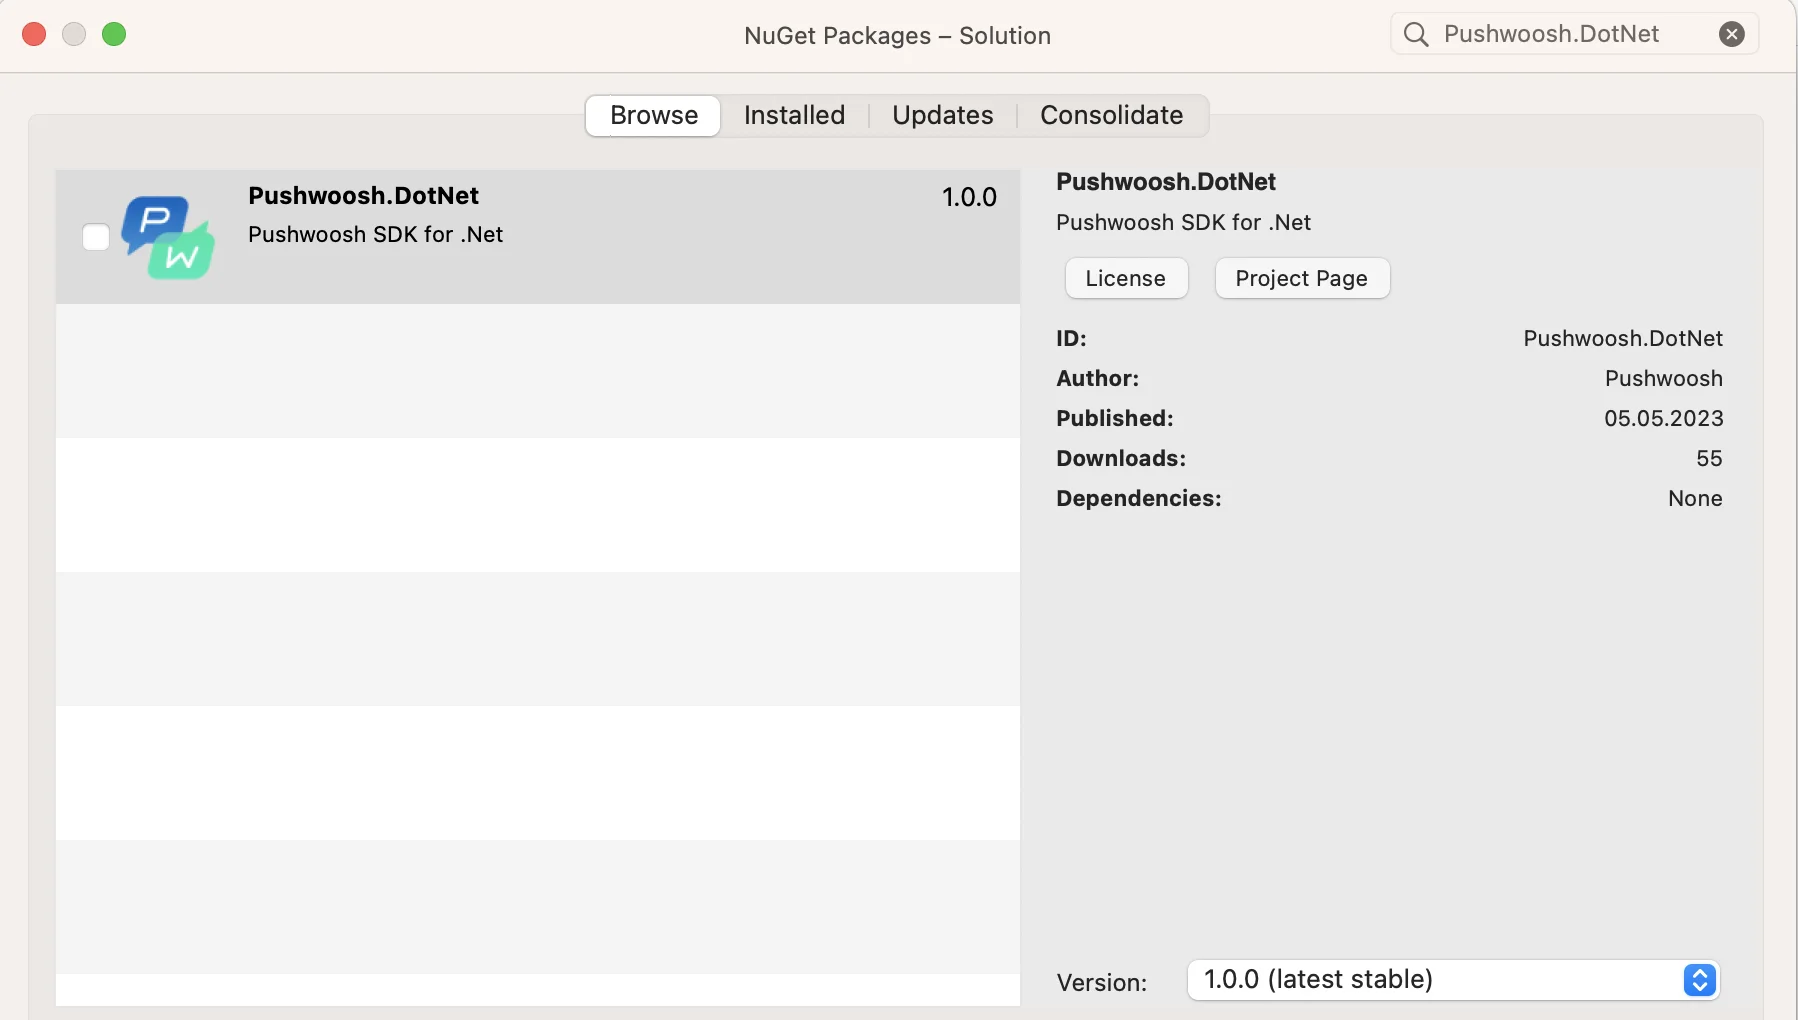
**1.** Android 및 iOS 프로젝트 모두에 **Pushwoosh.DotNet** Nuget 패키지를 추가합니다:
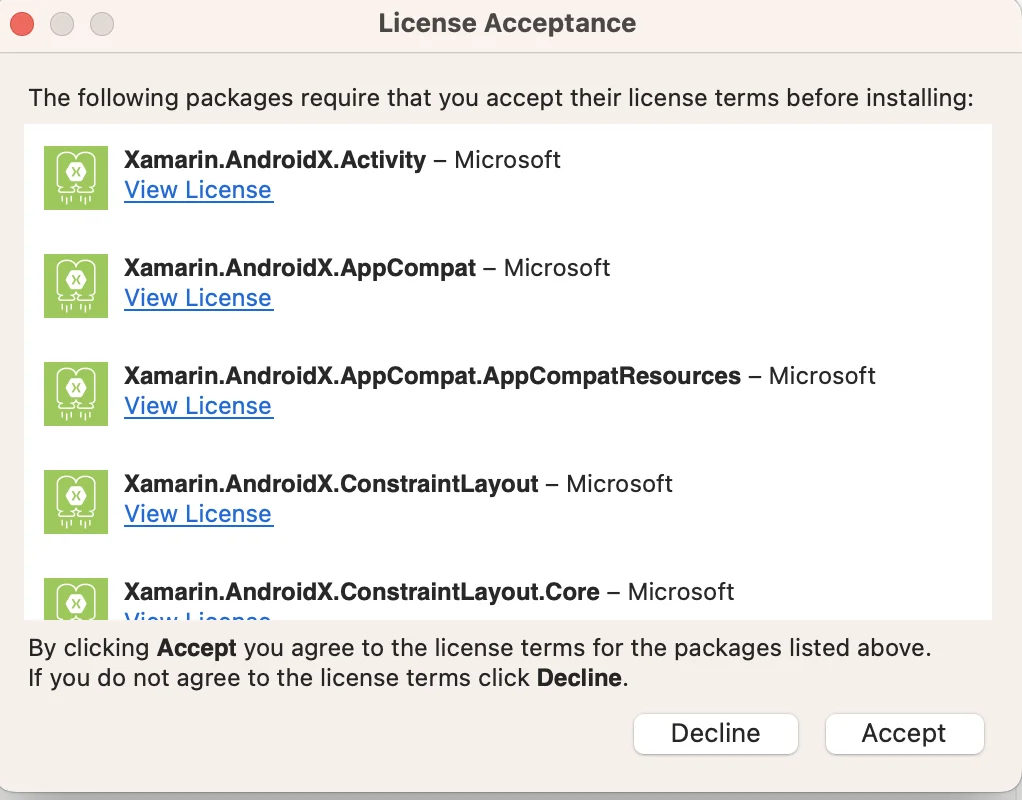
 **2.** 필요한 경우 전이적 Android 종속성에 대한 라이선스에 동의합니다:
 **3.** [Firebase Console](https://console.firebase.google.com/u/0/)에서 프로젝트를 구성합니다.
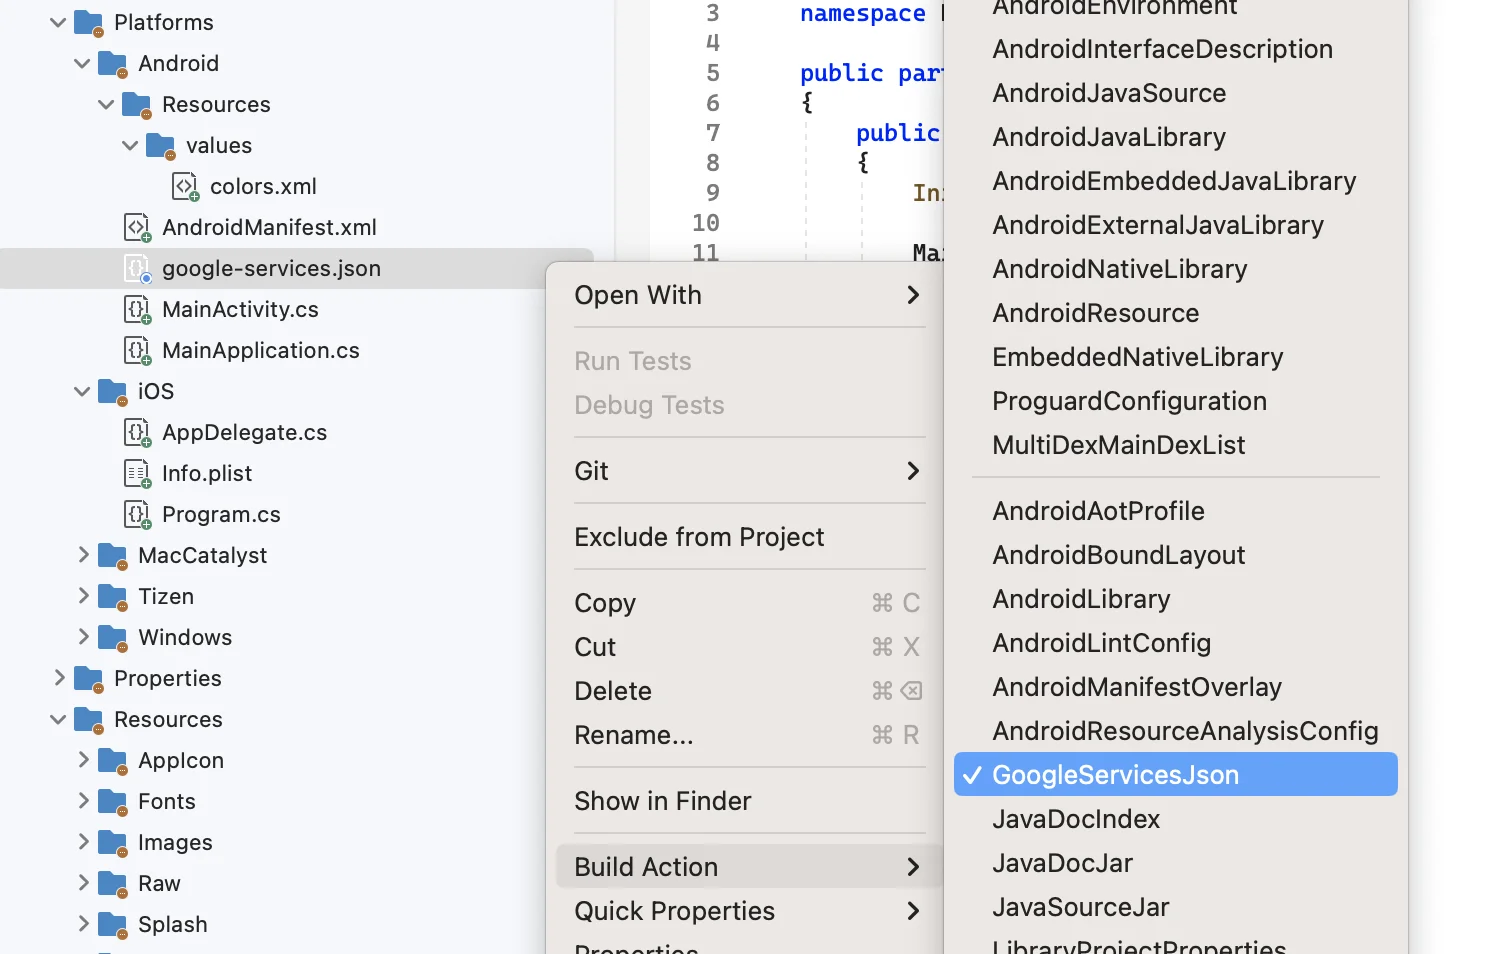
**4.** **google-services.json**을 Android 플랫폼 디렉터리의 루트에 추가합니다. 이 파일에 대해 **GoogleServicesJson** 빌드 작업을 설정합니다:
**3.** [Firebase Console](https://console.firebase.google.com/u/0/)에서 프로젝트를 구성합니다.
**4.** **google-services.json**을 Android 플랫폼 디렉터리의 루트에 추가합니다. 이 파일에 대해 **GoogleServicesJson** 빌드 작업을 설정합니다:
 **5.** **MainActivity.cs**에서 네임스페이스를 선언하기 전에 다음 줄을 추가합니다(**XXXXX-XXXXX**는 Pushwoosh 애플리케이션 ID입니다):
```csharp
[assembly: MetaData("com.pushwoosh.appid", Value = "XXXXX-XXXXX")]
[assembly: MetaData("com.pushwoosh.senderid", Value = "@string/fcm_sender_id")]
```
**6.** **MainActivity.cs**에서 `OnCreate()` 메서드를 재정의하고 `base.OnCreate(savedInstanceState);` 뒤에 `PushManager.Init();`를 호출합니다.
```csharp
using Pushwoosh.Android;
...
public class MainActivity : MauiAppCompatActivity
{
protected override void OnCreate(Bundle savedInstanceState)
{
base.OnCreate(savedInstanceState);
PushManager.Init();
}
}
```
**7.** Android 프로젝트에서 **Resources/values/strings.xml** 파일을 찾거나 생성합니다. 여기에 Sender ID 문자열을 추가합니다:
```txt
YOUR_SENDER_ID
```
**8.** `AndroidManifest.xml`에 다음을 추가합니다:
```xml
```
> **중요:** [Device API 토큰](/ko/developer/api-reference/api-access-token/#device-api-token)이 Pushwoosh 제어판의 올바른 애플리케이션에 액세스할 수 있는지 확인하십시오. [자세히 알아보기](/ko/developer/api-reference/api-access-token/#edit-token)
**9.** iOS 프로젝트의 **AppDelegate.cs**에서 다음과 같이 변경합니다:
`FinishedLaunching` 메서드의 시작 부분에 다음 줄을 넣습니다: \
`PushManager.Init();`
**AppDelegate**에 다음 메서드를 추가합니다(`MauiUIApplicationDelegate` 클래스는 기본적으로 이러한 메서드를 내보내지 않으므로 수동으로 추가해야 합니다):
```csharp
[Export("application:didReceiveRemoteNotification:fetchCompletionHandler:")]
public void DidReceiveRemoteNotification(UIKit.UIApplication application, NSDictionary userInfo, Action completionHandler)
{
PushManager.Instance.ReceivedRemoteNotification(userInfo);
}
[Export("application:didRegisterForRemoteNotificationsWithDeviceToken:")]
public void RegisteredForRemoteNotifications(UIKit.UIApplication application, NSData deviceToken)
{
PushManager.Instance.RegisteredForRemoteNotifications(deviceToken);
}
[Export("application:didFailToRegisterForRemoteNotificationsWithError:")]
public void FailedToRegisterForRemoteNotifications(UIKit.UIApplication application, NSError error)
{
PushManager.Instance.FailedToRegisterForRemoteNotifications(error);
}
```
**10.** **Info.plist**에서 **Pushwoosh\_APPID** 값을 Pushwoosh 애플리케이션 코드로 변경합니다. 제어판에서 찾을 수 있습니다:\
**5.** **MainActivity.cs**에서 네임스페이스를 선언하기 전에 다음 줄을 추가합니다(**XXXXX-XXXXX**는 Pushwoosh 애플리케이션 ID입니다):
```csharp
[assembly: MetaData("com.pushwoosh.appid", Value = "XXXXX-XXXXX")]
[assembly: MetaData("com.pushwoosh.senderid", Value = "@string/fcm_sender_id")]
```
**6.** **MainActivity.cs**에서 `OnCreate()` 메서드를 재정의하고 `base.OnCreate(savedInstanceState);` 뒤에 `PushManager.Init();`를 호출합니다.
```csharp
using Pushwoosh.Android;
...
public class MainActivity : MauiAppCompatActivity
{
protected override void OnCreate(Bundle savedInstanceState)
{
base.OnCreate(savedInstanceState);
PushManager.Init();
}
}
```
**7.** Android 프로젝트에서 **Resources/values/strings.xml** 파일을 찾거나 생성합니다. 여기에 Sender ID 문자열을 추가합니다:
```txt
YOUR_SENDER_ID
```
**8.** `AndroidManifest.xml`에 다음을 추가합니다:
```xml
```
> **중요:** [Device API 토큰](/ko/developer/api-reference/api-access-token/#device-api-token)이 Pushwoosh 제어판의 올바른 애플리케이션에 액세스할 수 있는지 확인하십시오. [자세히 알아보기](/ko/developer/api-reference/api-access-token/#edit-token)
**9.** iOS 프로젝트의 **AppDelegate.cs**에서 다음과 같이 변경합니다:
`FinishedLaunching` 메서드의 시작 부분에 다음 줄을 넣습니다: \
`PushManager.Init();`
**AppDelegate**에 다음 메서드를 추가합니다(`MauiUIApplicationDelegate` 클래스는 기본적으로 이러한 메서드를 내보내지 않으므로 수동으로 추가해야 합니다):
```csharp
[Export("application:didReceiveRemoteNotification:fetchCompletionHandler:")]
public void DidReceiveRemoteNotification(UIKit.UIApplication application, NSDictionary userInfo, Action completionHandler)
{
PushManager.Instance.ReceivedRemoteNotification(userInfo);
}
[Export("application:didRegisterForRemoteNotificationsWithDeviceToken:")]
public void RegisteredForRemoteNotifications(UIKit.UIApplication application, NSData deviceToken)
{
PushManager.Instance.RegisteredForRemoteNotifications(deviceToken);
}
[Export("application:didFailToRegisterForRemoteNotificationsWithError:")]
public void FailedToRegisterForRemoteNotifications(UIKit.UIApplication application, NSError error)
{
PushManager.Instance.FailedToRegisterForRemoteNotifications(error);
}
```
**10.** **Info.plist**에서 **Pushwoosh\_APPID** 값을 Pushwoosh 애플리케이션 코드로 변경합니다. 제어판에서 찾을 수 있습니다:\
 **11.** `Info.plist`에서 다음을 설정합니다:
- `Pushwoosh_API_TOKEN` 키를 [Pushwoosh Device API 토큰](/ko/developer/api-reference/api-access-token/#device-api-token)으로 설정합니다.
> **중요:** 토큰이 Pushwoosh 제어판의 올바른 앱에 액세스할 수 있도록 하십시오. [자세히 알아보기](/ko/developer/api-reference/api-access-token/#edit-token)
**12.** **App.xaml.cs**의 크로스 플랫폼 부분에서 `onStart` 메서드에 등록을 추가합니다:
```csharp
using PushwooshSDK.DotNet.Core;
...
public partial class App : Application
{
...
protected override void OnStart()
{
base.OnStart();
PushManager.Instance.Register();
}
}
```
> **Windows 사용자 참고:**
>빌드 시 파일 경로 길이와 관련된 문제가 발생할 수 있습니다.
>이는 Visual Studio에서 사용하는 디렉터리와 Pushwoosh SDK 내의 파일 경로의 총 길이가 Windows의 최대 경로 길이 제한인 260자를 초과하기 때문입니다.
>이 문제를 해결하려면 Windows 레지스트리에서 LongPathsEnabled 설정을 활성화하십시오.
### 피드백 공유
여러분의 피드백은 더 나은 경험을 만드는 데 도움이 됩니다. SDK 통합 과정에서 문제가 발생하면 언제든지 알려주시기 바랍니다. 어려움이 있으시면 주저하지 마시고 [이 양식을 통해](https://docs.google.com/forms/d/e/1FAIpQLSd\_0b8jwn-V\_JmoPLIxIFYbHACCQhrzidOZV3ELywoQPXRSxw/viewform) 의견을 공유해 주세요.
**11.** `Info.plist`에서 다음을 설정합니다:
- `Pushwoosh_API_TOKEN` 키를 [Pushwoosh Device API 토큰](/ko/developer/api-reference/api-access-token/#device-api-token)으로 설정합니다.
> **중요:** 토큰이 Pushwoosh 제어판의 올바른 앱에 액세스할 수 있도록 하십시오. [자세히 알아보기](/ko/developer/api-reference/api-access-token/#edit-token)
**12.** **App.xaml.cs**의 크로스 플랫폼 부분에서 `onStart` 메서드에 등록을 추가합니다:
```csharp
using PushwooshSDK.DotNet.Core;
...
public partial class App : Application
{
...
protected override void OnStart()
{
base.OnStart();
PushManager.Instance.Register();
}
}
```
> **Windows 사용자 참고:**
>빌드 시 파일 경로 길이와 관련된 문제가 발생할 수 있습니다.
>이는 Visual Studio에서 사용하는 디렉터리와 Pushwoosh SDK 내의 파일 경로의 총 길이가 Windows의 최대 경로 길이 제한인 260자를 초과하기 때문입니다.
>이 문제를 해결하려면 Windows 레지스트리에서 LongPathsEnabled 설정을 활성화하십시오.
### 피드백 공유
여러분의 피드백은 더 나은 경험을 만드는 데 도움이 됩니다. SDK 통합 과정에서 문제가 발생하면 언제든지 알려주시기 바랍니다. 어려움이 있으시면 주저하지 마시고 [이 양식을 통해](https://docs.google.com/forms/d/e/1FAIpQLSd\_0b8jwn-V\_JmoPLIxIFYbHACCQhrzidOZV3ELywoQPXRSxw/viewform) 의견을 공유해 주세요.