# React Native के लिए बैज सेट अप करना
चूंकि React Native प्लगइन में `PWNotificationExtensionManager` हेडर नहीं होता है, इसलिए आपको अपने React Native प्रोजेक्ट के लिए बैज लागू करने के लिए कई अतिरिक्त कदम उठाने होंगे।
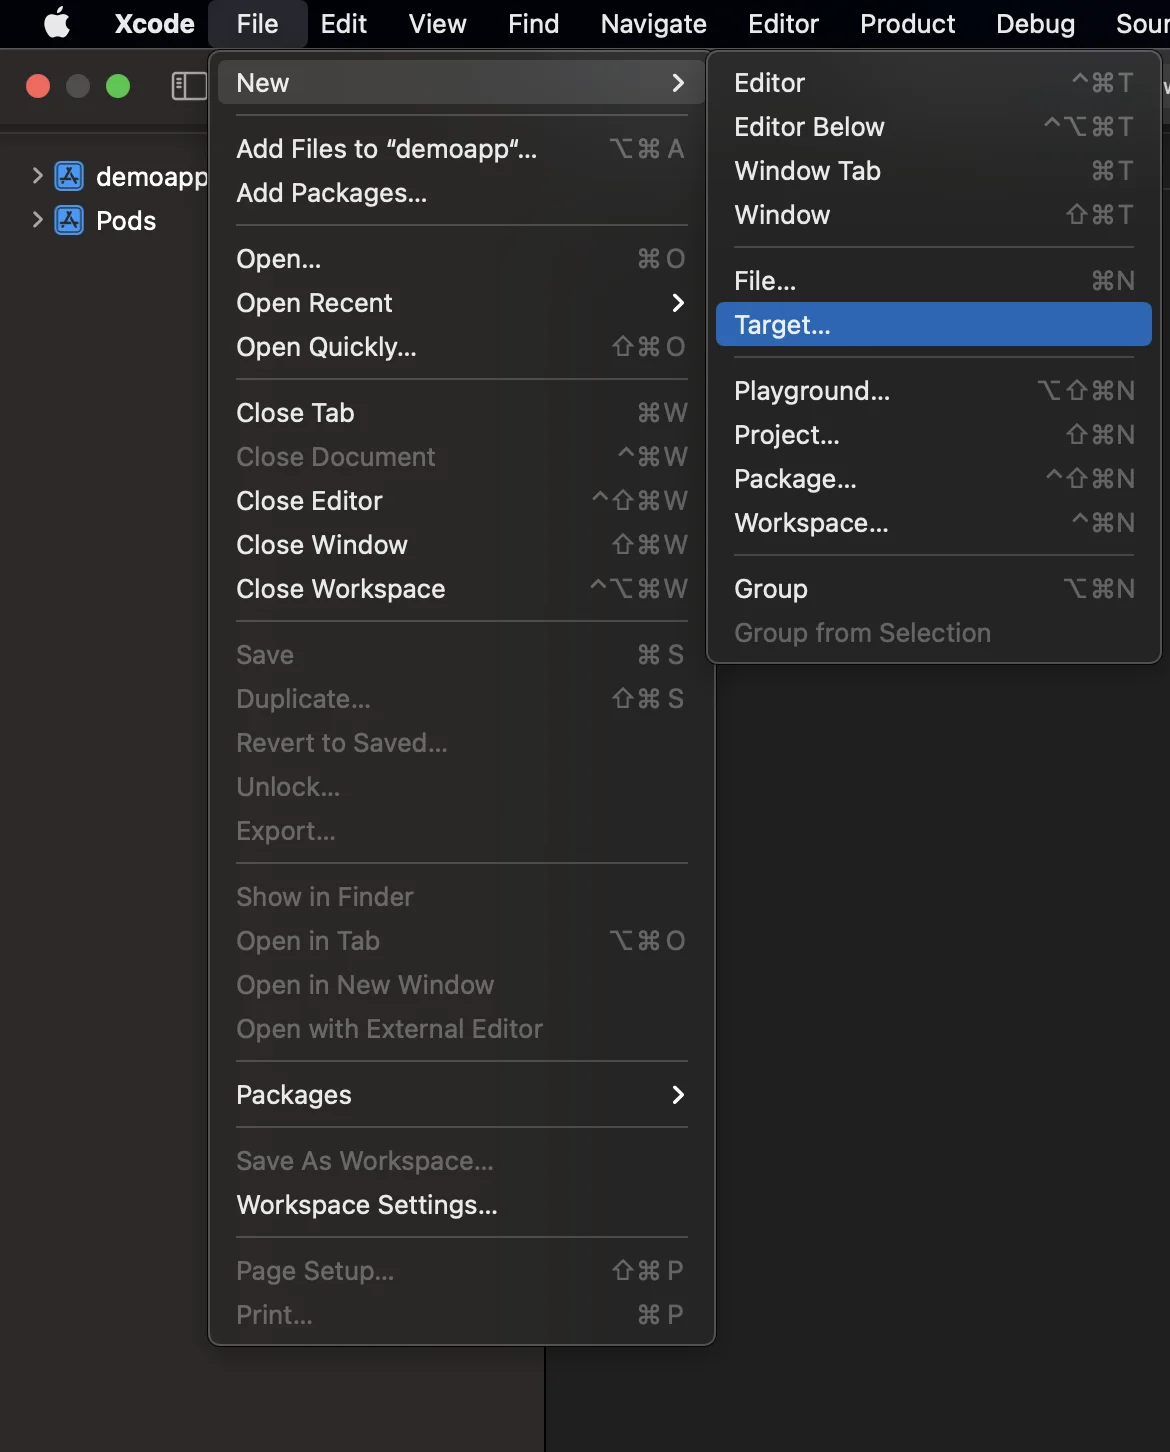
#### 1. नोटिफिकेशन सर्विस एक्सटेंशन जोड़ें (File -> New -> Target...)
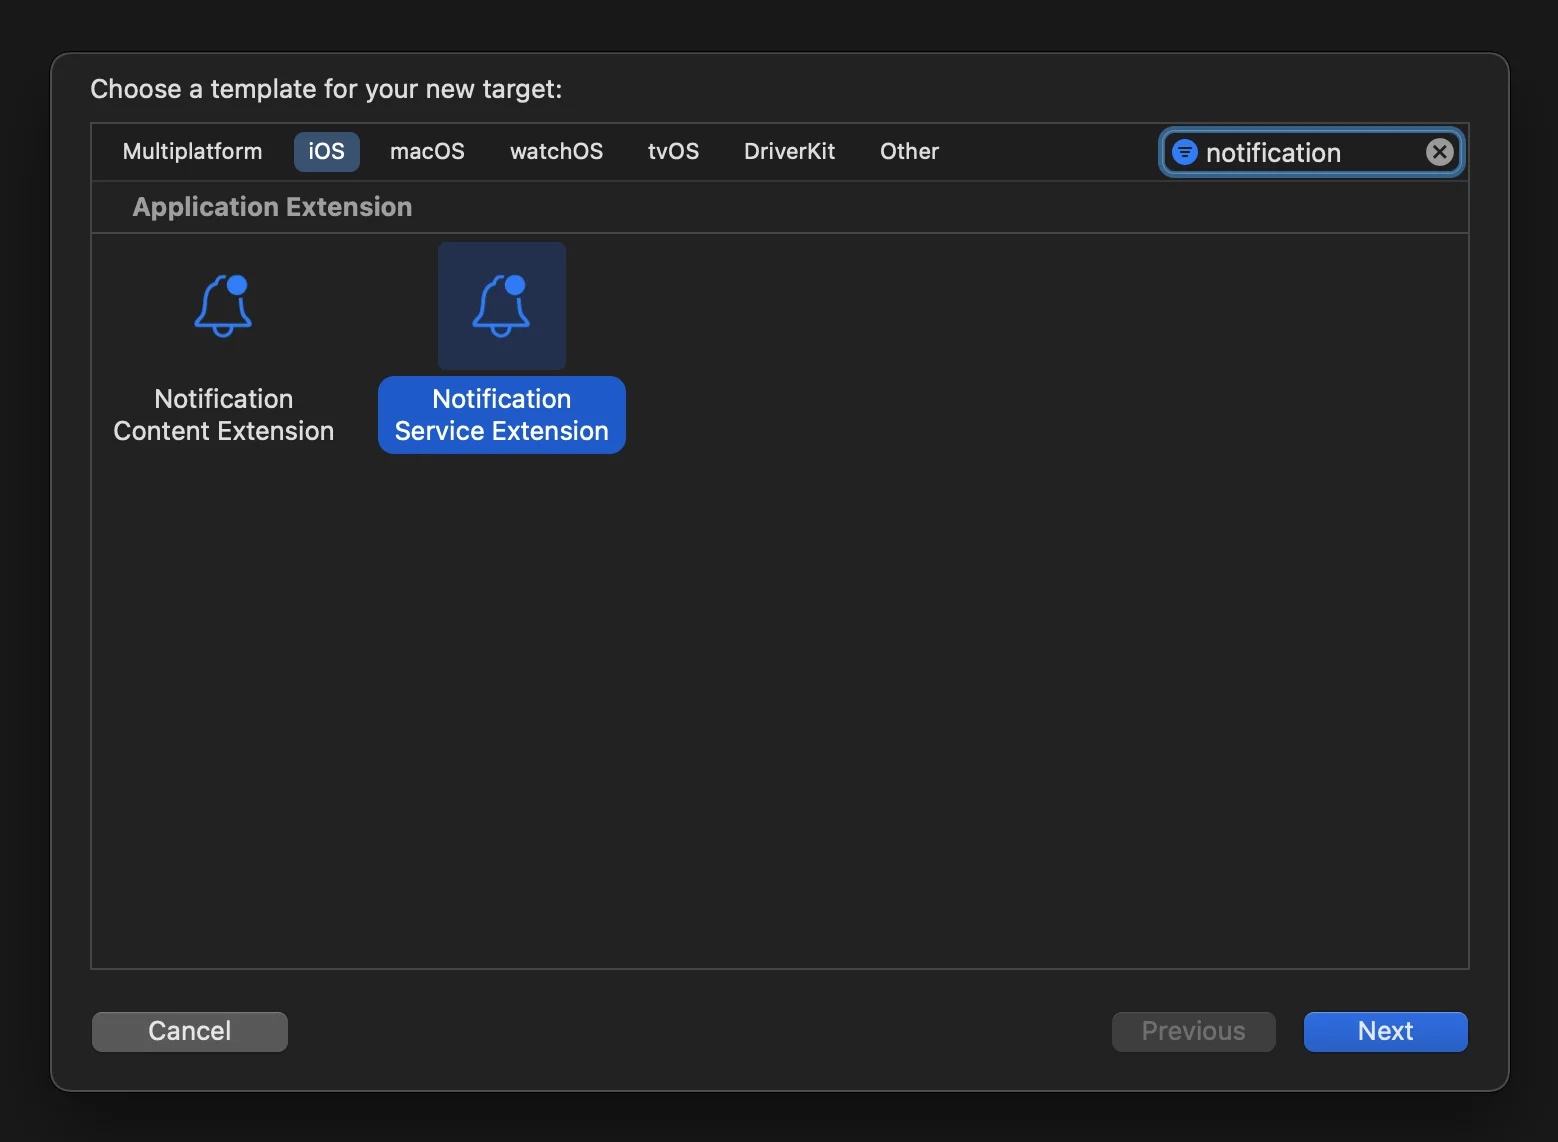
#### 2. "Notification Service Extension" चुनें
#### 3. नोटिफिकेशन सर्विस एक्सटेंशन कोड को इस प्रकार अपडेट करें:
```
#import "NotificationService.h"
#import
@interface NotificationService ()
@property (nonatomic, strong) void (^contentHandler)(UNNotificationContent *contentToDeliver);
@property (nonatomic, strong) UNMutableNotificationContent *bestAttemptContent;
@end
@implementation NotificationService
- (void)didReceiveNotificationRequest:(UNNotificationRequest *)request withContentHandler:(void (^)(UNNotificationContent * _Nonnull))contentHandler {
self.contentHandler = contentHandler;
self.bestAttemptContent = [request.content mutableCopy];
[[PWNotificationExtensionManager sharedManager] handleNotificationRequest:request contentHandler:contentHandler];
}
- (void)serviceExtensionTimeWillExpire {
// Called just before the extension will be terminated by the system.
// Use this as an opportunity to deliver your "best attempt" at modified content, otherwise the original push payload will be used.
self.contentHandler(self.bestAttemptContent);
}
@end
```
#### 4. डिपेंडेंसी को एक टारगेट से लिंक करें
React Native मैन्युअल रूप से बनाए गए टारगेट से सभी आवश्यक डिपेंडेंसी को स्वचालित रूप से लिंक नहीं करता है, इसलिए आपको टारगेट के **Build Phases** को अपडेट करना चाहिए और आवश्यक जानकारी प्रदान करनी चाहिए:
बस **Compile Sources** और **Link Binary With Libraries** के तहत **+** चिह्न पर क्लिक करें और आवश्यक libs/frameworks खोजें।
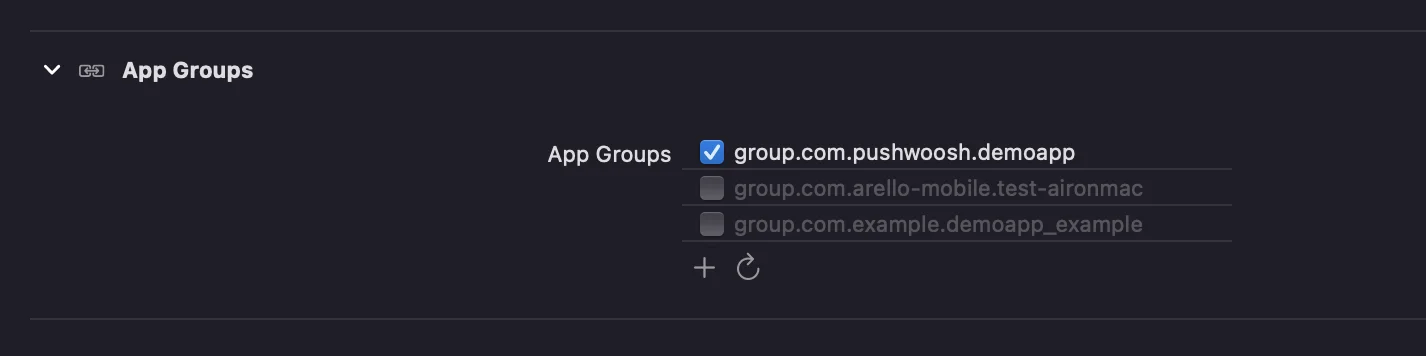
#### 5. Xcode में दोनों टारगेट में **App Groups** क्षमता जोड़ें और **ऐप और एक्सटेंशन दोनों के लिए** एक ही ग्रुप सेट करें:
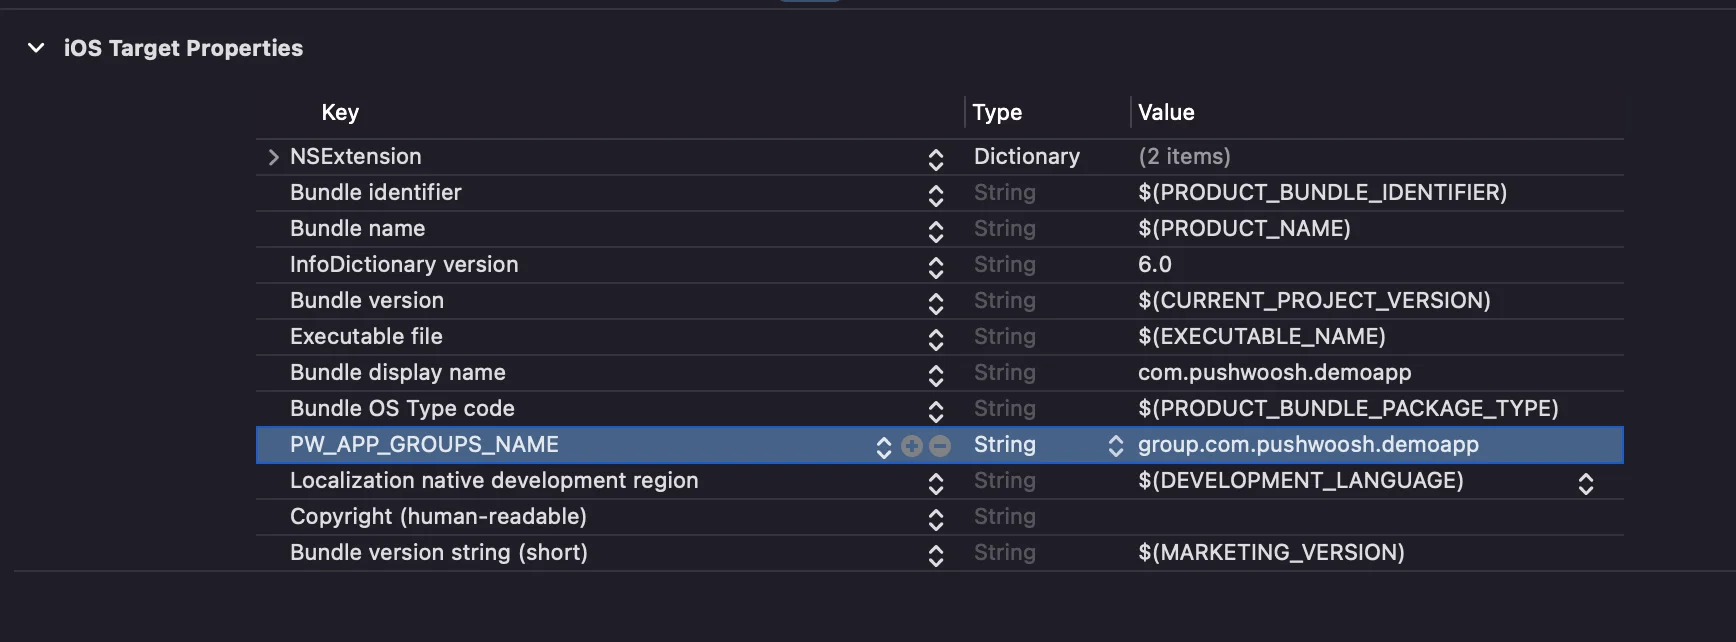
#### 6. **दोनों** टारगेट के info.plists में **PW\_APP\_GROUPS\_NAME** कुंजी जोड़ें। मान आपके ऐप ग्रुप का नाम है:
 #### 2. "Notification Service Extension" चुनें
 #### 3. नोटिफिकेशन सर्विस एक्सटेंशन कोड को इस प्रकार अपडेट करें:
```
#import "NotificationService.h"
#import
#### 3. नोटिफिकेशन सर्विस एक्सटेंशन कोड को इस प्रकार अपडेट करें:
```
#import "NotificationService.h"
#import 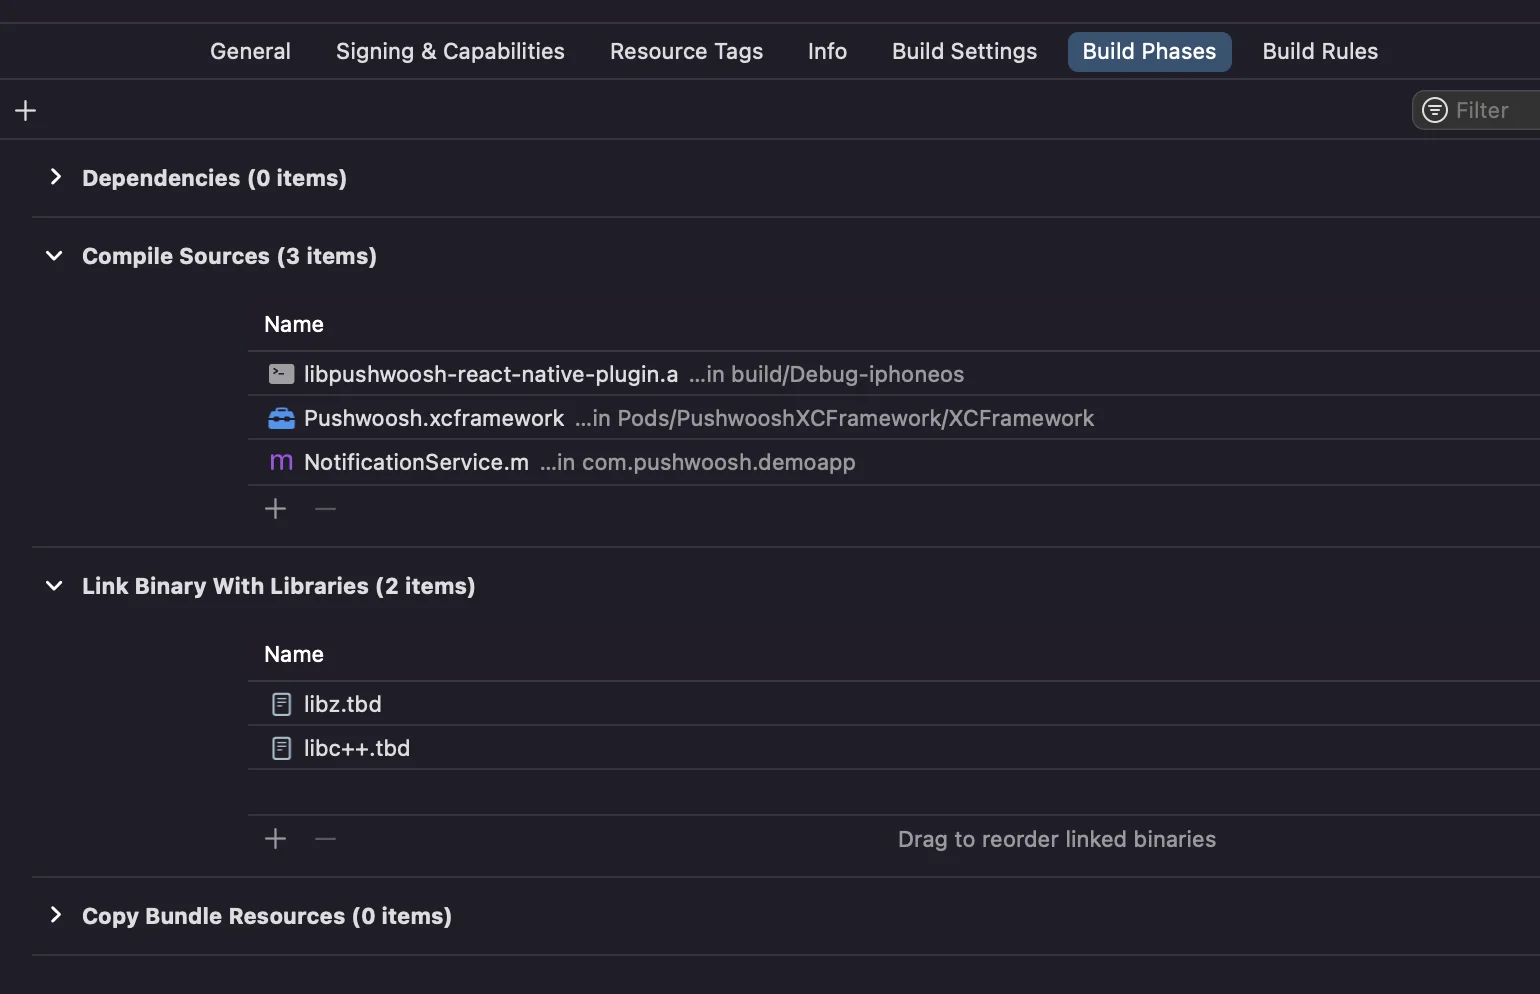 बस **Compile Sources** और **Link Binary With Libraries** के तहत **+** चिह्न पर क्लिक करें और आवश्यक libs/frameworks खोजें।
#### 5. Xcode में दोनों टारगेट में **App Groups** क्षमता जोड़ें और **ऐप और एक्सटेंशन दोनों के लिए** एक ही ग्रुप सेट करें:
बस **Compile Sources** और **Link Binary With Libraries** के तहत **+** चिह्न पर क्लिक करें और आवश्यक libs/frameworks खोजें।
#### 5. Xcode में दोनों टारगेट में **App Groups** क्षमता जोड़ें और **ऐप और एक्सटेंशन दोनों के लिए** एक ही ग्रुप सेट करें:
 #### 6. **दोनों** टारगेट के info.plists में **PW\_APP\_GROUPS\_NAME** कुंजी जोड़ें। मान आपके ऐप ग्रुप का नाम है: