Webhook
Ce contenu n'est pas encore disponible dans votre langue.
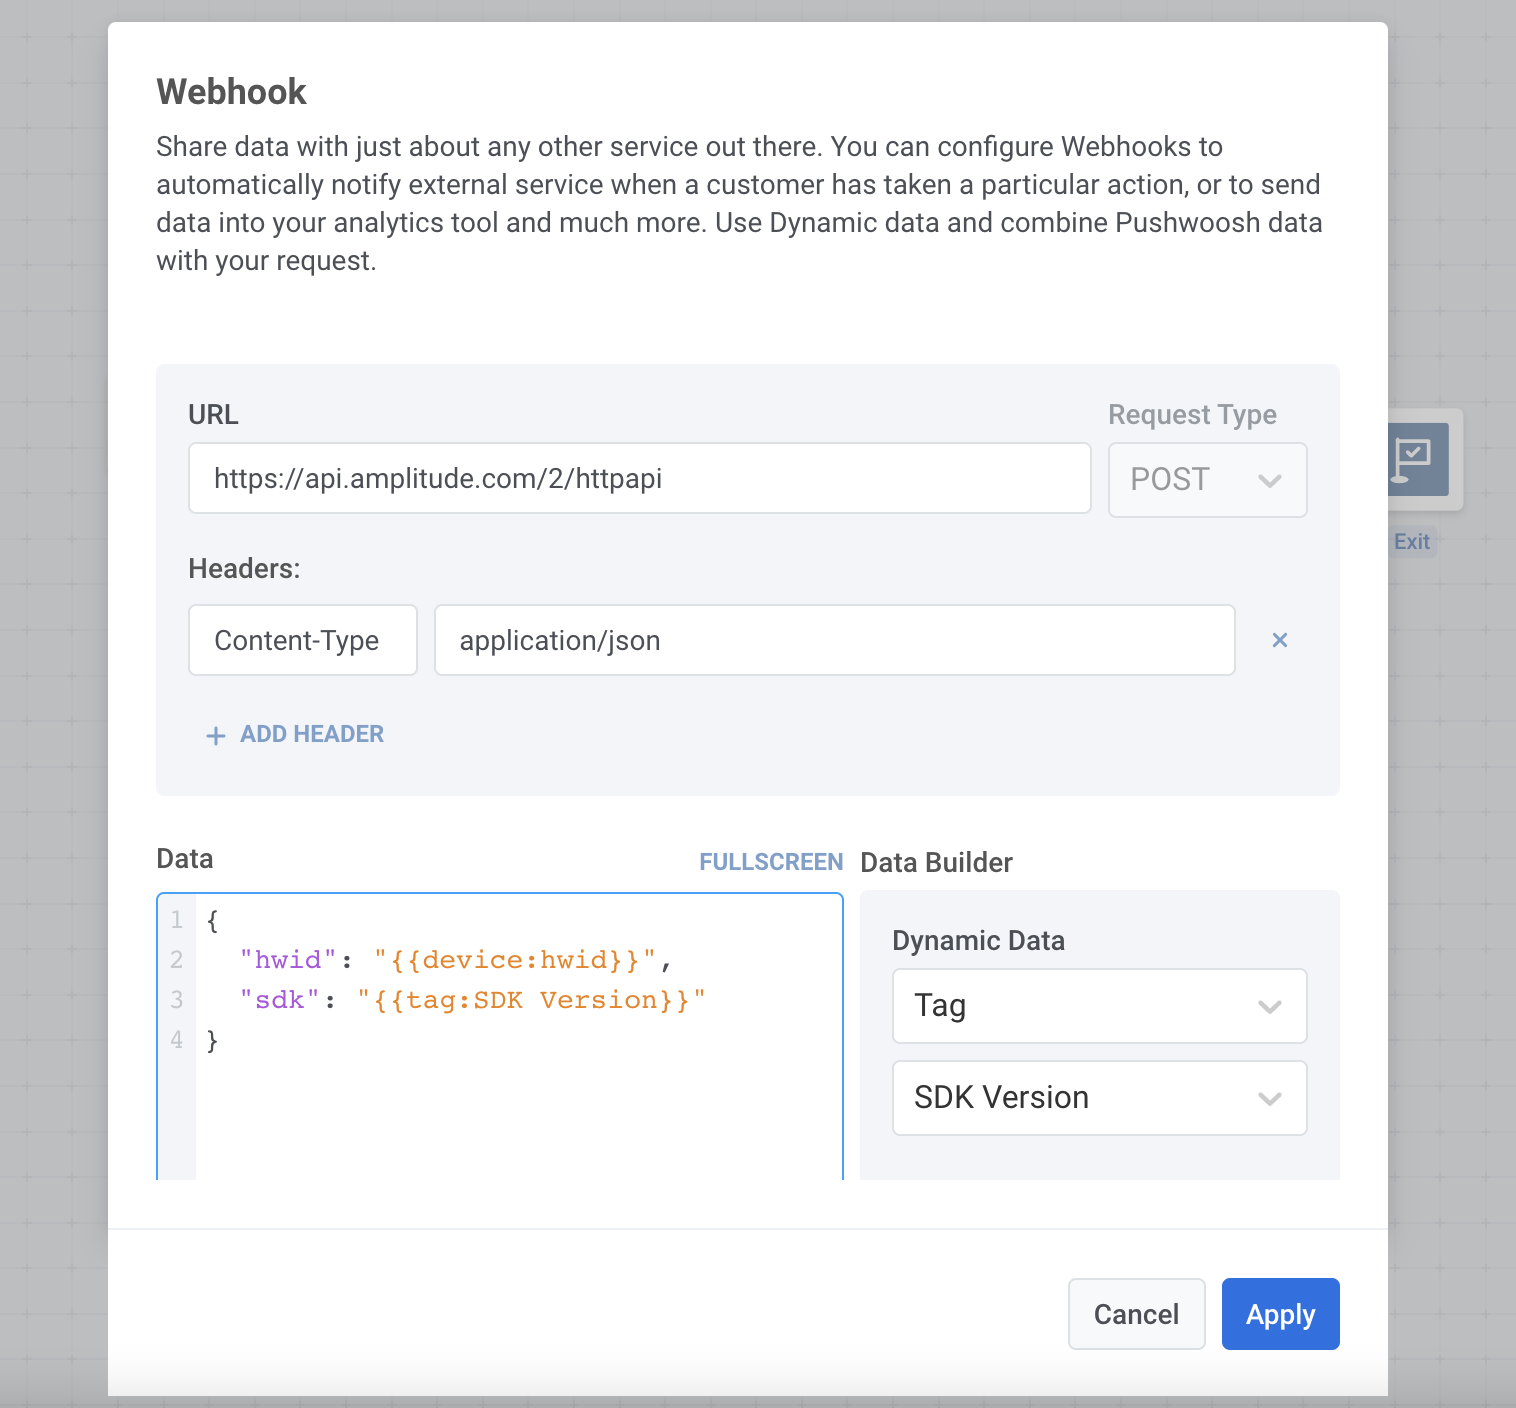
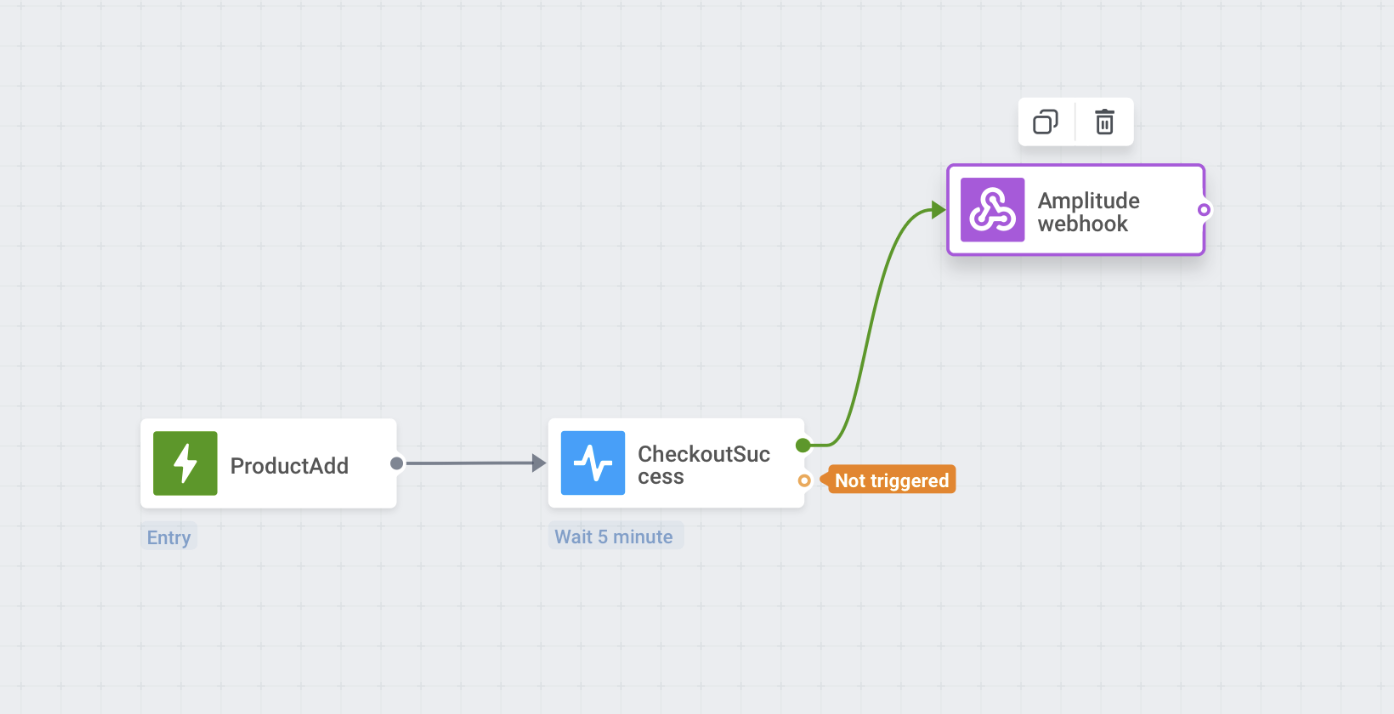
Using webhooks, you can share journey data with just about any other service out there: analytics, CRM systems, marketing automation services, and much more. For example, automatically notify external services when a customer has taken a particular action within the journey, send customer data into your analytic tools, and trigger third-party emails, SMS or WhatsApp messages on specific in-journey events – there are numerous use cases, choose yours.
- Drag-and-drop the Webhook element to the canvas. Place Webhook anywhere you’d like, keeping in mind what journey info you’re going to send to a third-party service.
- Give it a name. It might be handy to name webhooks according to the services they send data to or the use case.
Specify the request URL to which the data should be sent, and select the request type:
GETorPOST.Set the content type. By default, the content type is application/json. If the service you’re sending the webhook to requires another content type, enter the appropriate one in the Content-Type header value. Examples of content types are:
- x-www-form-urlencoded
- text/plain
- text/xml
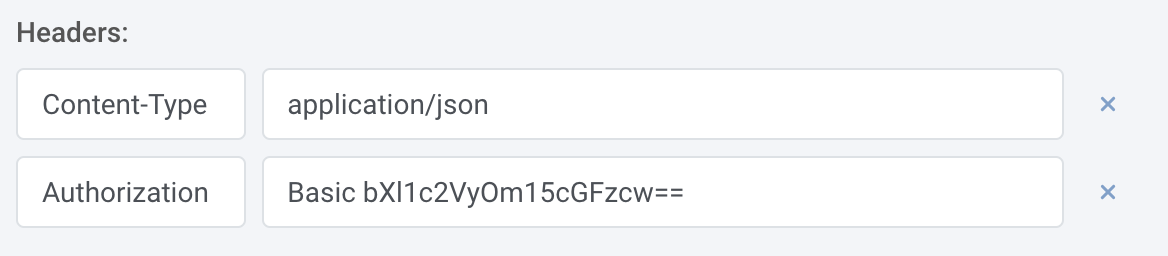
- Add headers if needed.
For example, some APIs may require HTTP Basic authentication. To authenticate such requests, do the following:
- Open plain text editor and type without any spaces username and password separated by a colon, e.g.:
myuser:mypass - Encode it into Base64.
- Copy the resulting string (e.g. bXl1c2VyOm15cGFzcw== )
- Add the Authorization header in webhook settings, where the value would be “Basic <YOUR BASE64 STRING>”. Mind the space after the word “Basic”.
- Compose the request.
- To add the Dynamic Data (customer’s tag values, attributes of the events the customer triggered, device data, etc.) to your webhook, choose the Dynamic Data parameter, copy the placeholder, and paste it to the request body.