Push
L’élément Push indique un point pour communiquer avec un client via une notification push.
Pour envoyer un message push au bon moment dans le parcours, ajoutez l’élément Push après l’événement ou la condition qui doit déclencher le message.
Sélectionner ou créer un contenu de push
Anchor link toEnsuite, sélectionnez un préréglage depuis votre compte Pushwoosh ou créez-en un. En savoir plus sur la création de préréglages de push.

Définir le type de message
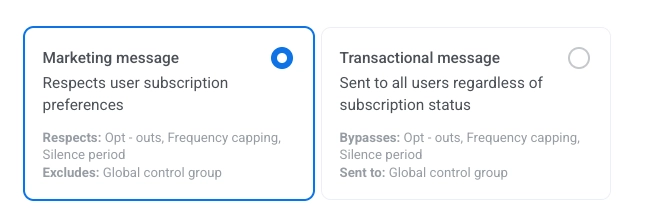
Anchor link toChoisissez Message marketing ou Message transactionnel :
- Message marketing : Respecte les préférences d’abonnement de l’utilisateur. Respecte les désabonnements, le plafonnement de la fréquence et la période de silence. Exclut le groupe de contrôle global.
- Message transactionnel : Envoyé à tous les utilisateurs quel que soit leur statut d’abonnement. Ignore les désabonnements, le plafonnement de la fréquence et la période de silence. Envoyé au groupe de contrôle global.
Découvrez comment le type de message affecte la livraison.
Personnaliser les messages avec le Contenu Dynamique et les Modèles Liquid
Anchor link toPour une plus grande pertinence de vos messages pour les participants au parcours, vous pouvez ajouter du contenu personnalisé basé sur le comportement des utilisateurs. Par exemple, lors de l’envoi d’un push de panier abandonné, ajoutez le nom du produit pour une meilleure conversion. Cela rappelle aux utilisateurs ce qu’ils voulaient acheter et rend votre message plus convaincant.
En savoir plus sur la personnalisation des messages de parcours
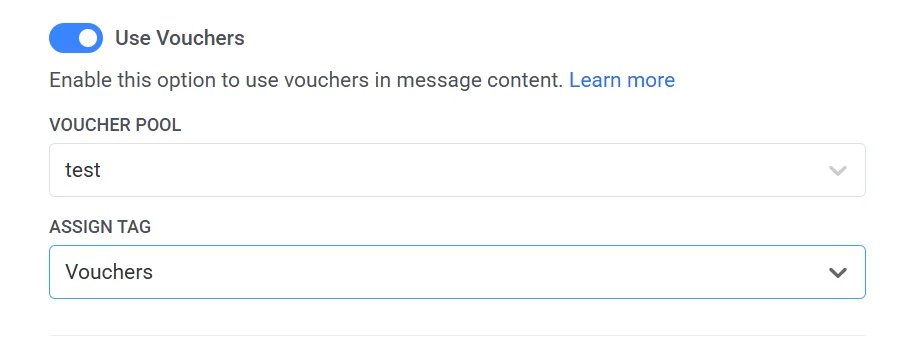
Utiliser des coupons
Anchor link toVous pouvez personnaliser les notifications push en joignant un code de coupon provenant d’un pool prédéfini. C’est utile pour les promotions, les réductions et les incitations à la fidélité.
Pour ce faire, créez à l’avance un préréglage de push qui inclut le placeholder {{voucher}}.
Pour inclure un coupon :
- Activez l’option Coupons.
- Dans le champ Pool de coupons, sélectionnez le pool contenant vos codes de coupon disponibles. Assurez-vous d’ajouter le pool de coupons à l’avance.
- (Facultatif) Utilisez le champ Attribuer un Tag pour appliquer un tag aux utilisateurs qui reçoivent un coupon. Ce tag peut être utilisé pour la segmentation ou le reporting.
Enregistrer dans la boîte de réception
Anchor link toL’option Enregistrer dans la boîte de réception vous permet de stocker les notifications push dans la boîte de réception de l’application, afin que les utilisateurs puissent accéder et consulter les messages quand cela leur convient. Cela permet de s’assurer que les notifications importantes ne sont pas manquées et peuvent être consultées plus tard, facilitant ainsi l’engagement des utilisateurs.
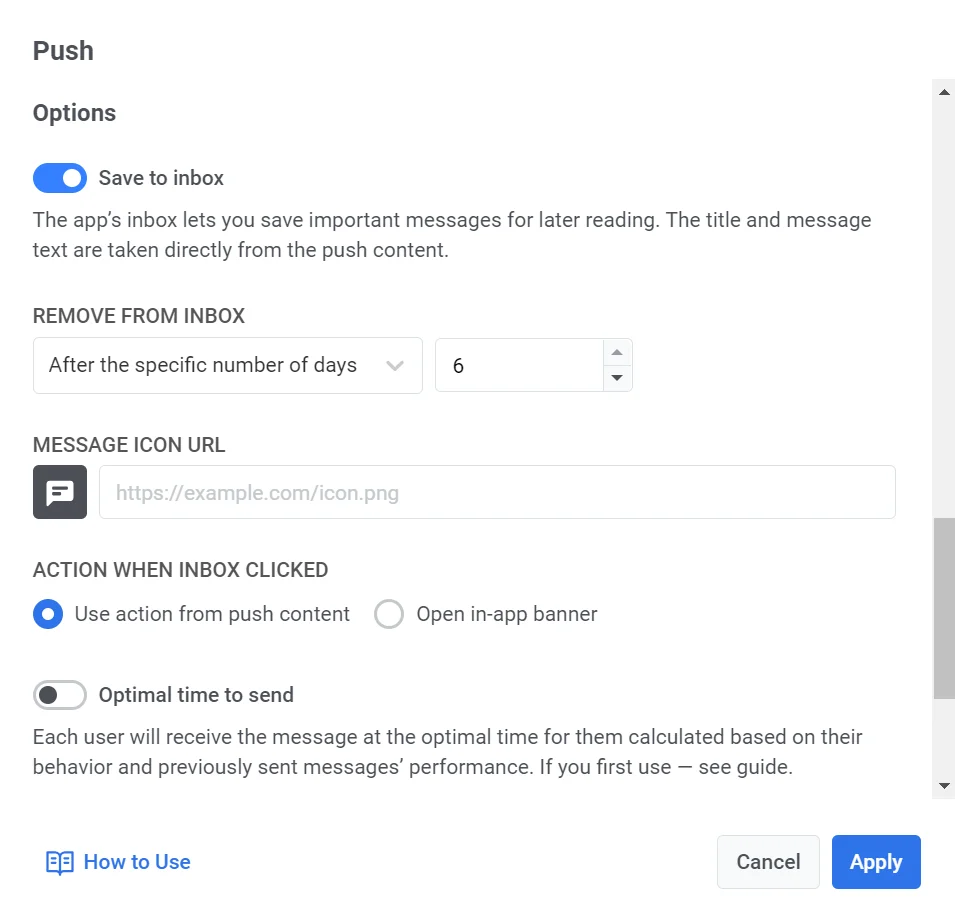
Pour enregistrer un message dans la boîte de réception, activez simplement l’option Enregistrer dans la boîte de réception et configurez-la.
- Choisissez la durée pendant laquelle le message reste dans la boîte de réception.
- Personnalisez l’icône du message, si nécessaire. Vous pouvez choisir une icône différente pour que le message se démarque dans la boîte de réception.
- Définissez ce qui se passe lorsque l’utilisateur clique sur le message.
En savoir plus sur la configuration de la boîte de réception
Configurer les paramètres de livraison des messages
Anchor link toDéfinir le plafonnement de la fréquence
Anchor link toUtilisez le Plafonnement de la fréquence pour limiter la fréquence à laquelle les utilisateurs reçoivent des messages push, évitant ainsi la sur-sollicitation et réduisant le désabonnement. Dans les paramètres de l’élément Push, choisissez l’une des options suivantes :
-
Utiliser les paramètres de plafonnement de la fréquence globaux
Appliquez les limites à l’échelle du projet configurées dans vos paramètres de plafonnement de la fréquence globaux.
Par exemple, si la limite globale est fixée à 3 messages en 9 jours, les messages supplémentaires dépassant cette limite seront ignorés.
-
Ignorer le plafonnement de la fréquence global
L’utilisateur recevra ce message même s’il a dépassé les limites de messages du canal. Utilisez cette option avec prudence pour éviter la sur-sollicitation.
-
Utiliser un plafonnement de la fréquence personnalisé
Définissez une limite de message personnalisée pour ce message. Si l’utilisateur dépasse ce plafond personnalisé, le message sera ignoré et l’utilisateur passera à l’étape suivante.
Important : Le plafonnement de la fréquence personnalisé n’isole pas le message du Plafonnement de la fréquence global. Tous les messages envoyés sur le même canal, y compris ceux d’autres parcours ou campagnes, sont toujours comptabilisés dans le plafond global. Si l’utilisateur a déjà reçu 3 messages push cette semaine d’autres sources, ce message peut toujours être bloqué, même si le plafonnement personnalisé l’autoriserait. En savoir plus
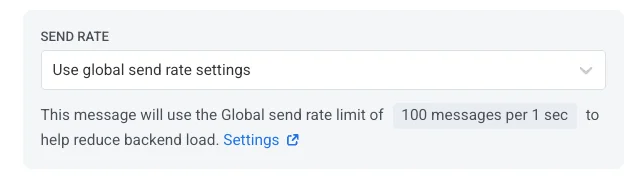
Définir les limites de vitesse d’envoi
Anchor link toLe paramètre Vitesse d’envoi contrôle la rapidité avec laquelle les messages sont livrés à votre audience. L’ajustement de la vitesse d’envoi vous aide à gérer la vitesse de livraison, à prévenir la surcharge du backend et à améliorer la délivrabilité globale.
Choisissez l’une des options suivantes :
- Utiliser les paramètres de vitesse d’envoi globaux Applique les limites de vitesse d’envoi configurées dans les paramètres de livraison de messages de votre projet. Si aucune limite n’est définie, tous les messages seront envoyés immédiatement. Utilisez cette option lorsque vous souhaitez que la vitesse de livraison suive les règles par défaut de votre projet. En savoir plus sur les limites de vitesse d’envoi globales
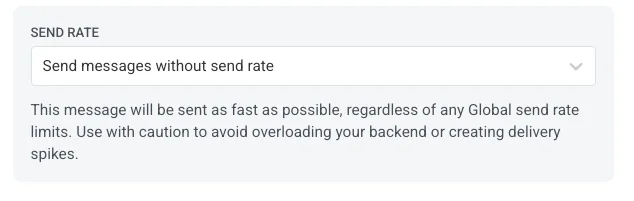
- Envoyer les messages sans vitesse d’envoi Envoie les messages aussi vite que possible, en ignorant toutes les limites de vitesse d’envoi globales. Utilisez avec prudence pour éviter de surcharger votre backend ou de créer des pics de livraison.
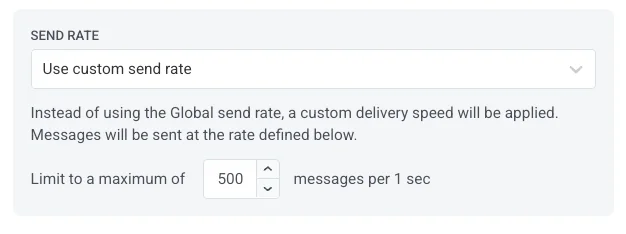
- Utiliser une vitesse d’envoi personnalisée Remplace la vitesse d’envoi globale pour ce message uniquement. Vous permet de spécifier le nombre de messages envoyés par minute, vous donnant un contrôle total sur la vitesse de livraison. Les messages seront envoyés à la vitesse personnalisée que vous définissez dans l’élément de message.
Activer le Meilleur moment pour envoyer
Anchor link toSi vous souhaitez que chaque utilisateur reçoive une notification push au moment où il est le plus susceptible d’interagir avec les pushes, activez l’option Meilleur moment pour envoyer. L’heure d’envoi du message à chaque utilisateur sera calculée en fonction de son comportement et des performances des messages envoyés précédemment.
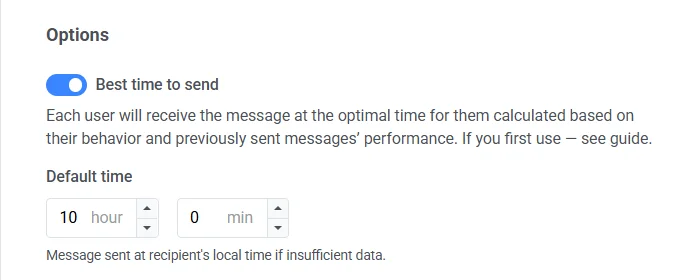
La précision du calcul du meilleur moment pour chaque utilisateur dépend du nombre de pushes que vous avez envoyés à cet utilisateur auparavant.
S’il n’y a pas assez de données sur l’utilisateur, il recevra un push à l’Heure par défaut que vous spécifiez en fonction de son fuseau horaire.
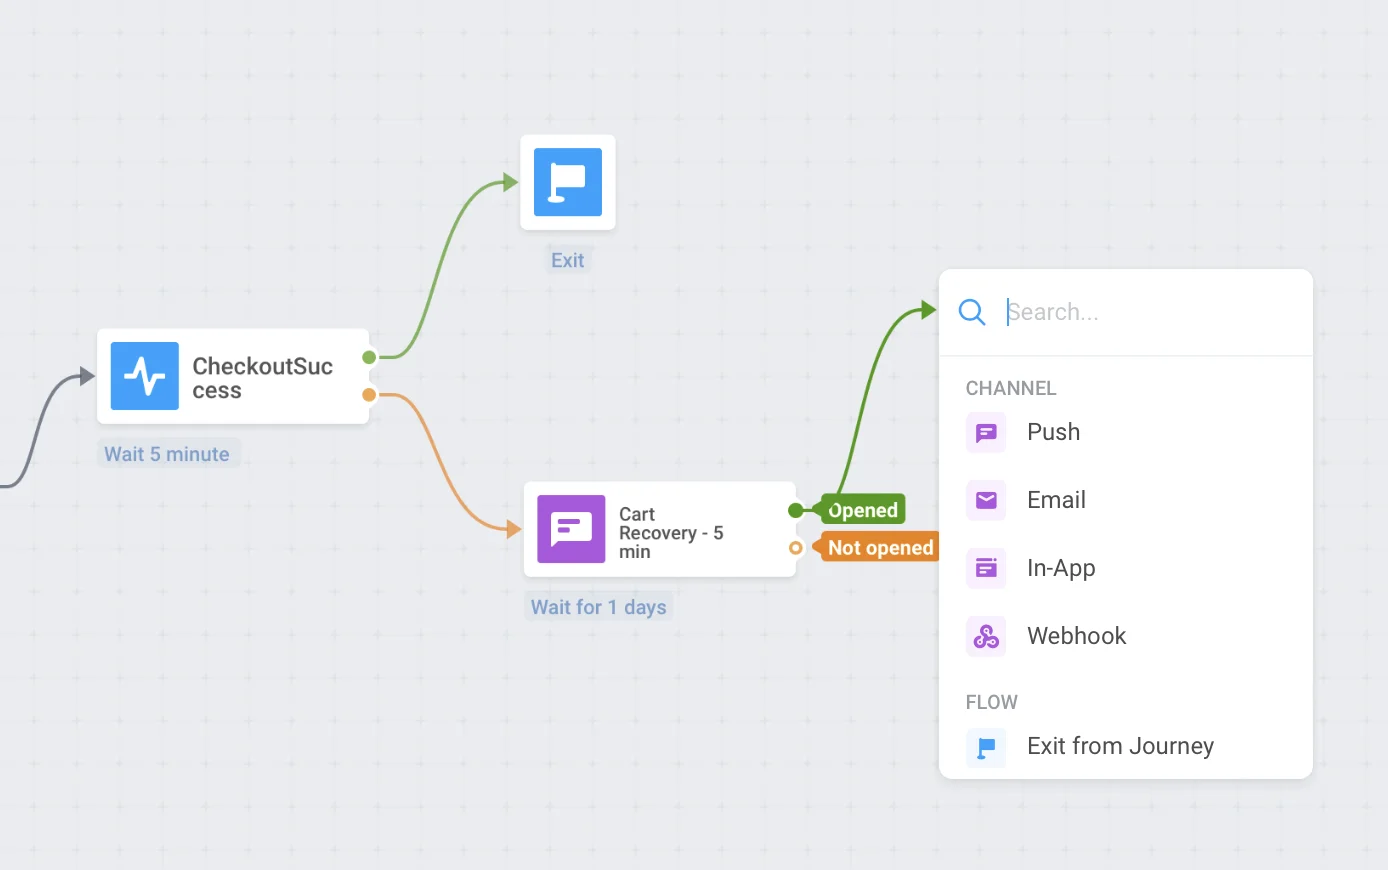
Diviser le flux par ouvertures ou ignorances
Anchor link toDivisez le reste du flux du parcours en fonction de si ce push est ouvert ou ignoré. Par exemple, envoyez un e-mail aux utilisateurs qui n’ouvrent pas les pushes ou envoyez un autre push à ceux qui l’ont fait.
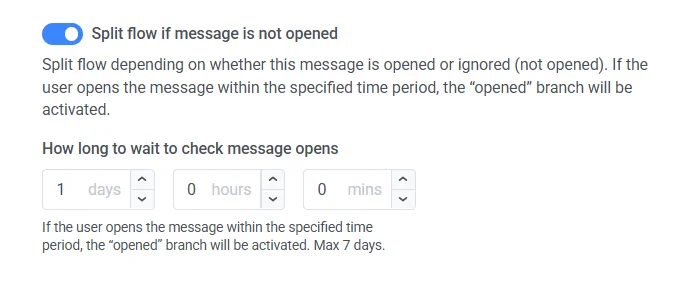
Cochez la case et définissez la période d’attente après l’envoi du push – après cette période, tous les utilisateurs qui ouvrent le push iront à la branche Ouvert du parcours, et les autres passeront par la branche Non ouvert.
La période d’attente peut être définie jusqu’à 7 jours.
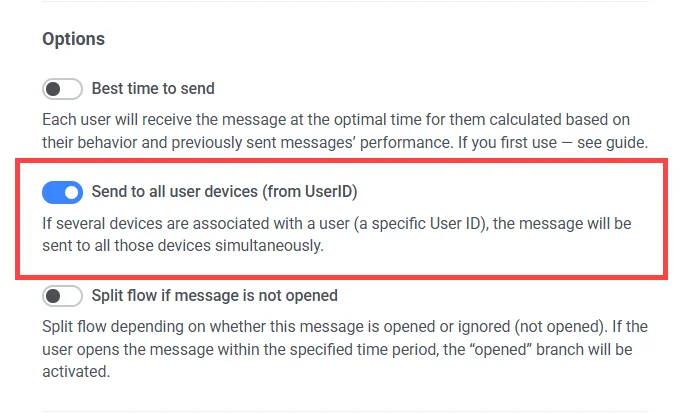
Envoyer par ID utilisateur
Anchor link toLorsque cette option est activée, le message sera envoyé à tous les appareils associés à l’ID d’un utilisateur qui atteint cet élément du parcours. Ainsi, si un utilisateur a plusieurs appareils, tous associés à un seul userID, cet utilisateur recevra plusieurs messages, un par appareil.
Lorsque tout est configuré, appuyez sur Appliquer.