# Notifications push iOS avec carrousel d'images
Le protocole `UNNotificationContentExtension` fournit le point d'entrée pour une extension de contenu de notification, qui affiche une interface personnalisée pour les notifications de votre application.
## 1. Ajouter une extension de contenu de notification
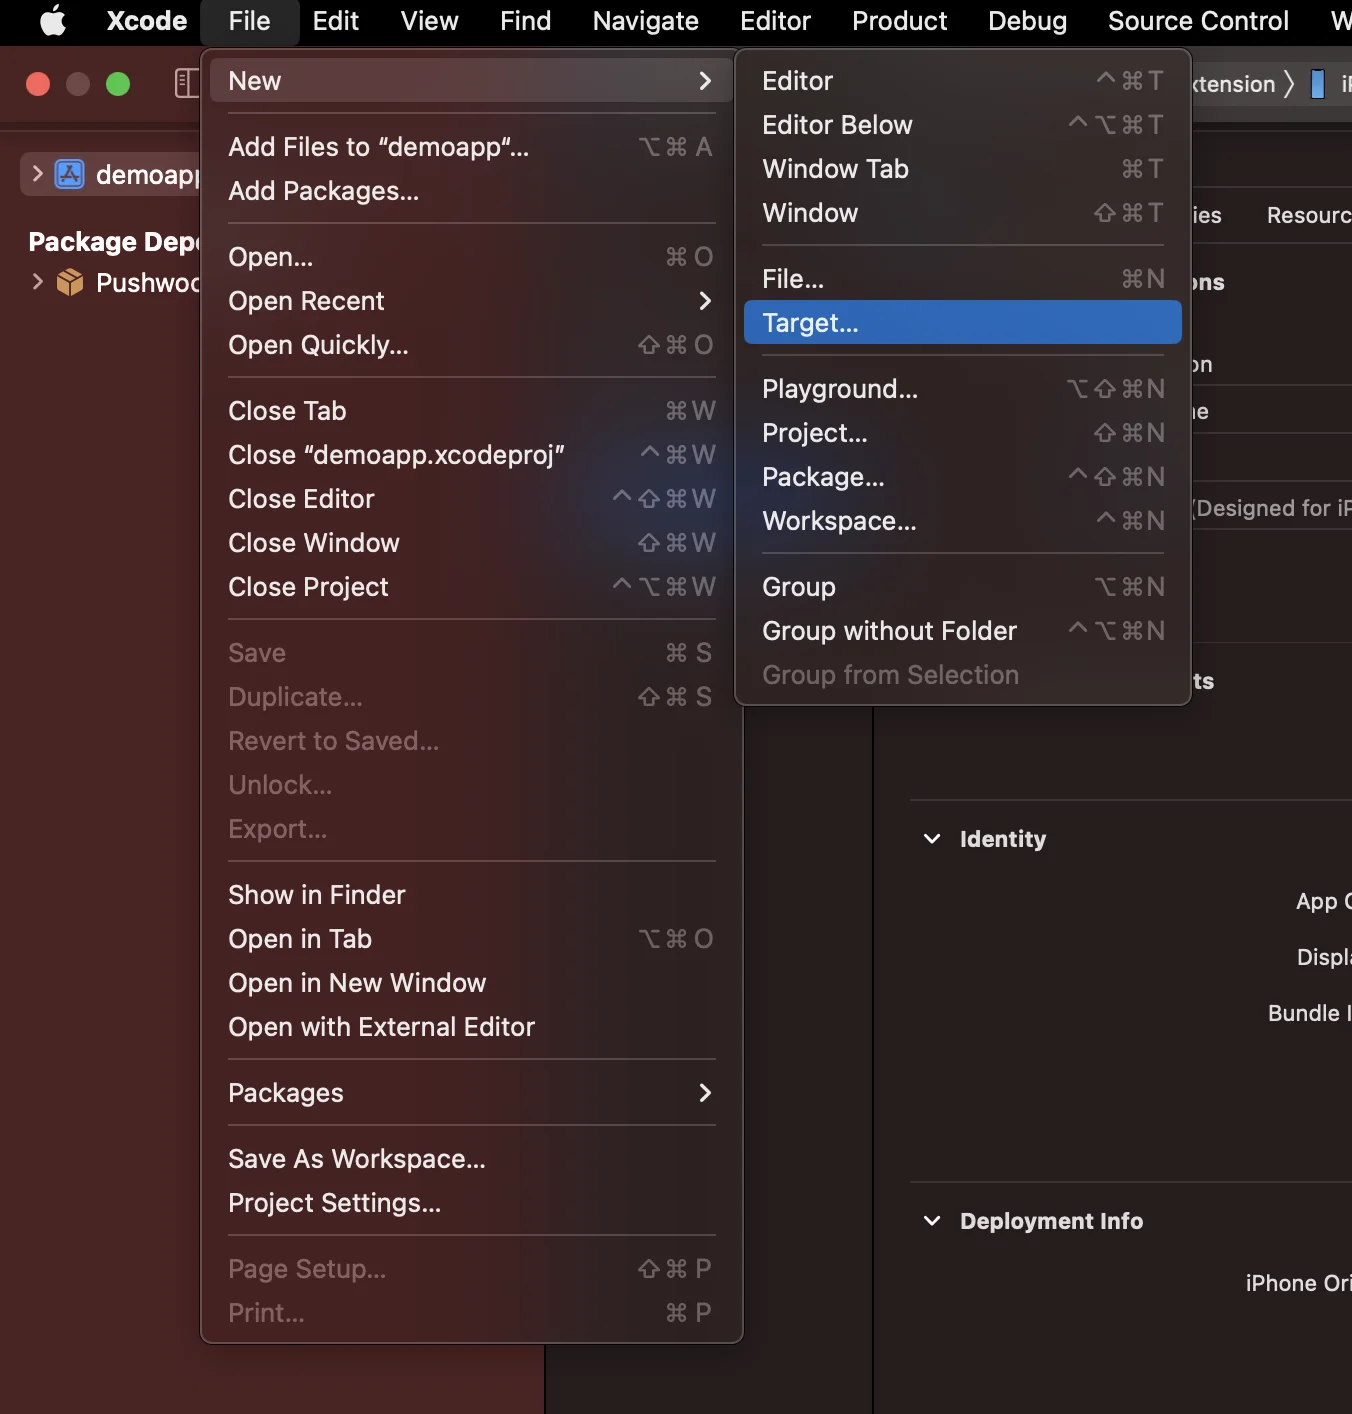
Dans Xcode, sélectionnez File > New > Target...
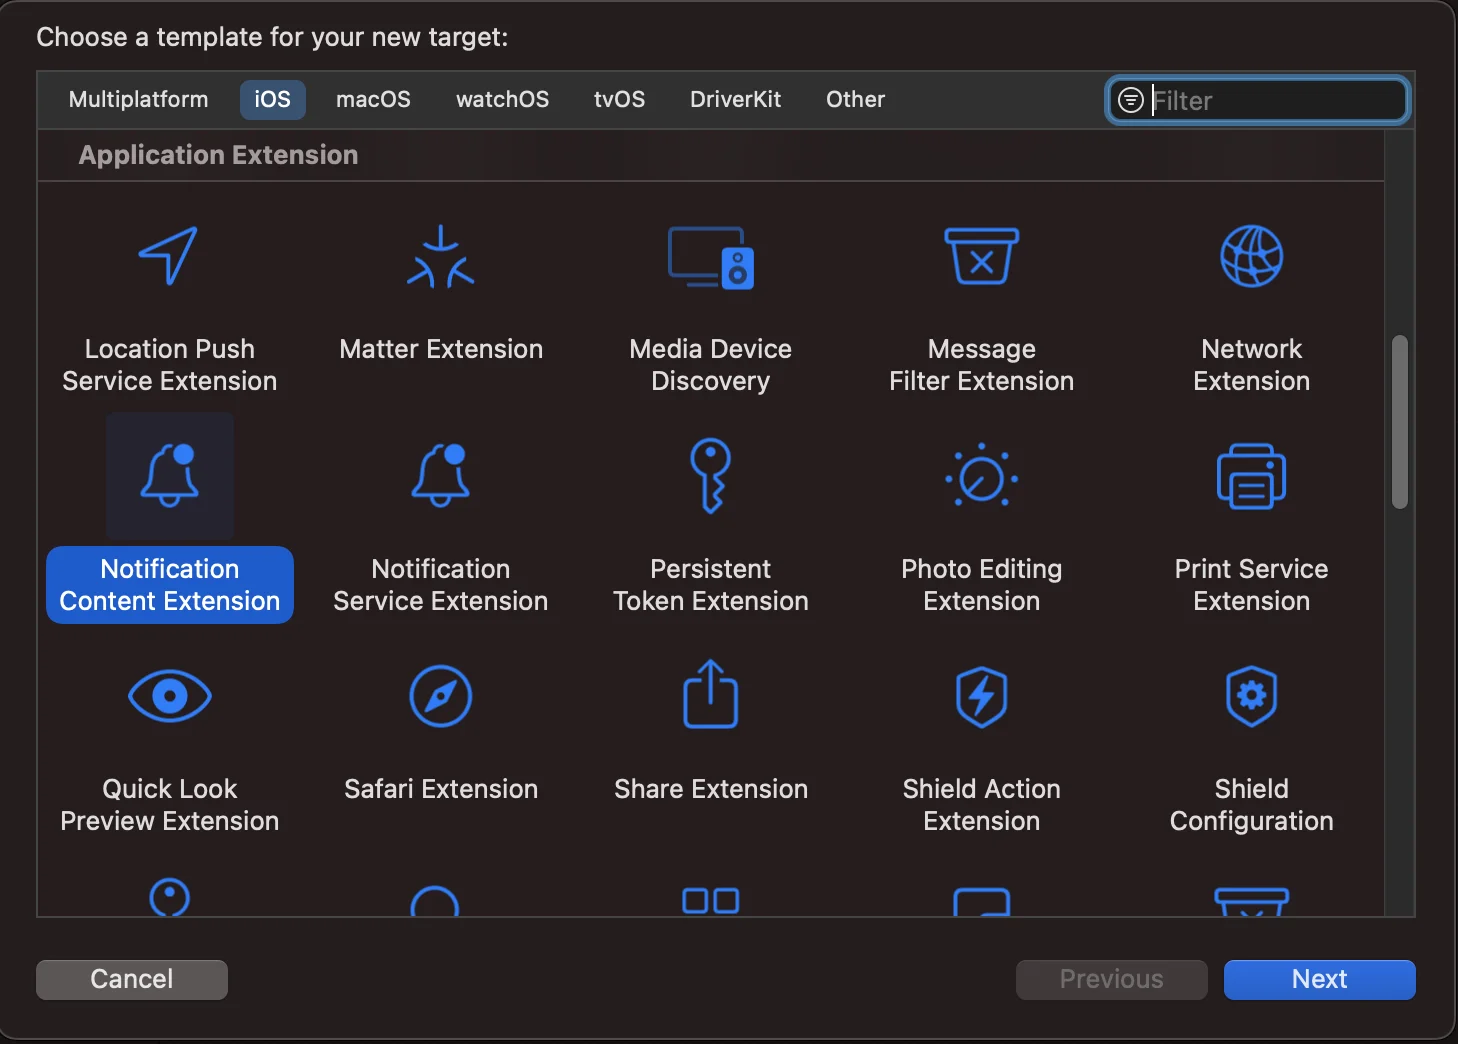
 Choisissez l'extension de contenu de notification (Notification Content Extension)
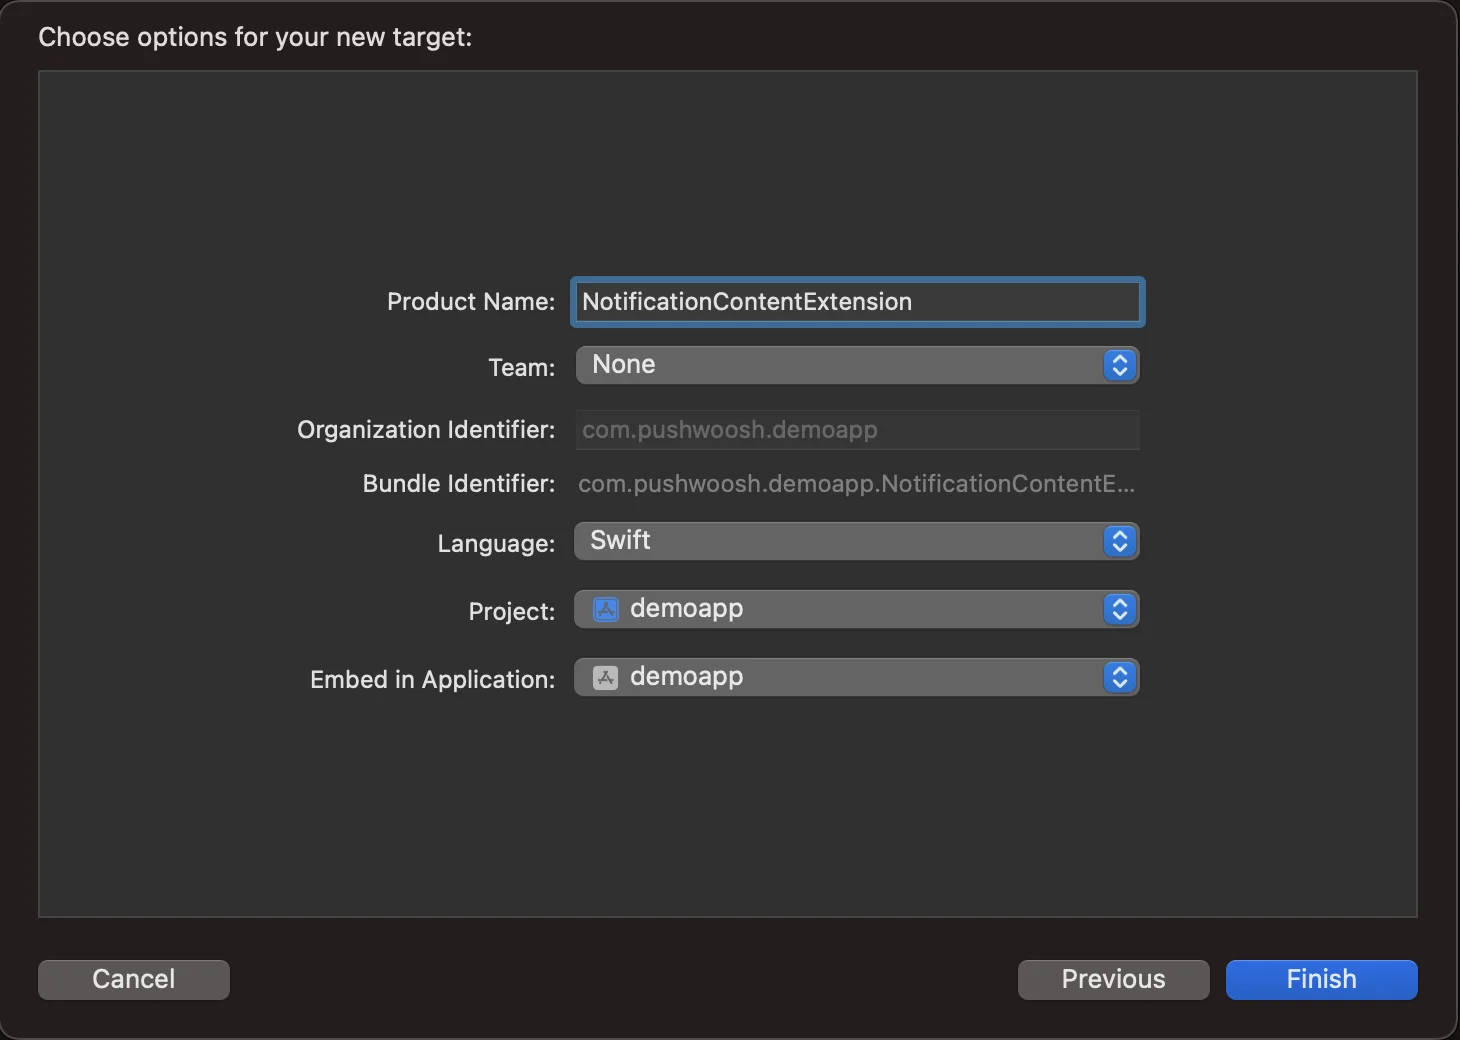
 Nommez-la **NotificationContentExtension**
 ## 2. Ajouter du code à votre application
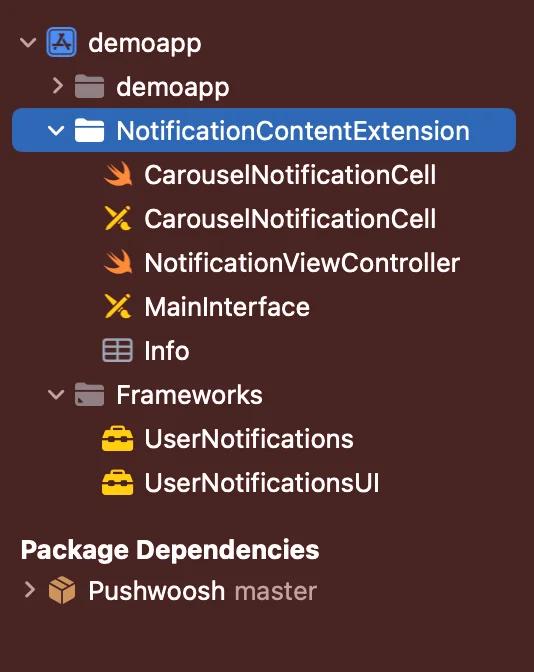
[Téléchargez PWNotificationExtension depuis Github](https://github.com/Pushwoosh/PWNotificationContentExtension) et remplacez le fichier **`PWNotificationContentExtension`** dans votre projet Xcode par le même fichier de Github.
## 2. Ajouter du code à votre application
[Téléchargez PWNotificationExtension depuis Github](https://github.com/Pushwoosh/PWNotificationContentExtension) et remplacez le fichier **`PWNotificationContentExtension`** dans votre projet Xcode par le même fichier de Github.
 ## 3. Catégorie de notification
Ajoutez le code ci-dessous à votre fichier **AppDelegate.swift**
```swift
func application(_ application: UIApplication, didFinishLaunchingWithOptions launchOptions: [UIApplication.LaunchOptionsKey: Any]?) -> Bool {
if #available(iOS 10.0, *) {
let options: UNAuthorizationOptions = [.alert]
UNUserNotificationCenter.current().requestAuthorization(options: options) { (authorized, error) in
if authorized {
let categoryIdentifier = "PWNotificationCarousel"
let carouselNext = UNNotificationAction(identifier: "PWNotificationCarousel.next", title: "➡️ RIGHT", options: [])
let carouselPrevious = UNNotificationAction(identifier: "PWNotificationCarousel.previous", title: "⬅️ LEFT", options: [])
let carouselCategory = UNNotificationCategory(identifier: categoryIdentifier, actions: [carouselNext, carouselPrevious], intentIdentifiers: [], options: [])
UNUserNotificationCenter.current().setNotificationCategories([carouselCategory])
}
}
}
return true
}
```
## 4. Envoyer une notification push
**Catégorie iOS :**
Envoyez une notification push avec le JSON APS :
## 3. Catégorie de notification
Ajoutez le code ci-dessous à votre fichier **AppDelegate.swift**
```swift
func application(_ application: UIApplication, didFinishLaunchingWithOptions launchOptions: [UIApplication.LaunchOptionsKey: Any]?) -> Bool {
if #available(iOS 10.0, *) {
let options: UNAuthorizationOptions = [.alert]
UNUserNotificationCenter.current().requestAuthorization(options: options) { (authorized, error) in
if authorized {
let categoryIdentifier = "PWNotificationCarousel"
let carouselNext = UNNotificationAction(identifier: "PWNotificationCarousel.next", title: "➡️ RIGHT", options: [])
let carouselPrevious = UNNotificationAction(identifier: "PWNotificationCarousel.previous", title: "⬅️ LEFT", options: [])
let carouselCategory = UNNotificationCategory(identifier: categoryIdentifier, actions: [carouselNext, carouselPrevious], intentIdentifiers: [], options: [])
UNUserNotificationCenter.current().setNotificationCategories([carouselCategory])
}
}
}
return true
}
```
## 4. Envoyer une notification push
**Catégorie iOS :**
Envoyez une notification push avec le JSON APS :
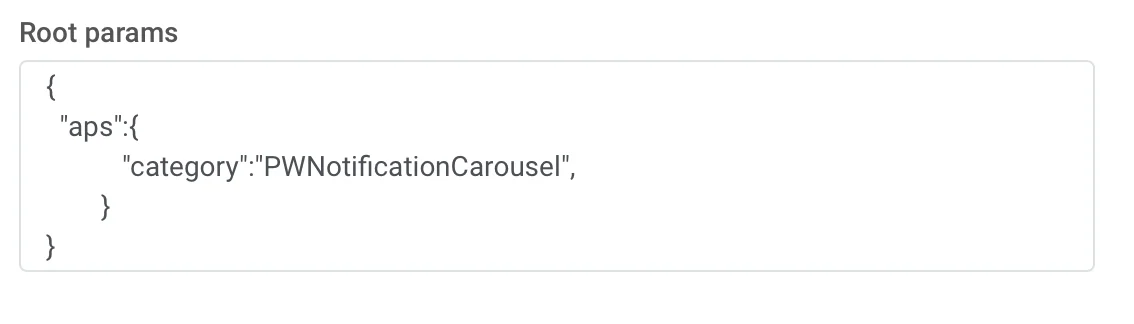 ```json
{
"aps":{
"category":"PWNotificationCarousel"
}
}
```
**Données personnalisées**
Vous devez lister les URL des images séparées par une virgule `,`
```json
{
"aps":{
"category":"PWNotificationCarousel"
}
}
```
**Données personnalisées**
Vous devez lister les URL des images séparées par une virgule `,`
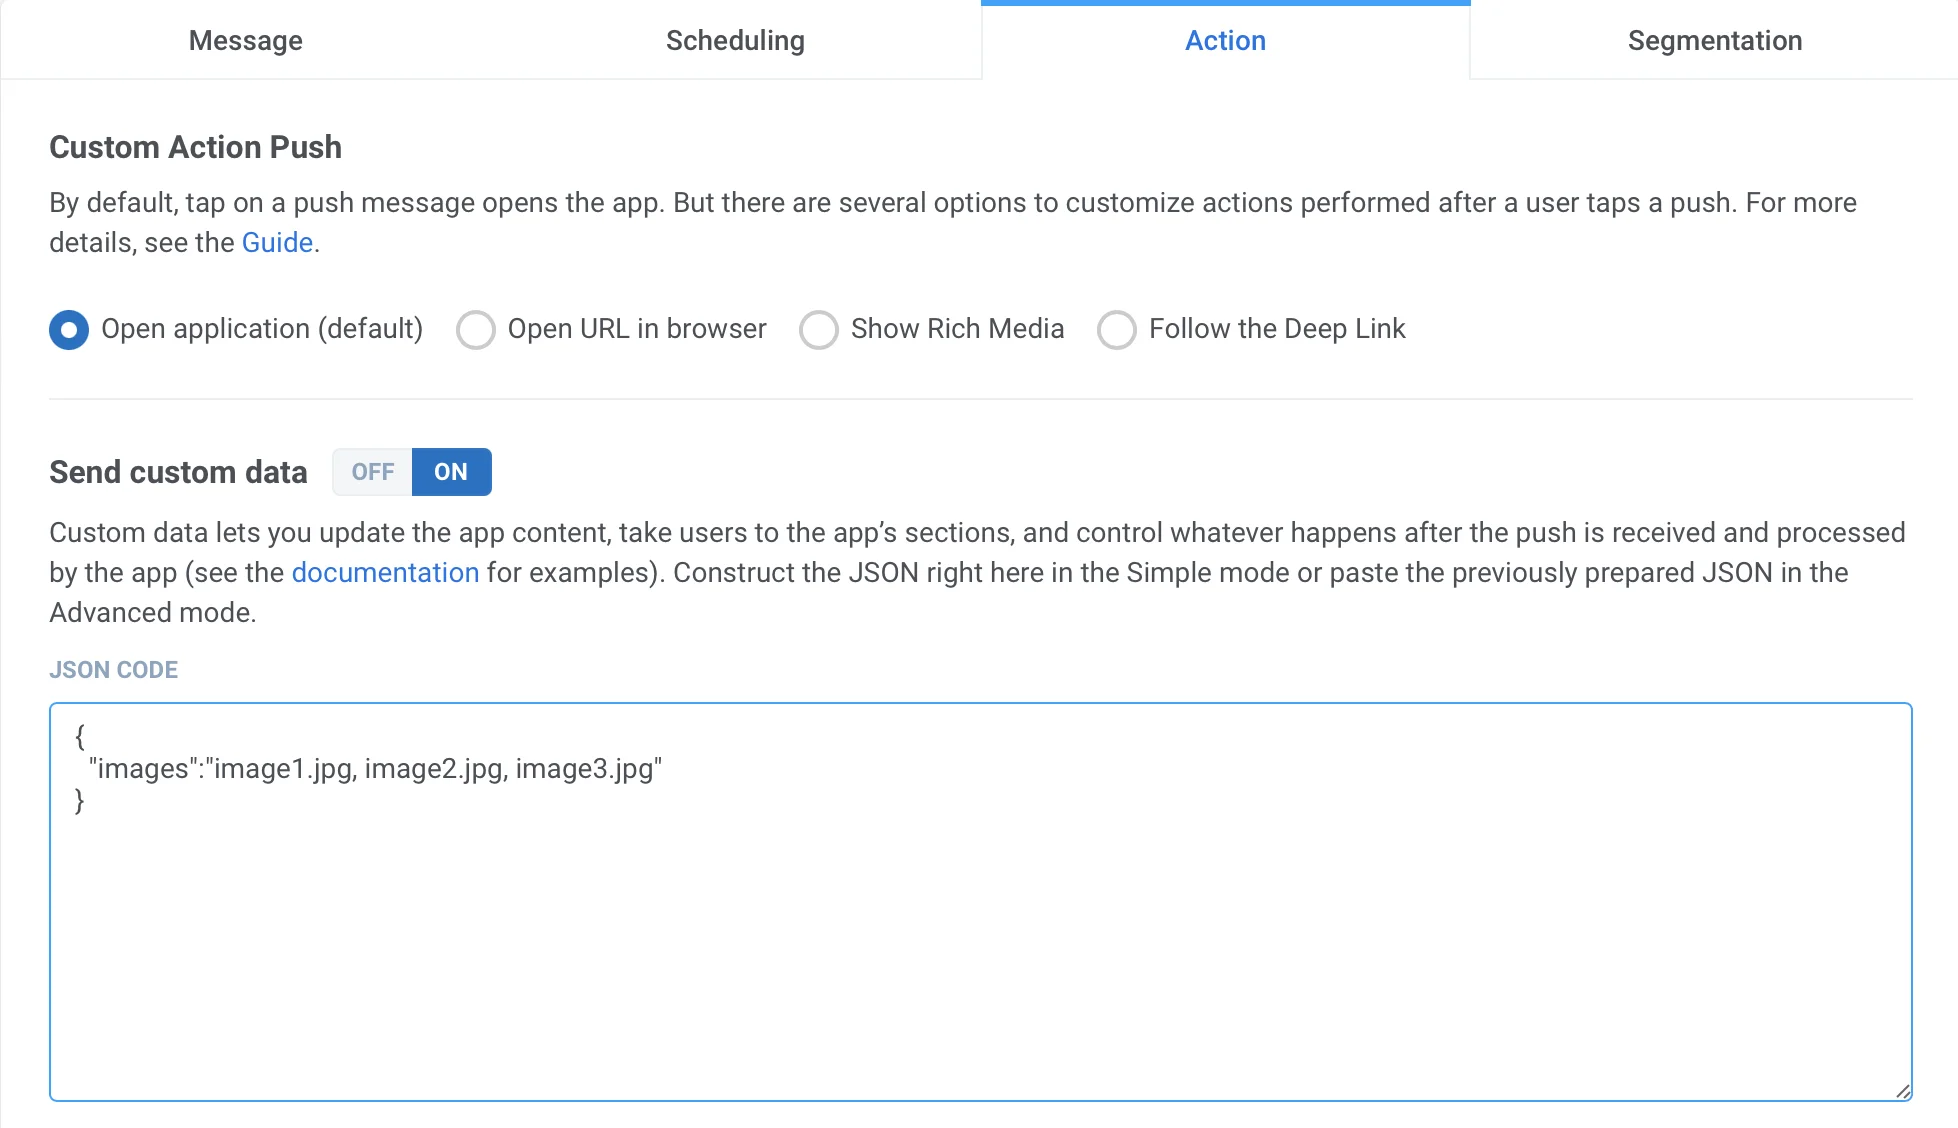 ```json
{
"images":"image1.jpg, image2.jpg, image3.jpg"
}
```
Une fois que vous recevez la notification push, vous devrez faire un appui long ou balayer vers la gauche et appuyer sur « Afficher » pour développer la notification, selon la version d'iOS.
```json
{
"images":"image1.jpg, image2.jpg, image3.jpg"
}
```
Une fois que vous recevez la notification push, vous devrez faire un appui long ou balayer vers la gauche et appuyer sur « Afficher » pour développer la notification, selon la version d'iOS.