# Web push via Google Tag Manager
Implement push notifications in four steps without any coding!\
Pushwoosh WebSDK Lite can be added to your website through Google Tag Manager, making the integration process as easy as possible.
## Integration
### Firebase Credentials
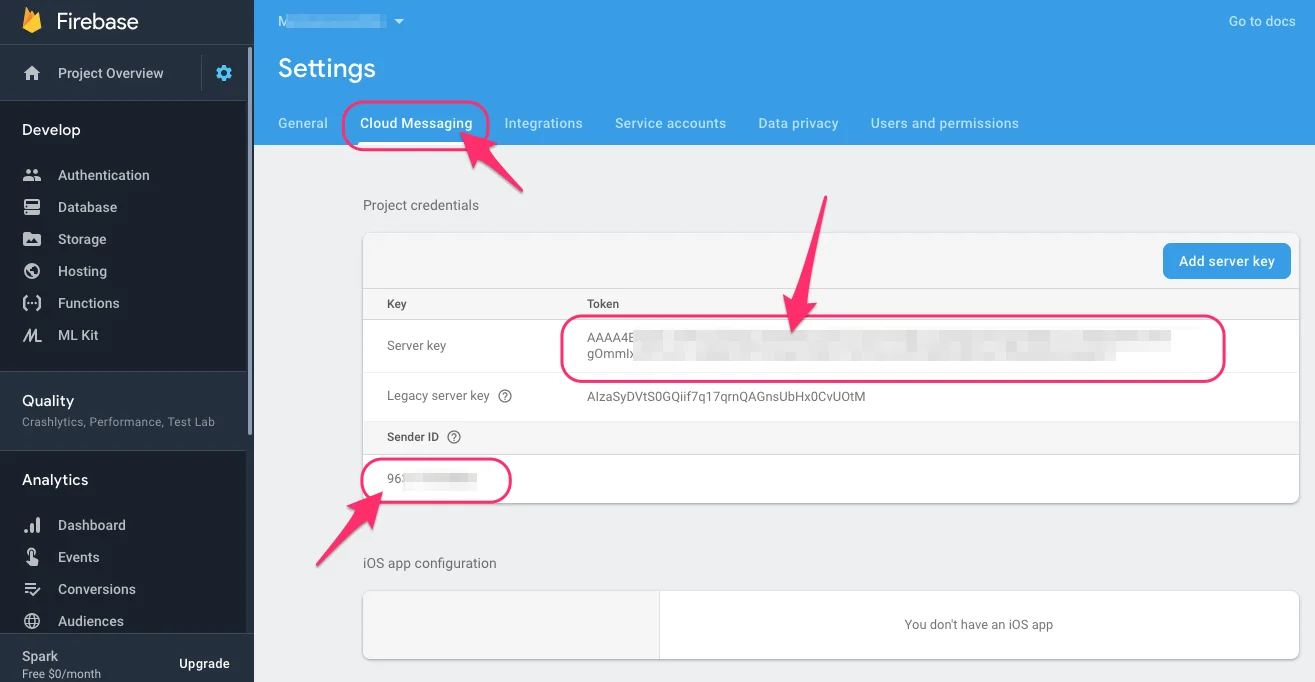
In the [Firebase Console](https://console.firebase.google.com/project/\_/settings/cloudmessaging/), choose your project to obtain your Firebase **Server Key** and **Sender ID**. Please see the screenshot below for reference:
### Pushwoosh Control Panel
Go to Pushwoosh [**Control Panel**](https://go.pushwoosh.com/v2/applications) and add a new app. On the opened page, configure Chrome or Firefox platform by clicking the **Configure** button in the respective row. Fill in the form:
* The **Server Key** from Firebase Console into the **API key** field;
* The **Sender ID** from Firebase Console into the **FCM Sender ID** field;
* The exact address of your website into **Website Name** field.
Make sure to copy the Application Code of the newly created app, you'll need it later. The app code is highlighted below:
### Google Tag Manager
**1.** In Google Tag Manager, choose a container or create a new one.
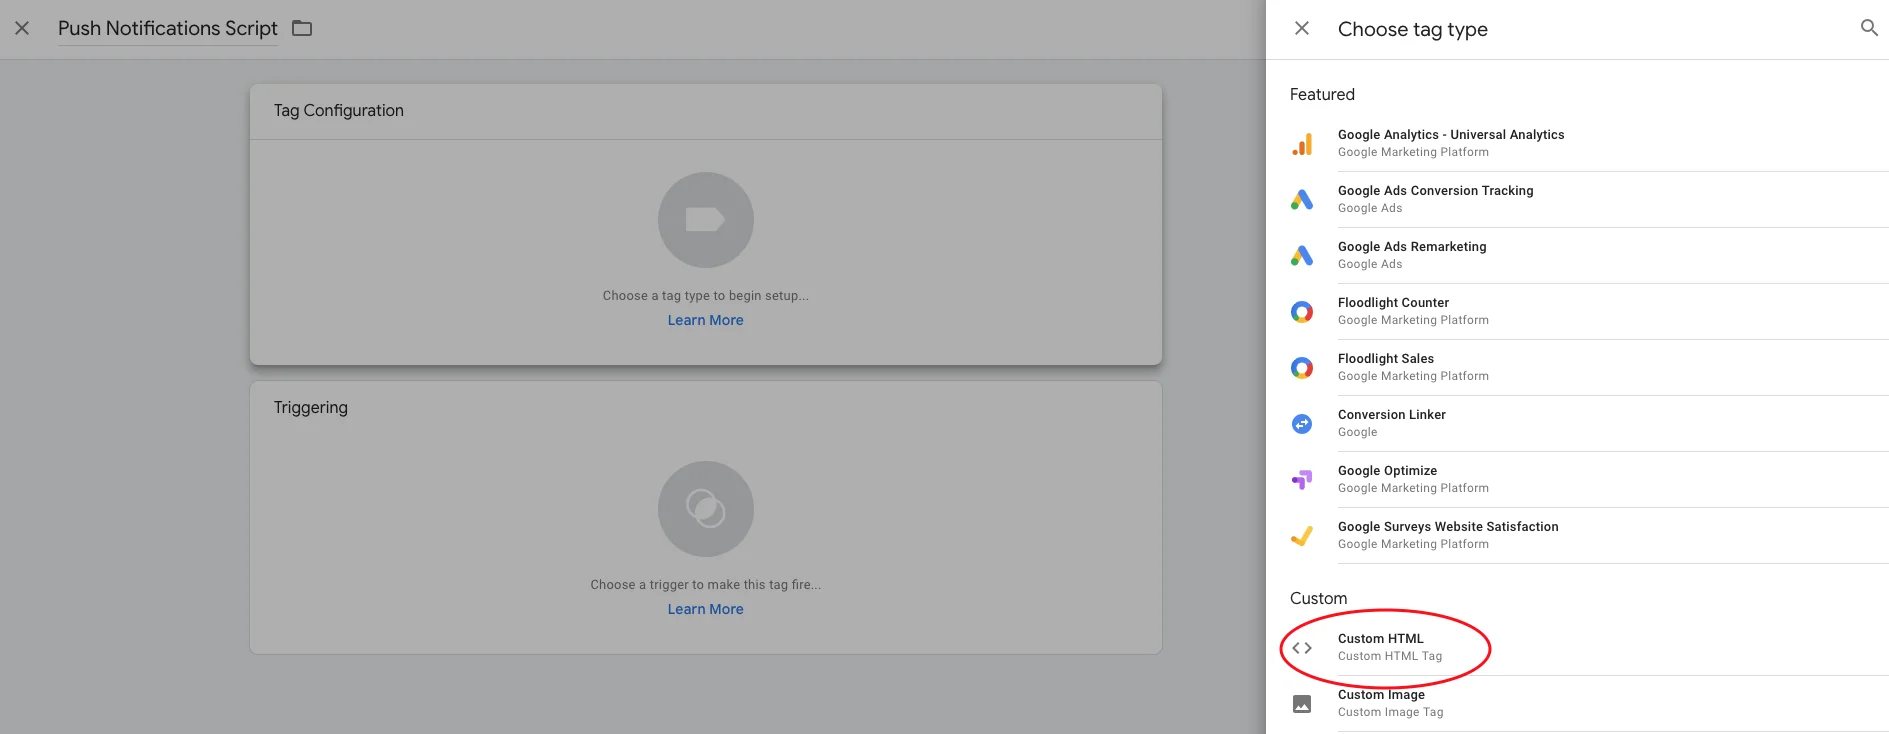
**2.** Create a new Tag and choose **Custom HTML** in Tag Configuration.
**3.** Copy the script below and paste it into the HTML field;
```txt
```
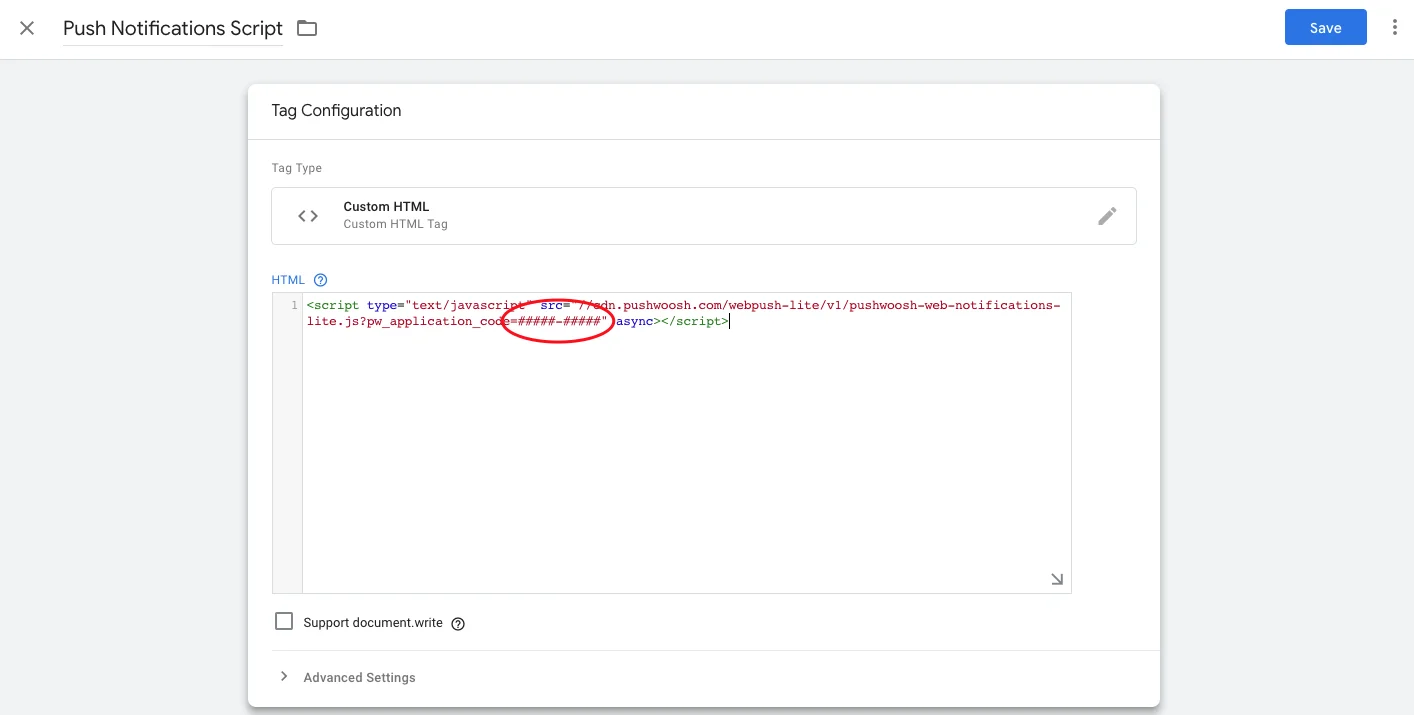
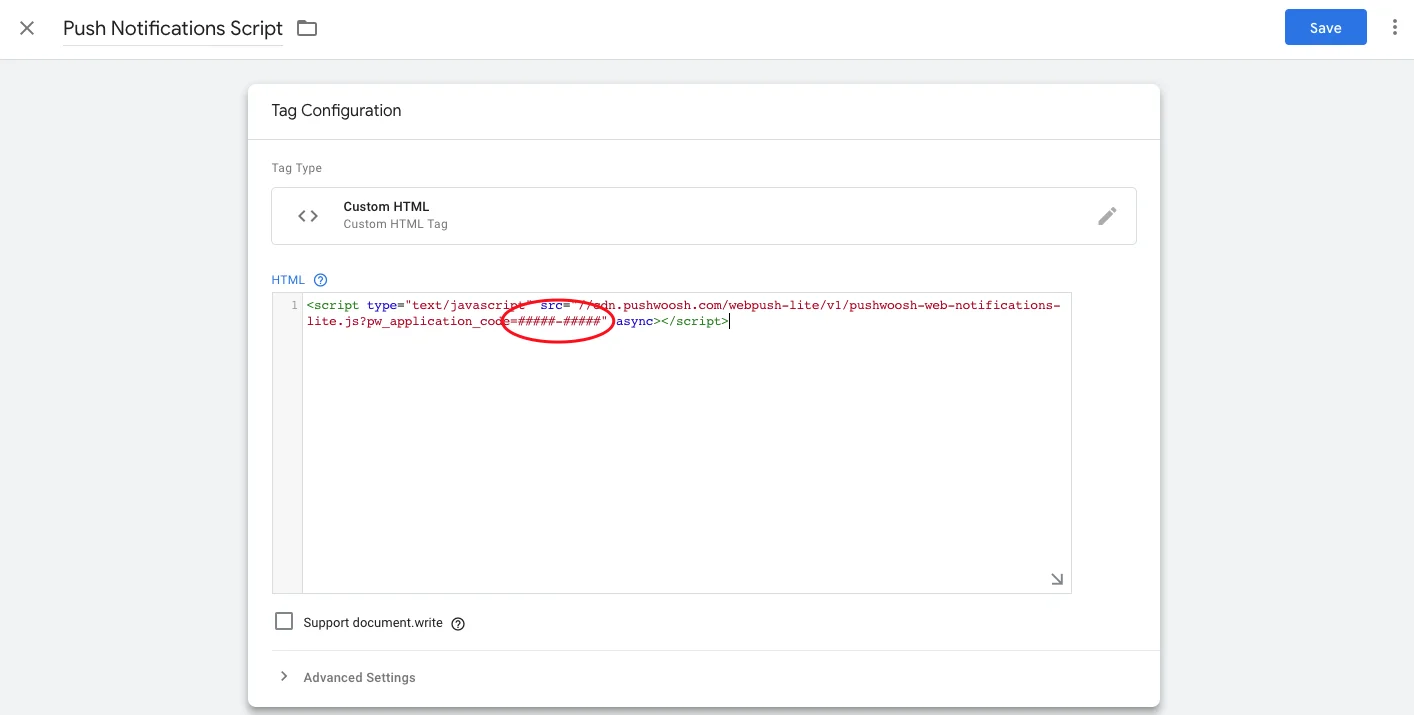
**4.** Change number signs `#####-#####` (highlighted on the picture below) in the script to your Pushwoosh Application Code, which you acquired in Step 2.
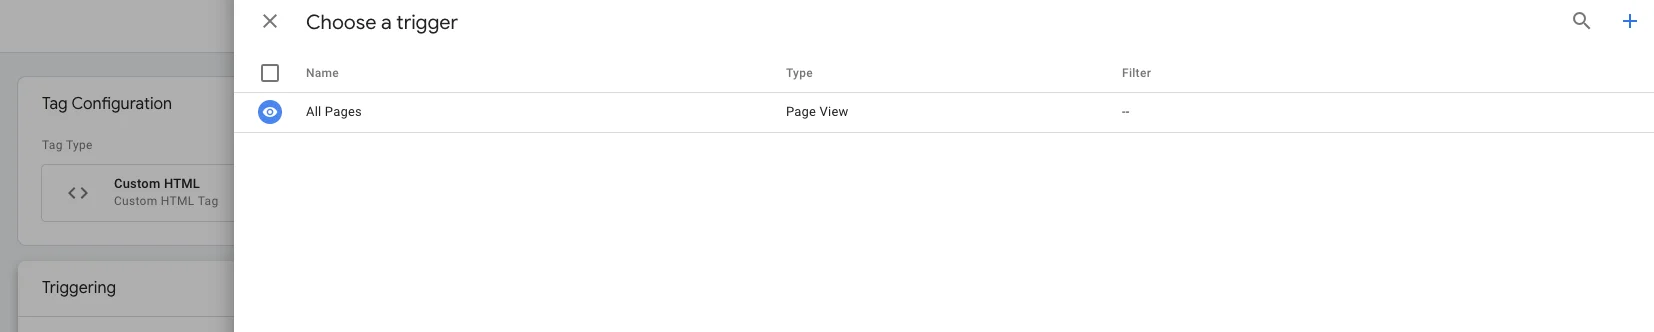
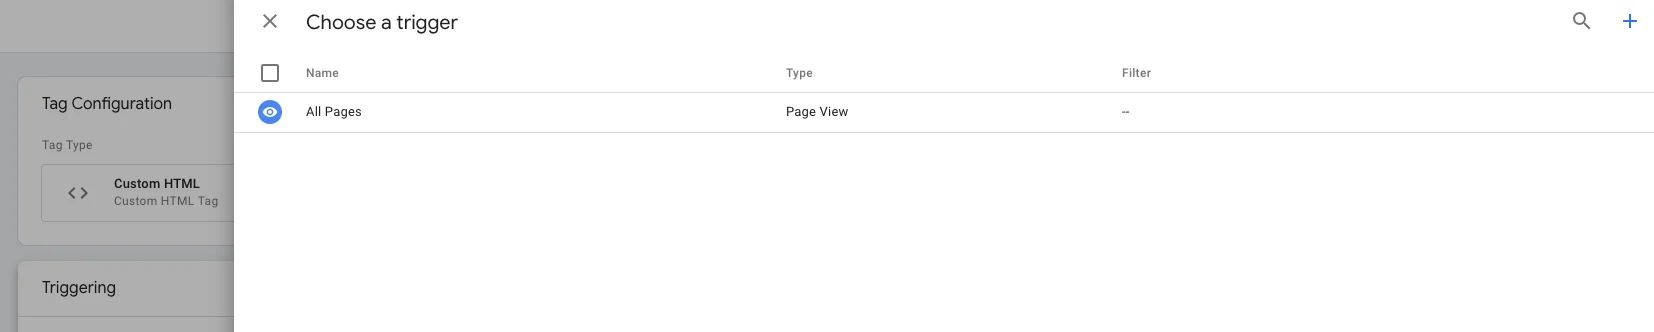
**5.** Scroll down to Triggering options and choose **All Pages**.
**6.** Click "Save". Your Tag is ready!
### Push subscription button
Let users subscribe for push notifications with a push subscription button. To set up the button, simply add the following script via Google Tag Manager.
```txt
```
All done! Your website's visitors can now subscribe for and receive push messages.
 ### Pushwoosh Control Panel
Go to Pushwoosh [**Control Panel**](https://go.pushwoosh.com/v2/applications) and add a new app. On the opened page, configure Chrome or Firefox platform by clicking the **Configure** button in the respective row. Fill in the form:
* The **Server Key** from Firebase Console into the **API key** field;
* The **Sender ID** from Firebase Console into the **FCM Sender ID** field;
* The exact address of your website into **Website Name** field.
### Pushwoosh Control Panel
Go to Pushwoosh [**Control Panel**](https://go.pushwoosh.com/v2/applications) and add a new app. On the opened page, configure Chrome or Firefox platform by clicking the **Configure** button in the respective row. Fill in the form:
* The **Server Key** from Firebase Console into the **API key** field;
* The **Sender ID** from Firebase Console into the **FCM Sender ID** field;
* The exact address of your website into **Website Name** field.
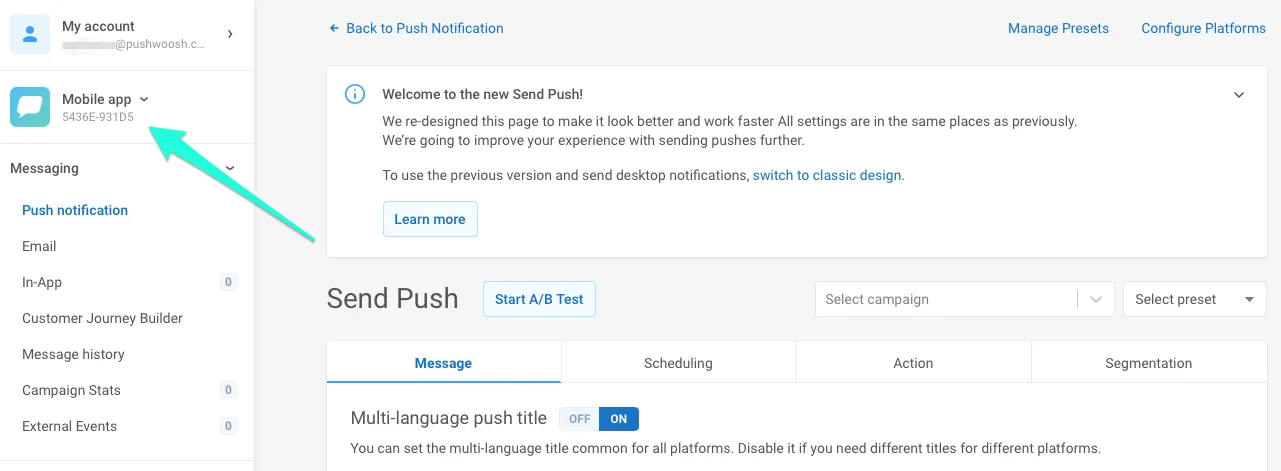 Make sure to copy the Application Code of the newly created app, you'll need it later. The app code is highlighted below:
 ### Google Tag Manager
**1.** In Google Tag Manager, choose a container or create a new one.
### Google Tag Manager
**1.** In Google Tag Manager, choose a container or create a new one.
 **2.** Create a new Tag and choose **Custom HTML** in Tag Configuration.
 **3.** Copy the script below and paste it into the HTML field;
```txt
```
**4.** Change number signs `#####-#####` (highlighted on the picture below) in the script to your Pushwoosh Application Code, which you acquired in Step 2.
**3.** Copy the script below and paste it into the HTML field;
```txt
```
**4.** Change number signs `#####-#####` (highlighted on the picture below) in the script to your Pushwoosh Application Code, which you acquired in Step 2.
 **5.** Scroll down to Triggering options and choose **All Pages**.
 **6.** Click "Save". Your Tag is ready!
### Push subscription button
Let users subscribe for push notifications with a push subscription button. To set up the button, simply add the following script via Google Tag Manager.
```txt
**6.** Click "Save". Your Tag is ready!
### Push subscription button
Let users subscribe for push notifications with a push subscription button. To set up the button, simply add the following script via Google Tag Manager.
```txt