# Setting up badges
Starting with version 6.4.0 of Pushwoosh iOS SDK, the process of managing and setting badges through push notifications has changed.
If you were previously using the badges number to indicate the number of received push notifications in your application, you have to migrate to newer version of iOS SDK (6.4.0 or later). The older versions will be supported until the end of the second quarter of 2022.
## How to set up badges
To set up badges, follow the steps below:
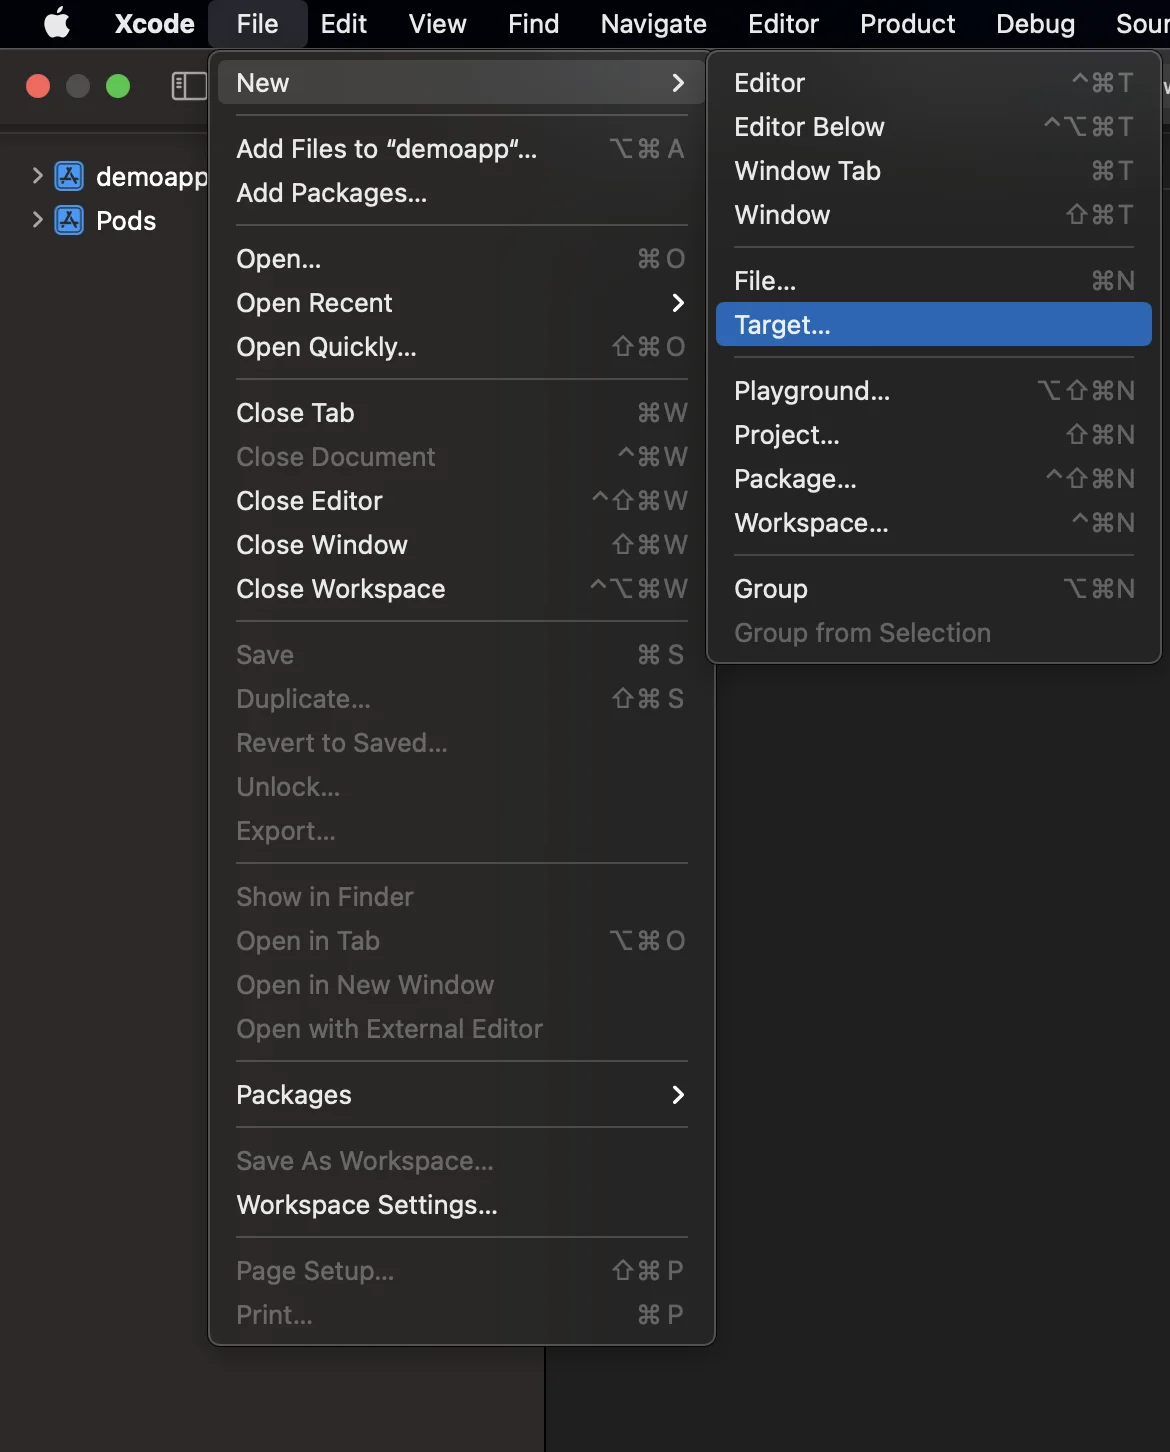
1. Add Notification Service Extension (File -> New -> Target...)
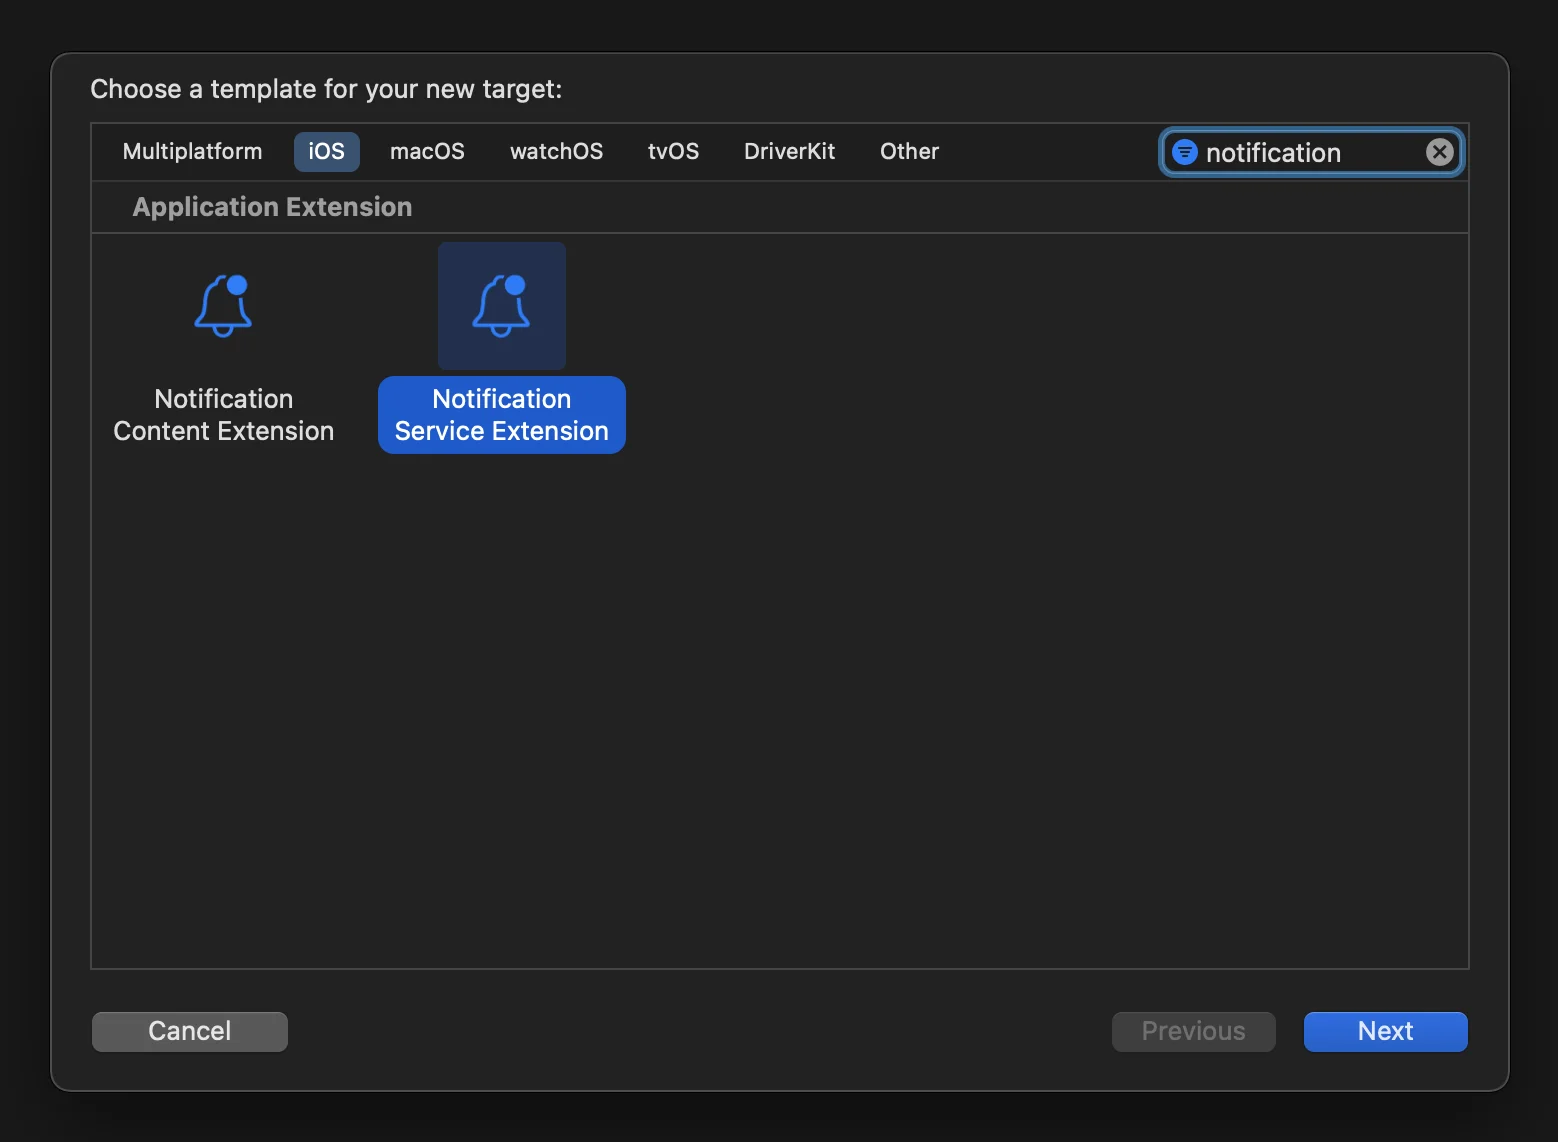
2. Select the "Notification Service Extension"
3. Replace the generated `NotificationService` class with a subclass of `PushwooshNotificationServiceExtension`. Pushwoosh handles the badge counting, delivery event, attachment download, and the timeout fallback for you:
```swift
import PushwooshFramework
class NotificationService: PushwooshNotificationServiceExtension {}
```
```objective-c
#import
@interface NotificationService : PushwooshNotificationServiceExtension
@end
@implementation NotificationService
@end
```
4. Add the App Groups capability to **both** targets — the main app and the Notification Service Extension — and use the same App Group for each.
5. Add the App Group ID to the **main app's** `info.plist`:
```
PW_APP_GROUPS_NAMEgroup.com.example.demoapp_example
```
The extension inherits this value from the host app, so you don't need to repeat it in the extension's `info.plist` — add it there only to override the host value.
If you prefer not to use the **info.plist** file, provide the App Group in code by overriding `pushwooshAppGroupsName` in your NotificationServiceExtension class:
```swift
override func pushwooshAppGroupsName() -> String? {
"group.com.example.demoapp_example"
}
```
```objective-c
- (NSString *)pushwooshAppGroupsName {
return @"group.com.example.demoapp_example";
}
```
## Send a push notification with badges
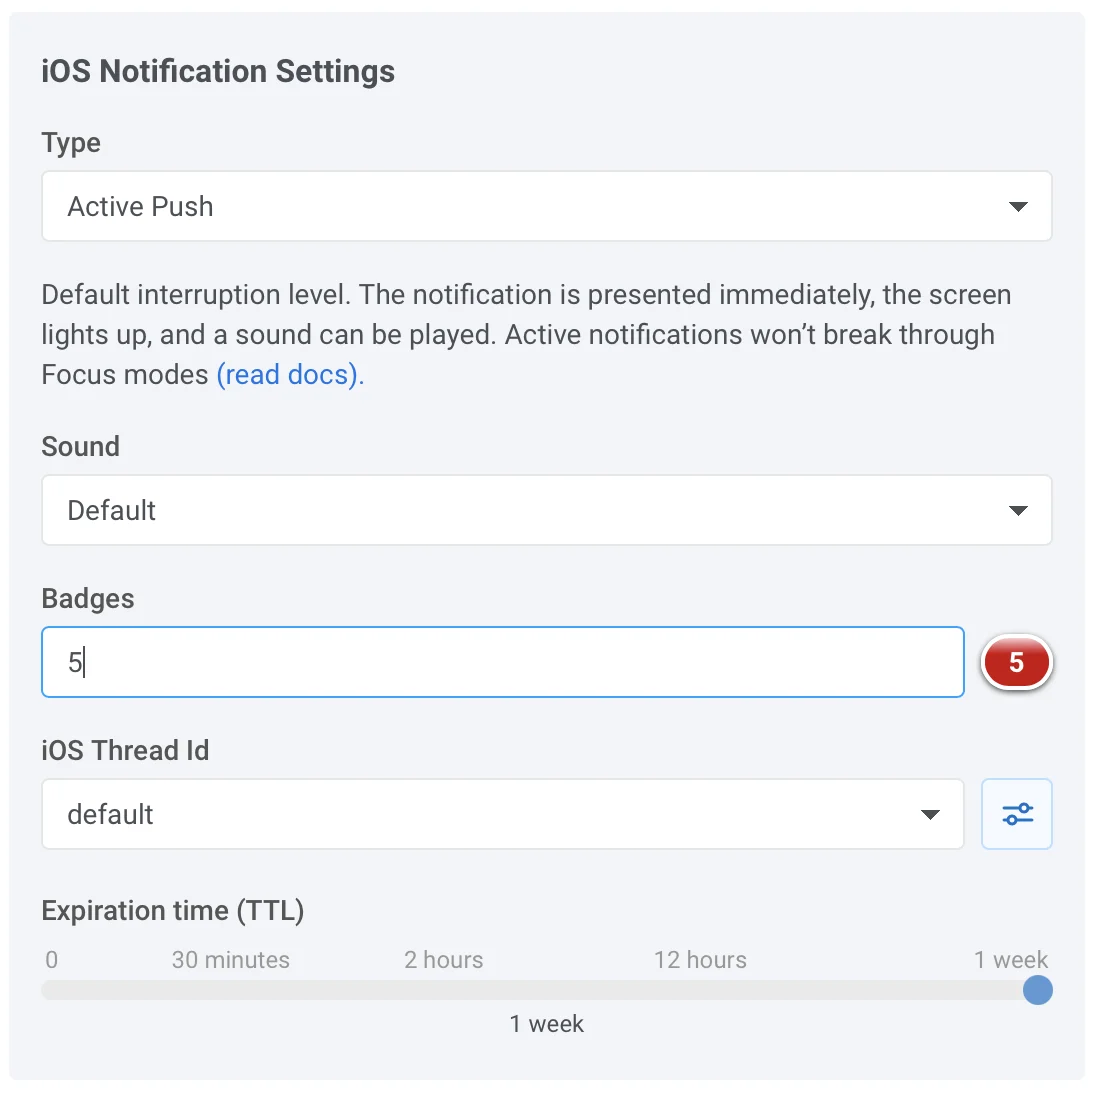
If you want to send push notification with badges from Pushwoosh Control Panel, just add a desired badge value to the **badges** text field as shown in the picture below:
## Share your feedback with us
Your feedback helps us create a better experience, so we would love to hear from you if you have any issues during the SDK integration process. If you face any difficulties, please do not hesitate to share your thoughts with us [via this form](https://docs.google.com/forms/d/e/1FAIpQLSd\_0b8jwn-V\_JmoPLIxIFYbHACCQhrzidOZV3ELywoQPXRSxw/viewform).
 2. Select the "Notification Service Extension"
 3. Replace the generated `NotificationService` class with a subclass of `PushwooshNotificationServiceExtension`. Pushwoosh handles the badge counting, delivery event, attachment download, and the timeout fallback for you:
 The extension inherits this value from the host app, so you don't need to repeat it in the extension's `info.plist` — add it there only to override the host value.
If you prefer not to use the **info.plist** file, provide the App Group in code by overriding `pushwooshAppGroupsName` in your NotificationServiceExtension class:
The extension inherits this value from the host app, so you don't need to repeat it in the extension's `info.plist` — add it there only to override the host value.
If you prefer not to use the **info.plist** file, provide the App Group in code by overriding `pushwooshAppGroupsName` in your NotificationServiceExtension class:
 ## Share your feedback with us
Your feedback helps us create a better experience, so we would love to hear from you if you have any issues during the SDK integration process. If you face any difficulties, please do not hesitate to share your thoughts with us [via this form](https://docs.google.com/forms/d/e/1FAIpQLSd\_0b8jwn-V\_JmoPLIxIFYbHACCQhrzidOZV3ELywoQPXRSxw/viewform).
## Share your feedback with us
Your feedback helps us create a better experience, so we would love to hear from you if you have any issues during the SDK integration process. If you face any difficulties, please do not hesitate to share your thoughts with us [via this form](https://docs.google.com/forms/d/e/1FAIpQLSd\_0b8jwn-V\_JmoPLIxIFYbHACCQhrzidOZV3ELywoQPXRSxw/viewform).