# iOS Live Activities
[Live Activities](https://developer.apple.com/design/human-interface-guidelines/live-activities) display your app’s most current data on the iPhone or iPad Lock Screen and in the Dynamic Island. This feature allows users to see live information at a glance and perform quick actions related to the displayed information.
Here are a few examples of using Live Activities:
* Show order status in a delivery app;
* Provide a real-time countdown in a training app;
* Show tracking information in a taxi app;
* Display game stats and current scores in a sports app;
* Provide hourly forecasts in a weather app.
You can enable Live Activities using the Pushwoosh iOS SDK as described below. To manage Live Activities and update their content, use the [/updateLiveActivity](/developer/api-reference/ios-live-activities-api#updateliveactivity) method.
## Setup
### Add a Widget Extension
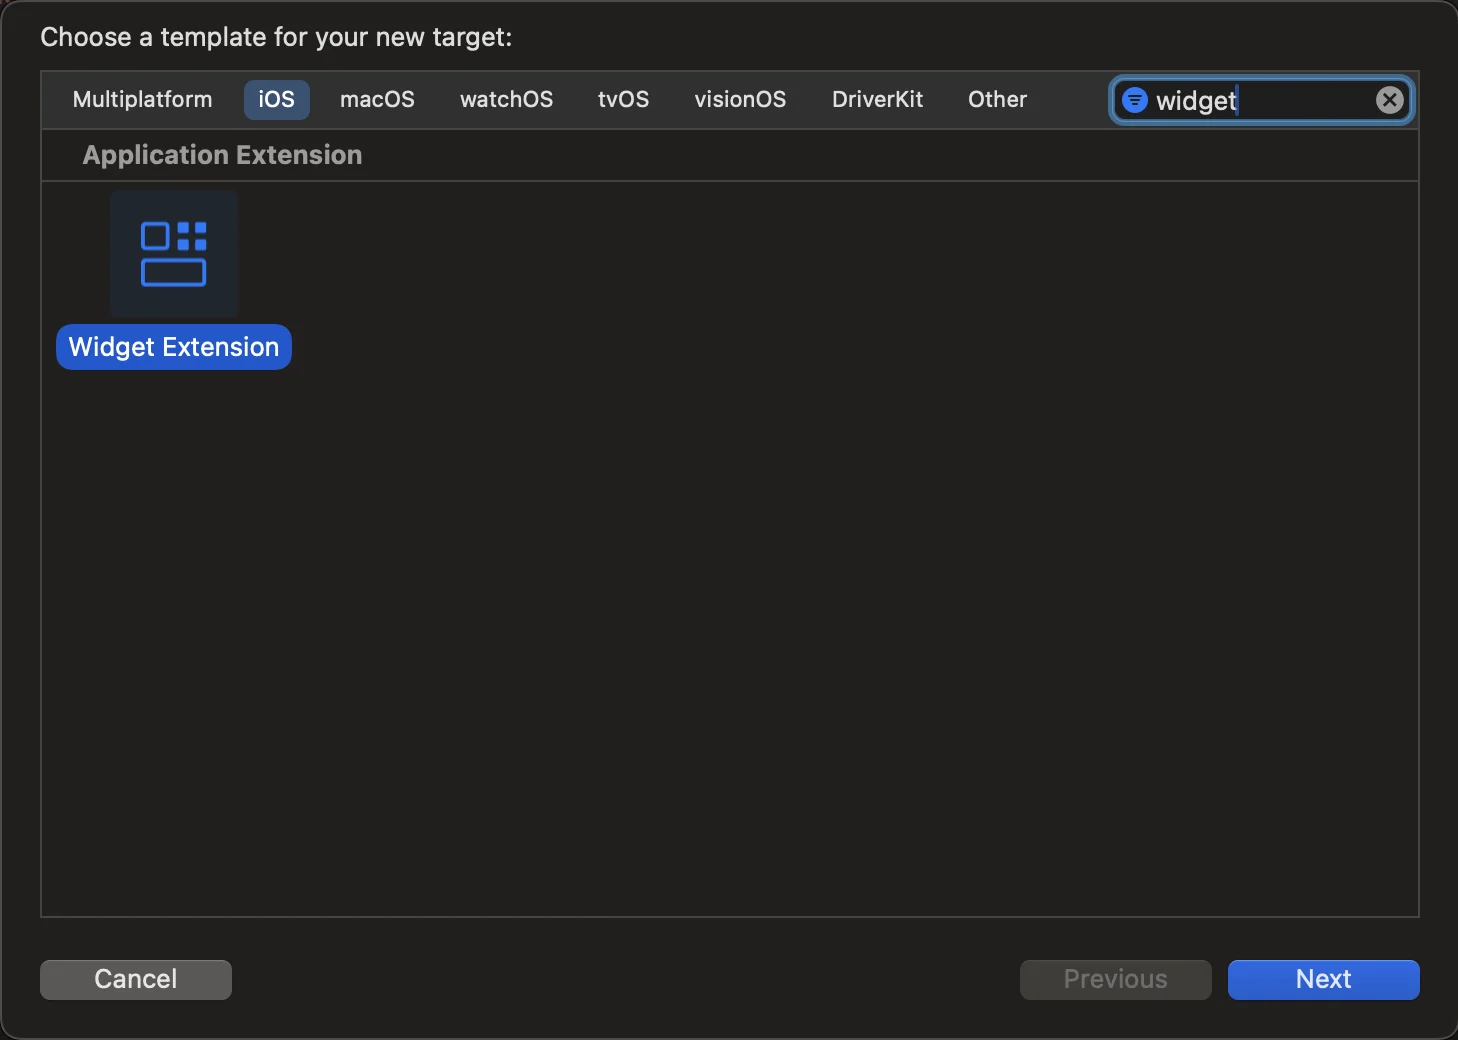
1. Create a new target
Go to **File > New > Target** and select **Widget Extension**.
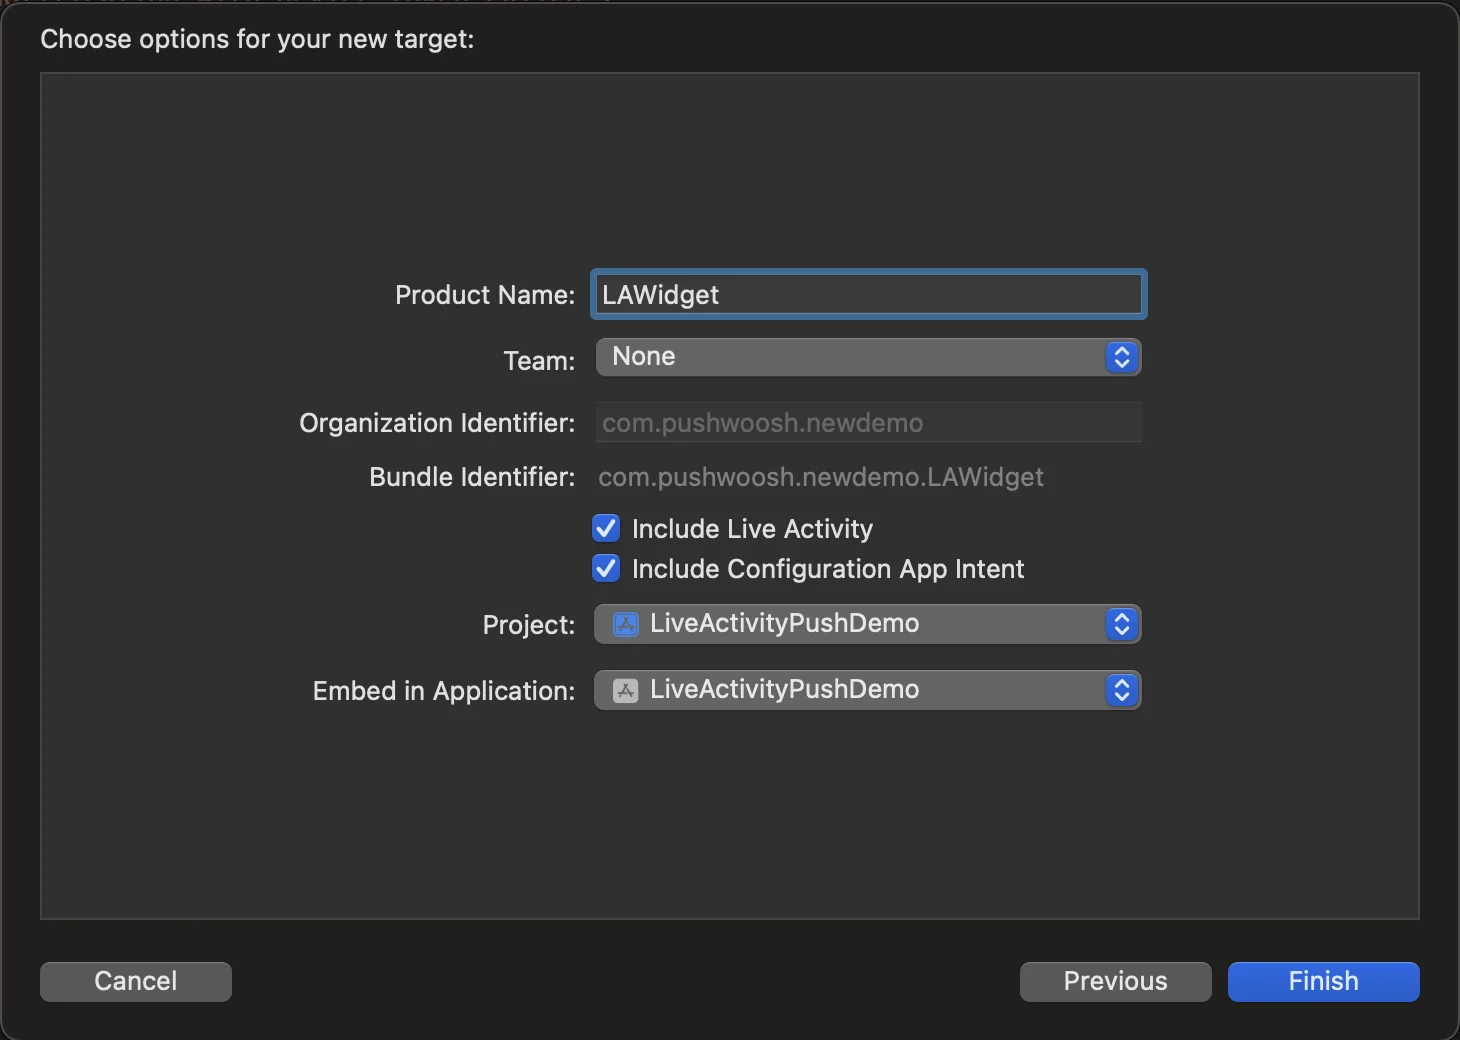
2. Widget Extension Configuration
Please enter a name and make sure to select **Include Live Activity** and click **Finish**.
### Info.plist configuration
Find the Info.plist file in the primary target, insert the "Supports Live Activities" key, and set its value to YES.
```xml
NSSupportsLiveActivities
```
### Enabling live activities from app
To enable Live Activities, add their code to your existing widget extension or create a new one if your app doesn’t already have it. Live Activities use [SwiftUI](https://developer.apple.com/documentation/SwiftUI) and [WidgetKit](https://developer.apple.com/documentation/WidgetKit) functionality for their user interface. ActivityKit handles the life cycle of each Live Activity: its API is used to request, update, and end a Live Activity and to receive ActivityKit push notifications. You can learn more about Live Activities in the [Apple documentation](https://developer.apple.com/documentation/activitykit/displaying-live-data-with-live-activities).
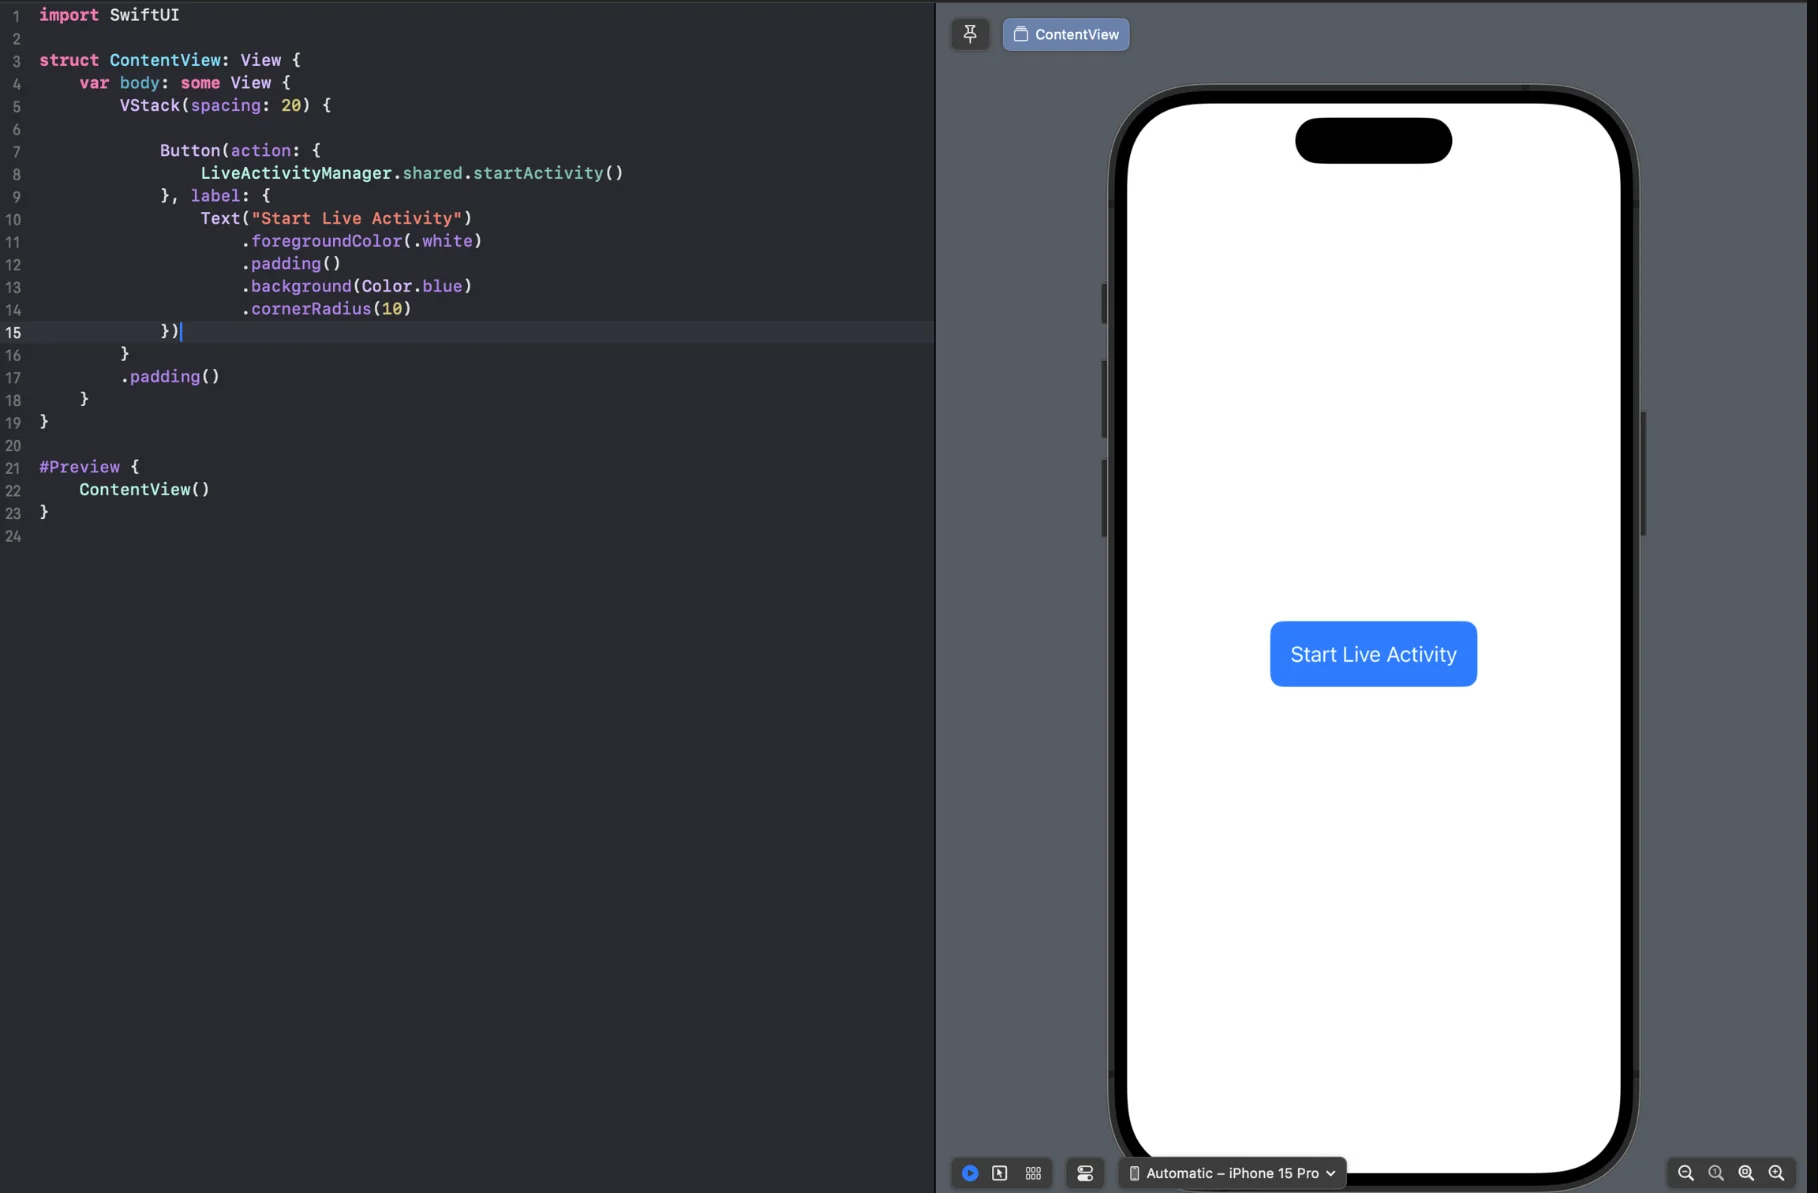
1. Navigate to the ContentView file of your project in Xcode and create a Button
```swift
import SwiftUI
struct ContentView: View {
var body: some View {
VStack(spacing: 20) {
Button(action: {
LiveActivityManager.shared.startActivity()
}, label: {
Text("Start Live Activity")
.foregroundColor(.white)
.padding()
.background(Color.blue)
.cornerRadius(10)
})
}
.padding()
}
}
#Preview {
ContentView()
}
```
2. Create a LiveActivityManager.swift file to manage Live Activities
```swift
import Foundation
import ActivityKit
import UIKit
import PushwooshFramework
import PushwooshLiveActivities
class LiveActivityManager: NSObject, ObservableObject {
public static let shared: LiveActivityManager = LiveActivityManager()
private var currentActivity: Activity? = nil
override init() {
super.init()
}
func startActivity() {
guard ActivityAuthorizationInfo().areActivitiesEnabled else {
print("You can't start live activity.")
return
}
do {
let pushwooshData = PushwooshLiveActivityAttributeData(activityId: "activity_id")
let atttribute = FoodDeliveryAttributes(orderNumber: "1234567", pushwoosh: pushwooshData)
let initialState = FoodDeliveryAttributes.ContentState(
status: "Preparing your meal",
estimatedTime: "25 min",
emoji: "👨🍳",
pushwoosh: nil
)
let activity = try Activity.request(
attributes: atttribute,
content: .init(state:initialState , staleDate: nil),
pushType: .token
)
self.currentActivity = activity
Task {
for await pushToken in activity.pushTokenUpdates {
let pushTokenString = pushToken.reduce("") {
$0 + String(format: "%02x", $1)
}
print("Activity:\(activity.id) push token: \(pushTokenString)")
// MARK: - Send Push Token to Pushwoosh
Pushwoosh.LiveActivities.startLiveActivity(
token: pushTokenString,
activityId: "activity_id"
)
}
}
} catch {
print("Start Activity Error: \(error.localizedDescription)")
}
}
}
```
3. That's it, now we run the project and press the 'Start Live Activity' button. Then we navigate to the lock screen and see the created Live Activity.
### Start Live Activity with a Remote push notification
1. To initiate a Live Activity via Remote Push Notification, you need to send the pushToStartTokenUpdates token to Pushwoosh.
```swift
func getPushToStartToken() {
if #available(iOS 17.2, *) {
Task {
for await data in Activity.pushToStartTokenUpdates {
let token = data.map {String(format: "%02x", $0)}.joined()
print("Activity PushToStart Token: \(token)")
// Send `pushToStartTokenUpdates` token to Pushwoosh
try await Pushwoosh.LiveActivities.sendPushToStartLiveActivity(token: token)
}
}
}
}
```
2. Initiate a Live Activity with a Remote Push Notification
### Managing Live Activities
The Pushwoosh iOS SDK provides the following methods for working with Live Activities:
```swift
// Send Live Activity Push To Start Token to Pushwoosh
static func sendPushToStartLiveActivity(token: String)
static func sendPushToStartLiveActivity(token: String, completion: @escaping (Error?) -> Void)
// Start Live Activity Methods with Activity ID
static func startLiveActivity(token: String, activityId: String)
static func startLiveActivity(token: String, activityId: String, completion: @escaping (Error?) -> Void)
// Stop Live Activity Methods
static func stopLiveActivity()
static func stopLiveActivity(completion: @escaping (Error?) -> Void)
static func stopLiveActivity(activityId: String)
static func stopLiveActivity(activityId: String, completion: @escaping (Error?) -> Void)
```
You can also update live activities by segments using the Activity ID parameter. When creating an activity, you need to pass a unique Activity ID parameter in the method, which will be relevant for a specific user segment.
For example, N users have subscribed to the same event in a live Activity. It is necessary that the Activity ID parameter be unique for all of these N users.
When you finish working with a Live Activity, use these methods:
```swift
static func stopLiveActivity()
static func stopLiveActivity(completion: @escaping (Error?) -> Void)
```
### `Setup()` method.
Pushwoosh simplifies the transfer of activity IDs by introducing the `PushwooshLiveActivities.setup` function, which handles the entire lifecycle of a Live Activity within the application. This function automatically listens for both pushToStart and pushToUpdate token updates. By using this method, the application no longer needs to manually track the initiation of Live Activities or manage token updates for activity updates.
We recommend using this method because it handles all token management on our side, reducing the amount of code you need to maintain on your end. This simplifies the integration and ensures a smoother, more efficient experience for your app.
In the AppDelegate, ensure you import `PushwooshFramework` and `PushwooshLiveActivities` call the `setup` method from the `Pushwoosh.LiveActivities` module.
**AppDelegate.swift**
```swift
if #available(iOS 16.1, *) {
Pushwoosh.LiveActivities.setup(FoodDeliveryAttributes.self)
}
```
**FoodDeliveryAttributes**
```swift
import WidgetKit
import SwiftUI
import ActivityKit
import PushwooshFramework
import PushwooshLiveActivities
struct FoodDeliveryAttributes: PushwooshLiveActivityAttributes {
public struct ContentState: PushwooshLiveActivityContentState {
var status: String
var estimatedTime: String
var emoji: String
var pushwoosh: PushwooshLiveActivityContentStateData?
}
var orderNumber: String
var pushwoosh: PushwooshLiveActivityAttributeData
}
```
`FoodDeliveryAttributes`: This structure conforms to the `PushwooshLiveActivityAttributes` protocol. It is used to define the attributes of a live activity within the app.
## Migration guide
Starting from version 6.8.0 of the Pushwoosh iOS SDK, we’ve updated the SDK structure. Live Activities methods are now accessed through the `PushwooshLiveActivities` module.
If you were using a version of the Pushwoosh iOS SDK earlier than 6.8.0 and were calling the methods listed below, and have since updated to version 6.8.0 or later, please note the following changes:
```swift
static func setup(_ activityType: Attributes.Type)
static func defaultSetup()
static func defaultStart(_ activityId: String, attributes: [String: Any], content: [String: Any])
```
Now, to access these methods, you should use the LiveActivity module.
```swift
import PushwooshFramework
import PushwooshLiveActivities
```
```swift
Pushwoosh.LiveActivities.setup(FoodDeliveryAttributes.self)
Pushwoosh.LiveActivities.defaultSetup()
Pushwoosh.LiveActivities.defaultStart("activity_id",
attributes: ["key_attribute": "value_attribute"],
content: ["key_content": "value_content"])
```
We have also maintained support for the methods through `Pushwoosh.sharedInstance()` as listed below, but please note that these methods will be deprecated in future releases.
``` swift
// Send Live Activity Push To Start Token to Pushwoosh
static func sendPushToStartLiveActivity(token: String)
static func sendPushToStartLiveActivity(token: String, completion: @escaping (Error?) -> Void)
// Start Live Activity Methods with Activity ID
static func startLiveActivity(token: String, activityId: String)
static func startLiveActivity(token: String, activityId: String, completion: @escaping (Error?) -> Void)
// Stop Live Activity Methods
static func stopLiveActivity()
static func stopLiveActivity(completion: @escaping (Error?) -> Void)
static func stopLiveActivity(activityId: String)
static func stopLiveActivity(activityId: String, completion: @escaping (Error?) -> Void)
```
 2. Widget Extension Configuration
Please enter a name and make sure to select **Include Live Activity** and click **Finish**.
2. Widget Extension Configuration
Please enter a name and make sure to select **Include Live Activity** and click **Finish**.
 ### Info.plist configuration
Find the Info.plist file in the primary target, insert the "Supports Live Activities" key, and set its value to YES.
```xml
### Info.plist configuration
Find the Info.plist file in the primary target, insert the "Supports Live Activities" key, and set its value to YES.
```xml
 2. Create a LiveActivityManager.swift file to manage Live Activities
```swift
import Foundation
import ActivityKit
import UIKit
import PushwooshFramework
import PushwooshLiveActivities
class LiveActivityManager: NSObject, ObservableObject {
public static let shared: LiveActivityManager = LiveActivityManager()
private var currentActivity: Activity
2. Create a LiveActivityManager.swift file to manage Live Activities
```swift
import Foundation
import ActivityKit
import UIKit
import PushwooshFramework
import PushwooshLiveActivities
class LiveActivityManager: NSObject, ObservableObject {
public static let shared: LiveActivityManager = LiveActivityManager()
private var currentActivity: Activity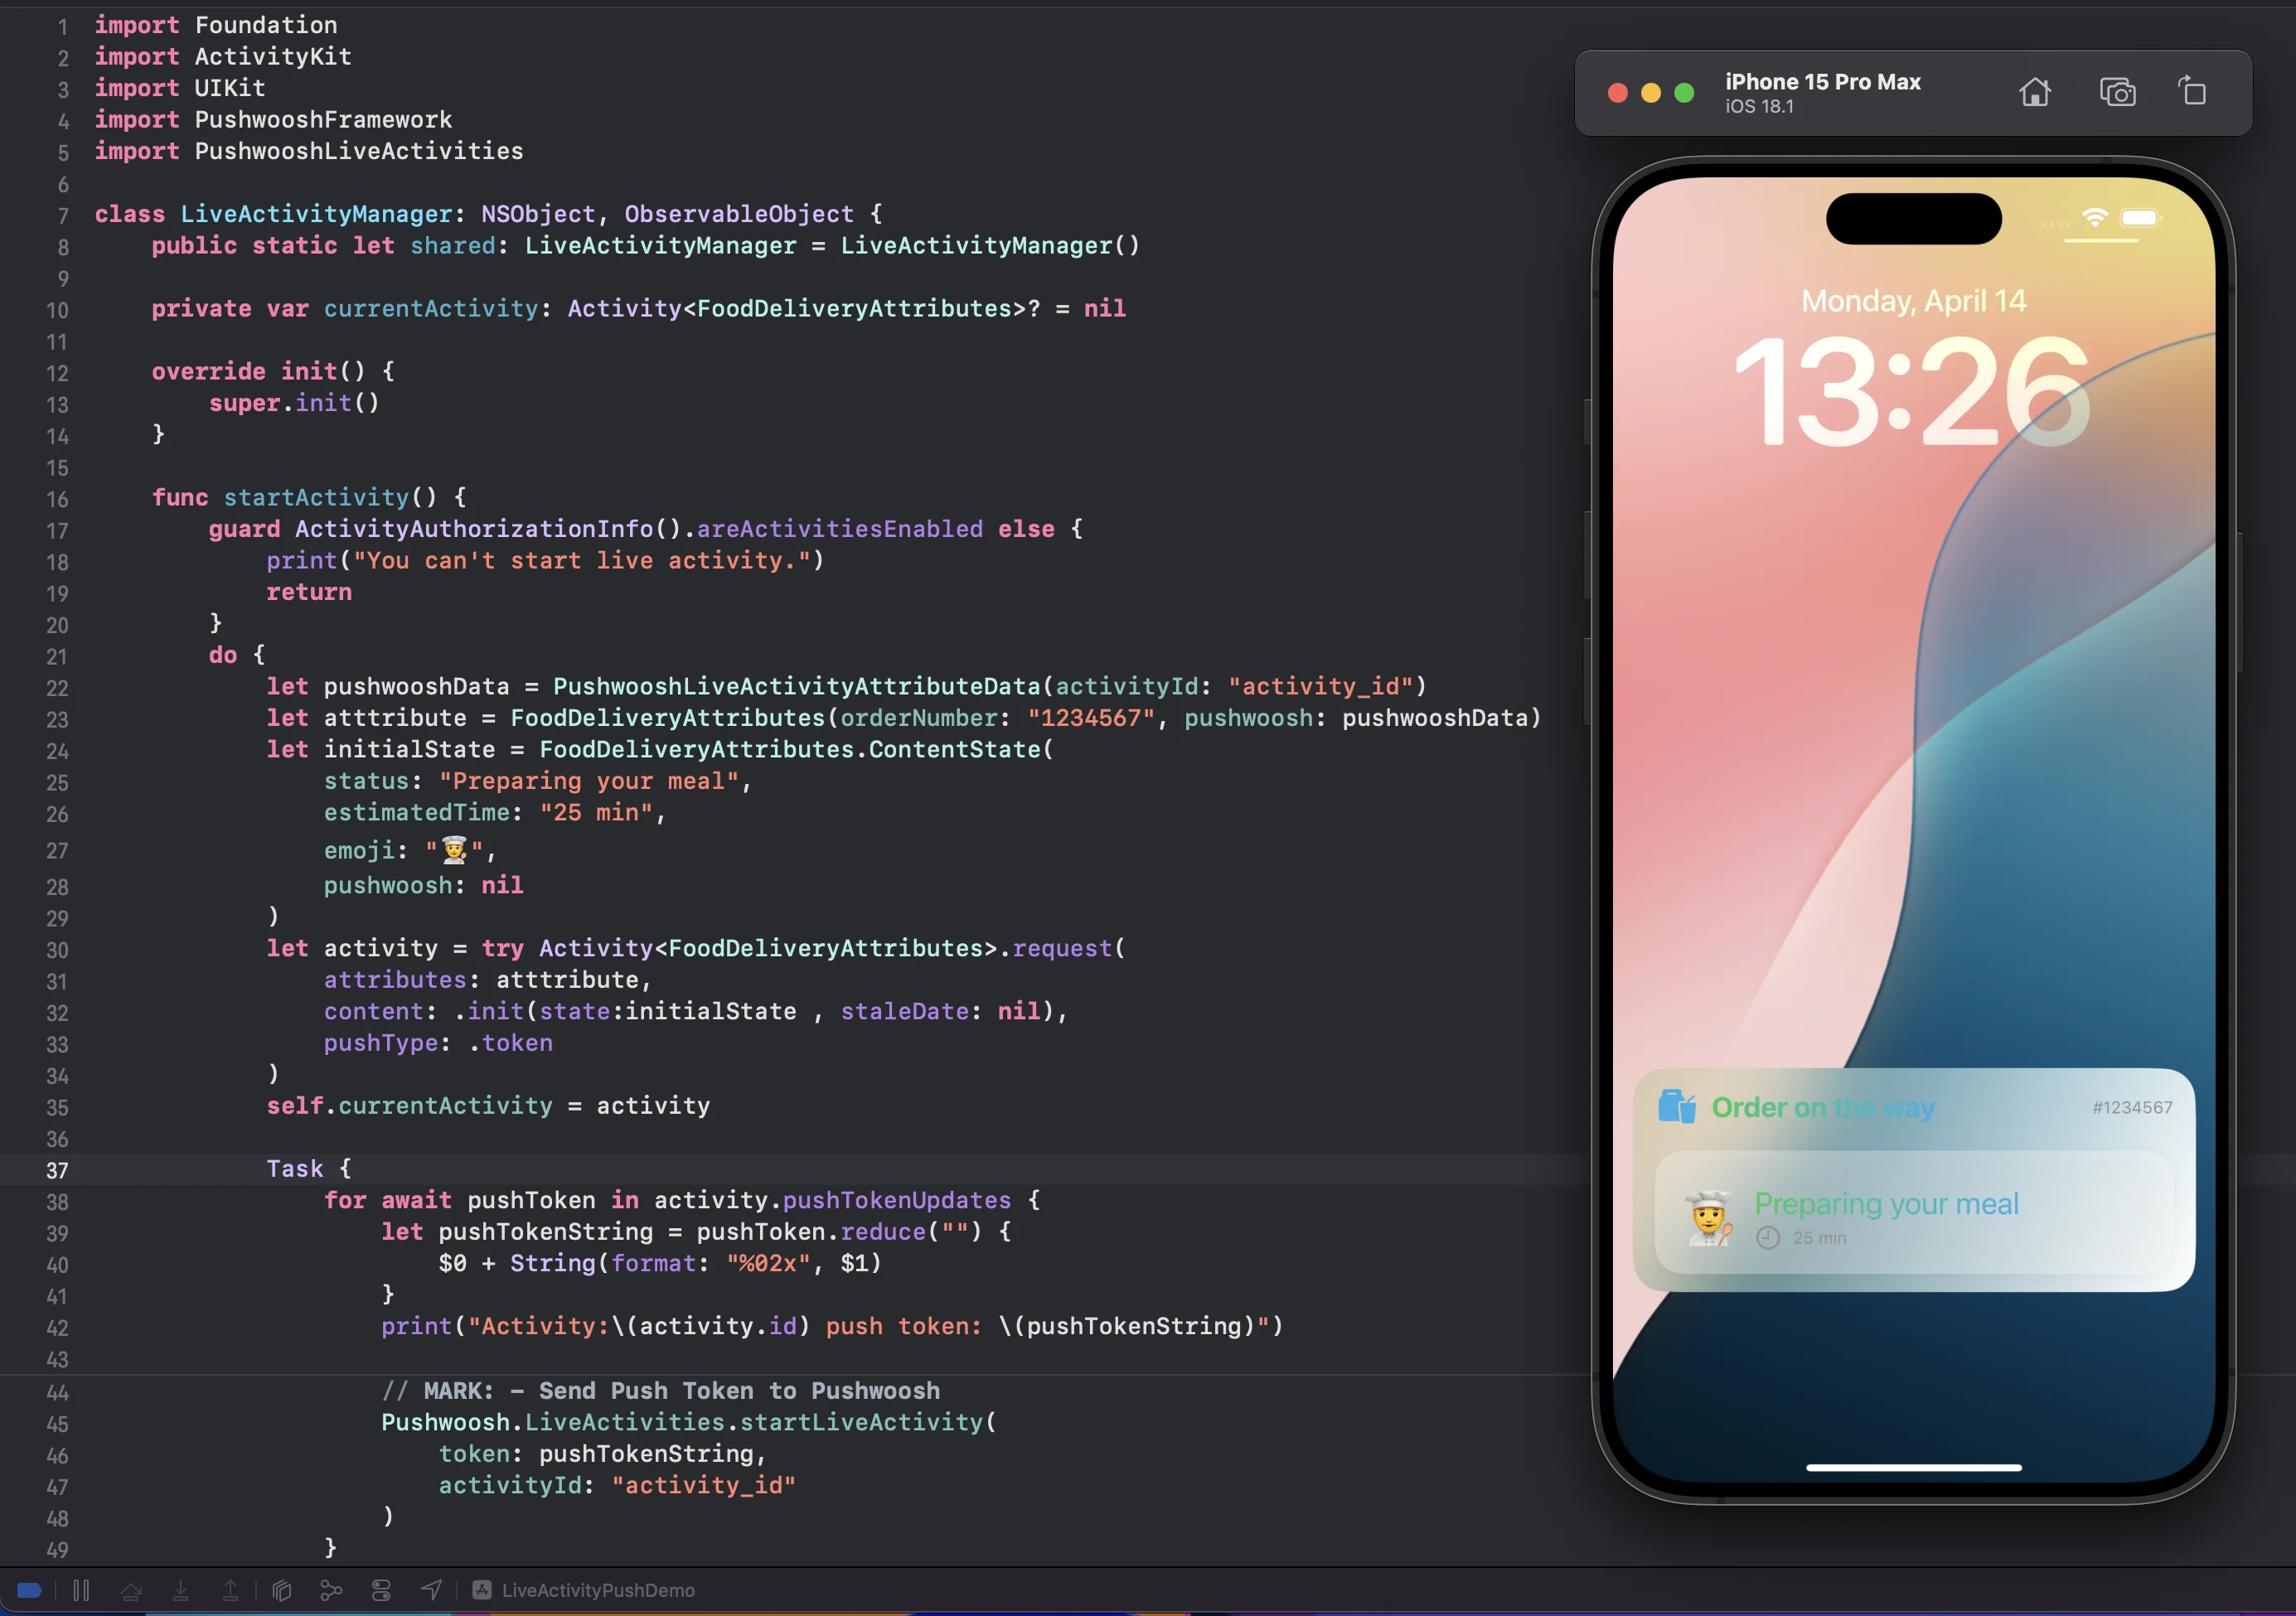 ### Start Live Activity with a Remote push notification
1. To initiate a Live Activity via Remote Push Notification, you need to send the pushToStartTokenUpdates token to Pushwoosh.
```swift
func getPushToStartToken() {
if #available(iOS 17.2, *) {
Task {
for await data in Activity
### Start Live Activity with a Remote push notification
1. To initiate a Live Activity via Remote Push Notification, you need to send the pushToStartTokenUpdates token to Pushwoosh.
```swift
func getPushToStartToken() {
if #available(iOS 17.2, *) {
Task {
for await data in Activity