# Outsystems FAQ
## Managing google-services files in projects with several possible package names
In the plugin, you can add multiple `google-service.json` files to your project, which will be selected based on the package name set during the build.
If you want to switch between multiple Firebase projects (each with its own `google-services.json` configuration file), follow these steps:
1. Create a ZIP archive. Place each `google-services.json` file into a `.zip` archive named `google-services.zip`.
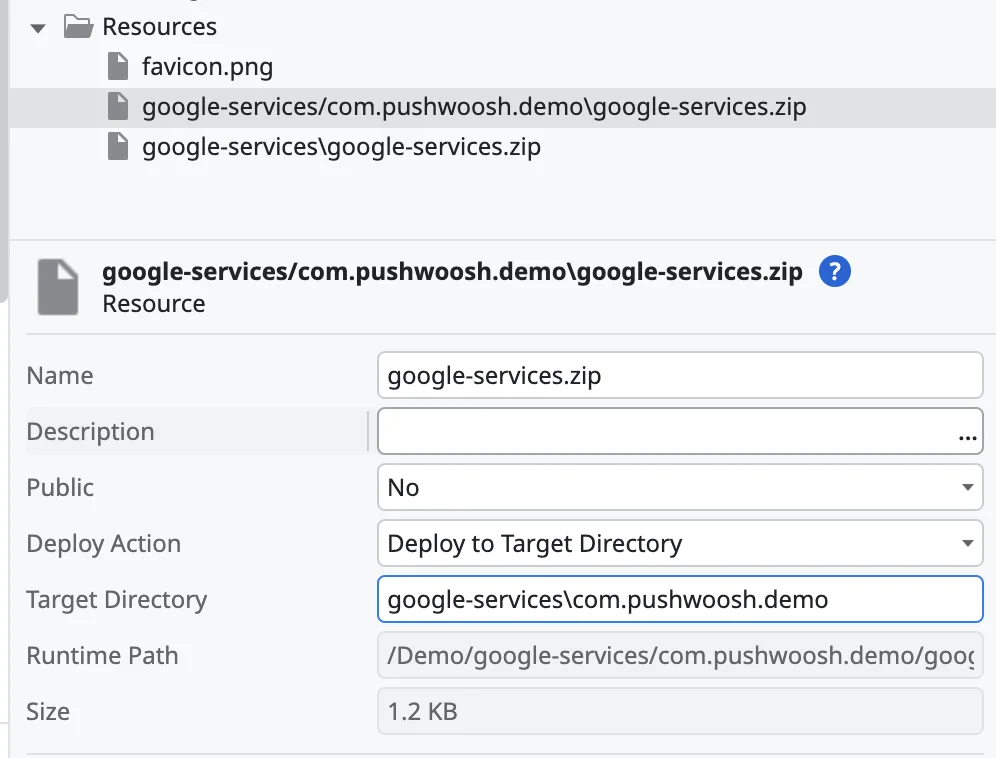
2. When adding this `.zip` file to the project, set the action to Deploy to Target Directory and specify the target directory as `google-services/${package_name}`.
For example, if the project package name is `com.pushwoosh.demo`, the target directory will be `google-services/com.pushwoosh.demo`.
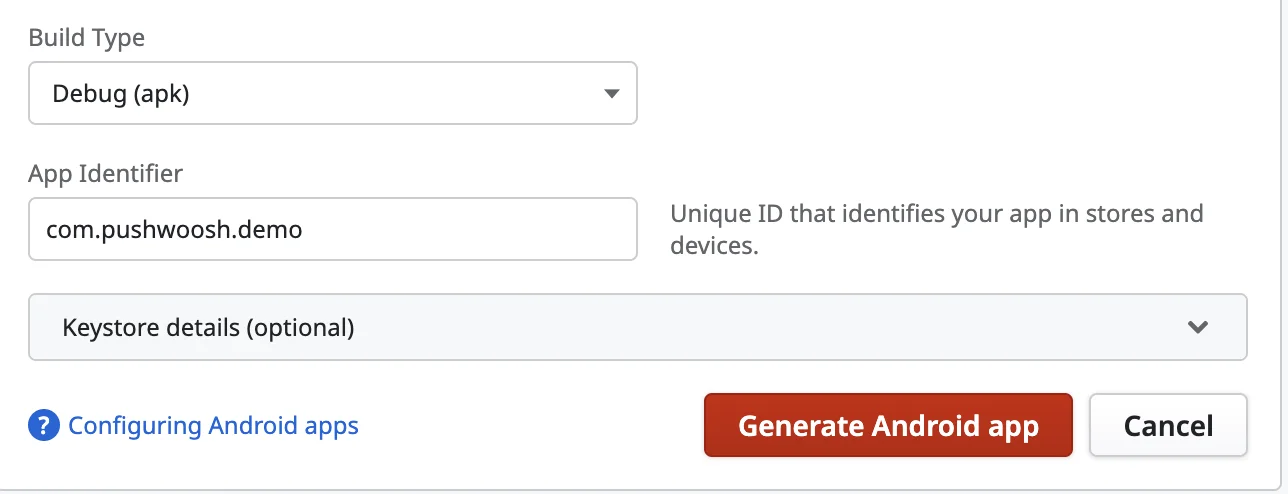
 3. During the project build, specify the corresponding package name.
 ## Resolving conflicts between multiple plugins depending on FirebaseMessagingService
Android does not automatically resolve such conflicts, so it must be done manually. Since each plugin has its own logic, we cannot provide universal code that works for all possible plugins.
Here's how to address conflicts:
1. Write a router class in Java to handle the conflict. This class must be named `FirebaseMessagingRouterService`.
Refer to the guide for an example: [Using Pushwoosh SDK with other FCM services](/developer/pushwoosh-sdk/android-sdk/android-faq/#using-pushwoosh-sdk-with-other-fcm-services).
2. Name the Class File. The file containing this class must be named `FirebaseMessagingRouterService.java`.
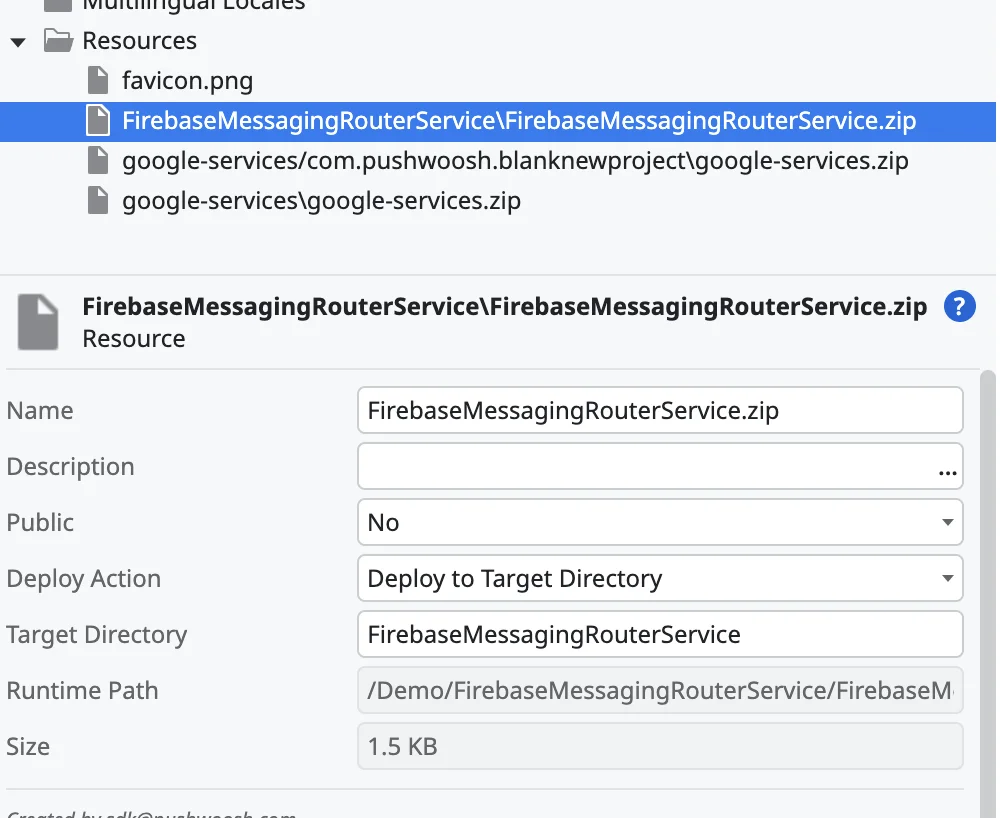
3. Place this file into a `.zip` archive named `FirebaseMessagingRouterService.zip`.
4. Add this archive to the resources of your Outsystems project.
5. Set the action to Deploy to Target Directory, and specify the target directory as `FirebaseMessagingRouterService`.
## Resolving conflicts between multiple plugins depending on FirebaseMessagingService
Android does not automatically resolve such conflicts, so it must be done manually. Since each plugin has its own logic, we cannot provide universal code that works for all possible plugins.
Here's how to address conflicts:
1. Write a router class in Java to handle the conflict. This class must be named `FirebaseMessagingRouterService`.
Refer to the guide for an example: [Using Pushwoosh SDK with other FCM services](/developer/pushwoosh-sdk/android-sdk/android-faq/#using-pushwoosh-sdk-with-other-fcm-services).
2. Name the Class File. The file containing this class must be named `FirebaseMessagingRouterService.java`.
3. Place this file into a `.zip` archive named `FirebaseMessagingRouterService.zip`.
4. Add this archive to the resources of your Outsystems project.
5. Set the action to Deploy to Target Directory, and specify the target directory as `FirebaseMessagingRouterService`.