# Huawei for Outsystems
## Set up the Outsystems plugin
Set up the Outsystems plugin for your project following the steps described in the guide:
## Get a Huawei configuration file
1. Go to [AppGallery Connect -> Projects List](https://developer.huawei.com/consumer/en/service/josp/agc/index.html#/myProject) and select a project to configure.
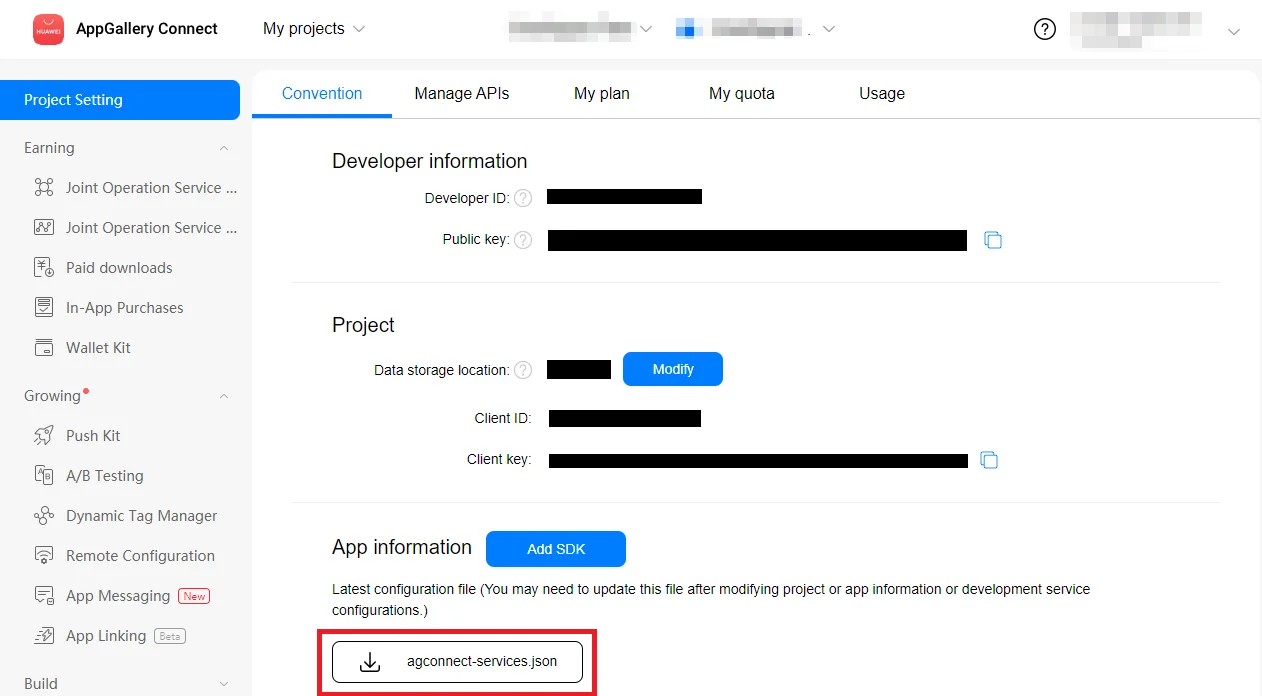
2. Press **agconnect-services.json** in the App information section to download a configuration file.
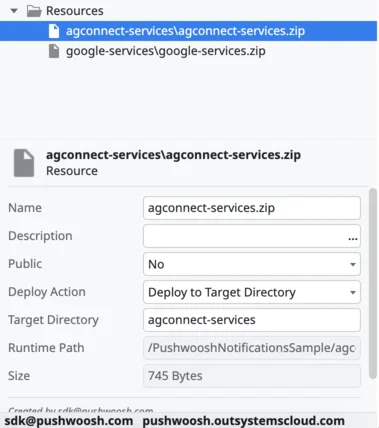
 3. Create a zip file containing the **agconnect-services.json** in the root. Upload the "**agconnect-services.zip"** to your OutSystems application's data resources and make sure to:
* Set the "Name" as "agconnect-services.zip"
* Set "Deploy to Target Directory" as "agconnect-services"
3. Create a zip file containing the **agconnect-services.json** in the root. Upload the "**agconnect-services.zip"** to your OutSystems application's data resources and make sure to:
* Set the "Name" as "agconnect-services.zip"
* Set "Deploy to Target Directory" as "agconnect-services"
 ## Generate a signing certificate fingerprint
Follow [Generating a Signing Certificate Fingerprint](https://developer.huawei.com/consumer/en/doc/development/HMS-Guides/Preparations#h2-1575707383351) to generate a signing certificate fingerprint.
## Configure Huawei platform
Refer to the [Huawei platform Configuration](/developer/first-steps/connect-messaging-services/huawei-configuration/) for step-by-step guide on how to configure Huawei platform in Pushwoosh.
## Enable Huawei for your project
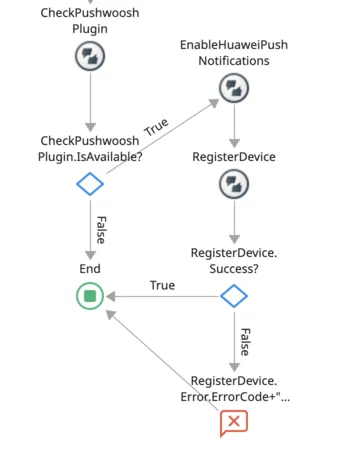
Add the **EnableHuaweiPushNotifications** action prior to RegisterDevice.
## Generate a signing certificate fingerprint
Follow [Generating a Signing Certificate Fingerprint](https://developer.huawei.com/consumer/en/doc/development/HMS-Guides/Preparations#h2-1575707383351) to generate a signing certificate fingerprint.
## Configure Huawei platform
Refer to the [Huawei platform Configuration](/developer/first-steps/connect-messaging-services/huawei-configuration/) for step-by-step guide on how to configure Huawei platform in Pushwoosh.
## Enable Huawei for your project
Add the **EnableHuaweiPushNotifications** action prior to RegisterDevice.
 ## Share your feedback with us
Your feedback helps us create a better experience, so we would love to hear from you if you have any issues during the SDK integration process. If you face any difficulties, please do not hesitate to share your thoughts with us [via this form](https://docs.google.com/forms/d/e/1FAIpQLSd\_0b8jwn-V\_JmoPLIxIFYbHACCQhrzidOZV3ELywoQPXRSxw/viewform).
## Share your feedback with us
Your feedback helps us create a better experience, so we would love to hear from you if you have any issues during the SDK integration process. If you face any difficulties, please do not hesitate to share your thoughts with us [via this form](https://docs.google.com/forms/d/e/1FAIpQLSd\_0b8jwn-V\_JmoPLIxIFYbHACCQhrzidOZV3ELywoQPXRSxw/viewform).