# Send custom data
This guide will help you to better understand how to pass custom data to your apps in the push notification payload so your app could react to such pushes and perform various actions accordingly.
The ways you handle custom data can vary according to your business objectives. In this article we’ll show some basic examples of parsing custom data and performing simple actions:
* changing the background color of the app;
* opening a custom page in your app.
## Prerequisites
This guide covers iOS Native development. It is assumed that you have an iOS sample application configured and receiving push notifications as per the [iOS Getting Started guide](/developer/pushwoosh-sdk/ios-sdk/setting-up-pushwoosh-ios-sdk/quick-start/).
In `AppDelegate` in the `didFinishLaunchingWithOptions` function, we will use `self.viewController` as a delegate for push notifications processing:
```swift
func application(_ application: UIApplication, didFinishLaunchingWithOptions launchOptions: [UIApplication.LaunchOptionsKey: Any]?) -> Bool {
Pushwoosh.sharedInstance().delegate = self.viewController
Pushwoosh.sharedInstance().registerForPushNotifications()
if let launchOptions = launchOptions {
Pushwoosh.sharedInstance().handlePushReceived(launchOptions)
}
return true
}
```
Our `ViewController` implements the `PWMessagingDelegate` protocol:
```swift
extension ViewController: PWMessagingDelegate
```
And therefore has the `onMessageOpened` function that handles received push notifications:
```swift
// User pressed on the push notification
func pushwoosh(_ pushwoosh: Pushwoosh, onMessageOpened message: PWMessage) {}
```
## Opening another ViewController and changing the background color
Now we are getting `customData` from the push payload. For instance, let's change the view's background color and discount percentage. We assume that the custom data will contain the items `“r”`, `“g”`, `“b”`, and `"d"` in JSON object format as follows:
```swift
guard let customDataJson = message.customData,
let redString = customDataJson["r"] as? String,
let greenString = customDataJson["g"] as? String,
let blueString = customDataJson["b"] as? String,
let discount = customDataJson["d"] as? String else {
return
}
setViewBackgroundColor(red: redString, green: greenString, blue: blueString, discount: discount)
```
We will use the following function to open a new ViewController and set the background color and discount percentage:
```swift
func setViewBackgroundColor(red: String, green: String, blue: String, discount: String) {
let red = CGFloat((red as NSString).floatValue)
let green = CGFloat((green as NSString).floatValue)
let blue = CGFloat((blue as NSString).floatValue)
let color = UIColor(red: red / 255.0, green: green / 255.0, blue: blue / 255.0, alpha: 1)
if let topController = UIApplication.shared.topMostController() {
let storyboard = UIStoryboard(name: "Main", bundle: nil)
if let customViewController = storyboard.instantiateViewController(withIdentifier: "custom_page") as? CustomPageViewController {
customViewController.discount = discount
customViewController.bgColor = color
topController.present(customViewController, animated: true, completion: nil)
}
}
}
```
Let’s test our example. Navigate to Pushwoosh Journey and add a **Push element** to the canvas. Next, click on **Create new content**. In the Push content form that opens, enter any push notification text.
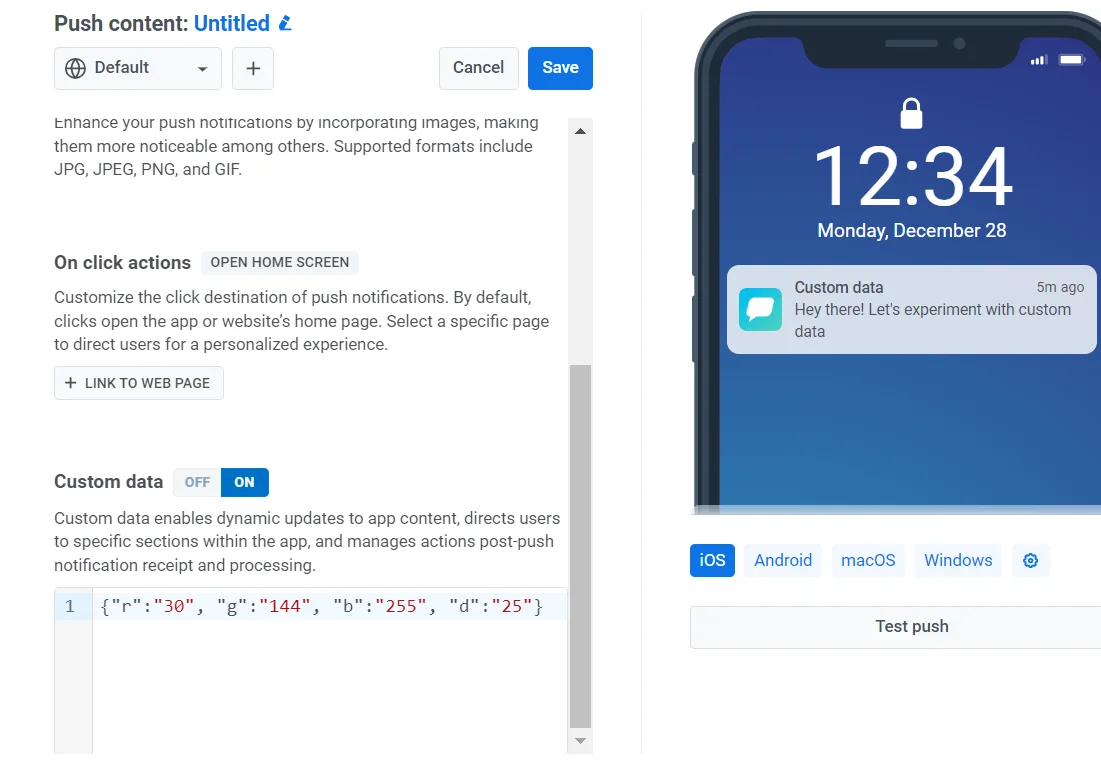
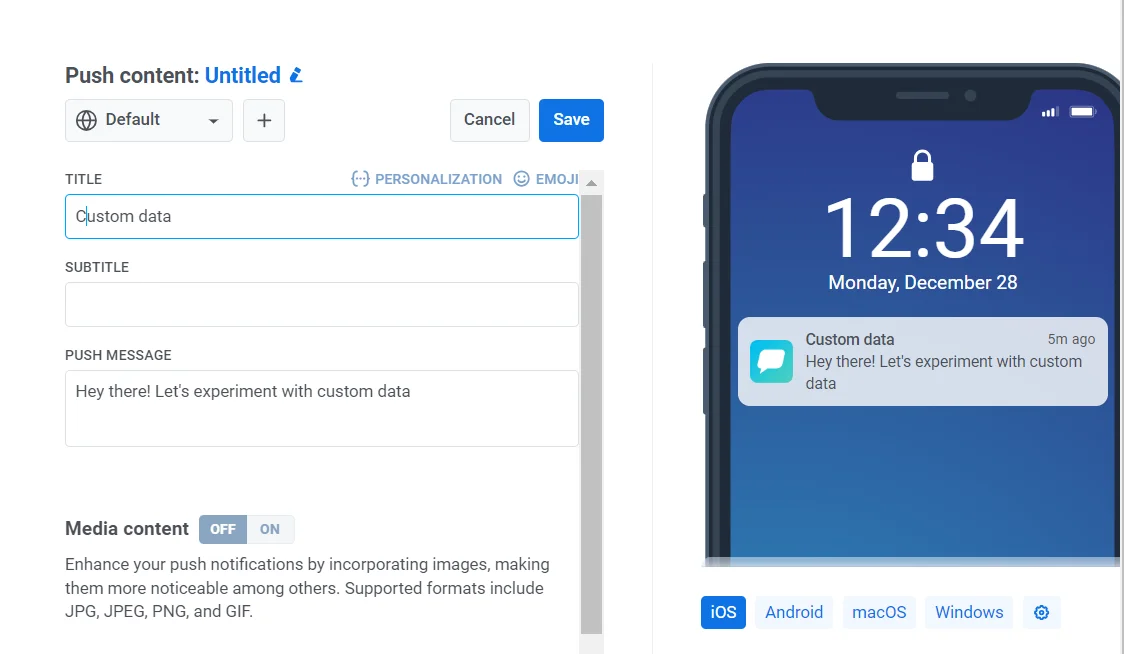 Then toggle `Send custom data` on. Insert the JSON into the Custom data field.
As we've decided that our custom data format would be a JSON object with `“r”`, `“g”`, `“b”` values in it, we need to use the `“custom data”` field in the Control Panel and populate it with the JSON object `{"r":"30", "g":"144", "b":"255", "d":"25"}`:
Then toggle `Send custom data` on. Insert the JSON into the Custom data field.
As we've decided that our custom data format would be a JSON object with `“r”`, `“g”`, `“b”` values in it, we need to use the `“custom data”` field in the Control Panel and populate it with the JSON object `{"r":"30", "g":"144", "b":"255", "d":"25"}`:
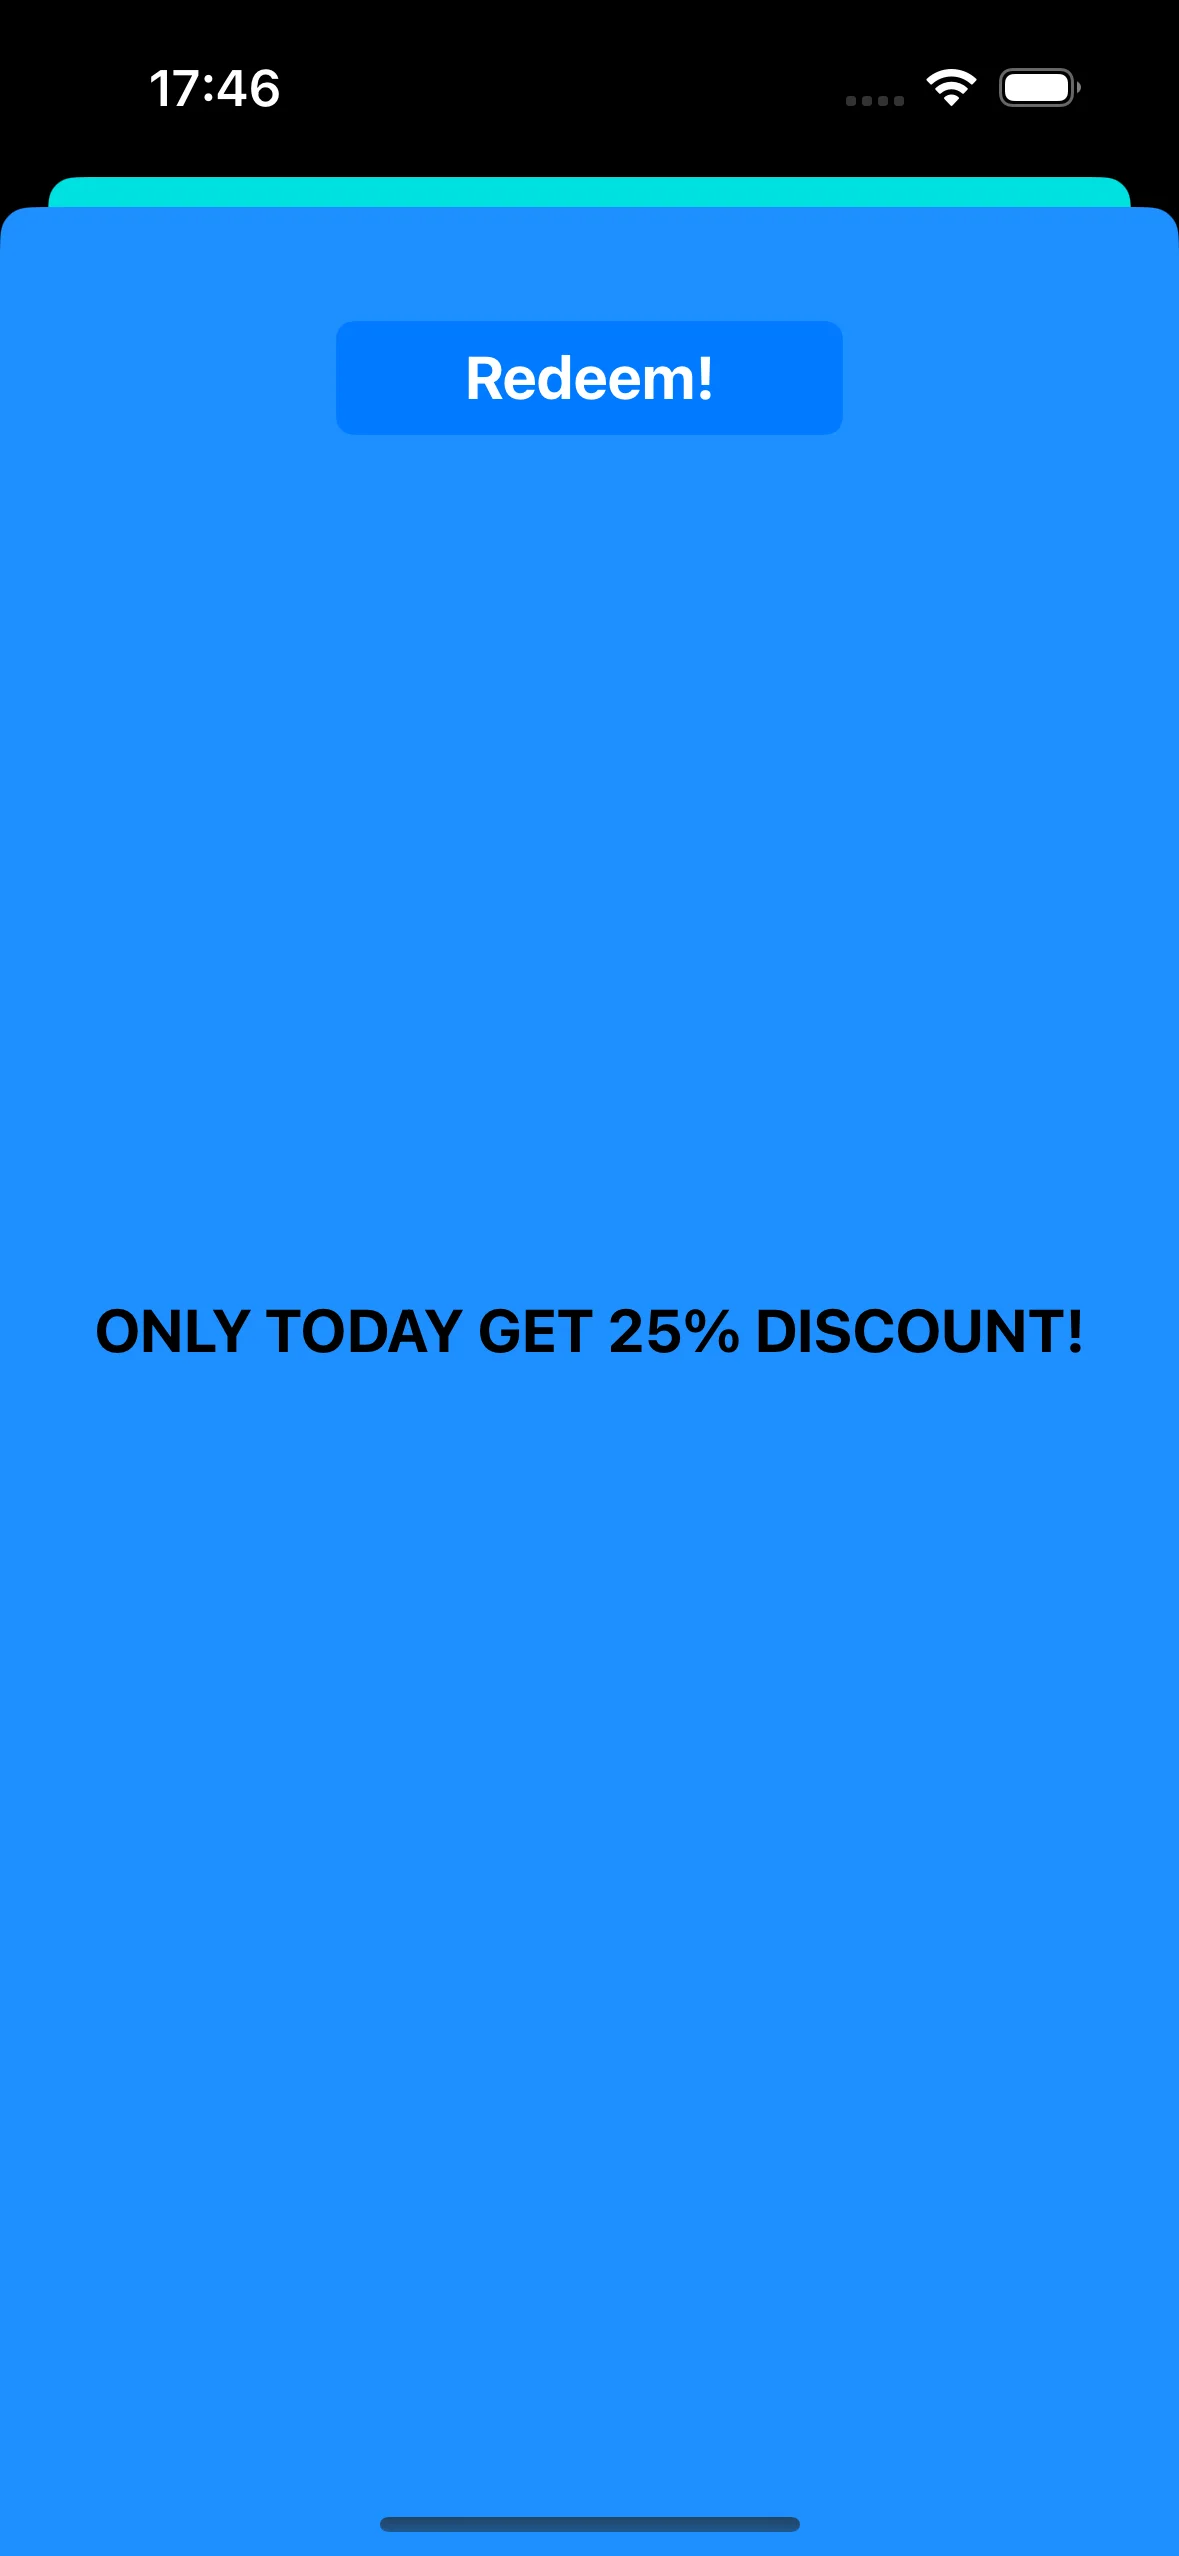
 Upon tapping the push notification, the `CustomPageViewController` opens, the background color is set, and the discount is applied:
 CustomPageViewController Code:
```swift
class CustomPageViewController: UIViewController {
var bgColor: UIColor?
var discount: String?
@IBOutlet weak var titleLabel: UILabel!
override func viewDidLoad() {
super.viewDidLoad()
self.view.backgroundColor = self.bgColor
if self.discount != nil {
self.titleLabel?.text = "ONLY TODAY GET \(self.discount!)% DISCOUNT!"
}
}
func showPromoPage(discount: String) {
let vc = CustomPageViewController()
vc.bgColor = self.view.backgroundColor
vc.discount = discount
vc.modalTransitionStyle = UIModalTransitionStyle.crossDissolve
if self.presentedViewController != nil {
self.dismiss(animated: true, completion: {
self.present(vc, animated: true, completion: nil)
})
} else {
self.present(vc, animated: true, completion: nil)
}
}
@IBAction func closeButtonAction(_ sender: Any) {
self.dismiss(animated: true)
}
}
```
We assume that the discount value will come as `"d"` parameter in the JSON of the push notification payload. As push notification payloads are limited in size, you’d rather use short names for the parameters.
```swift
guard let customDataJson = message.customData,
let redString = customDataJson["r"] as? String,
let greenString = customDataJson["g"] as? String,
let blueString = customDataJson["b"] as? String,
let discount = customDataJson["d"] as? String else {
return
}
```
You can write code to initialize and open different View Controllers depending on the parameters you pass in the push notification payload.
## Opening A/B testing view controller
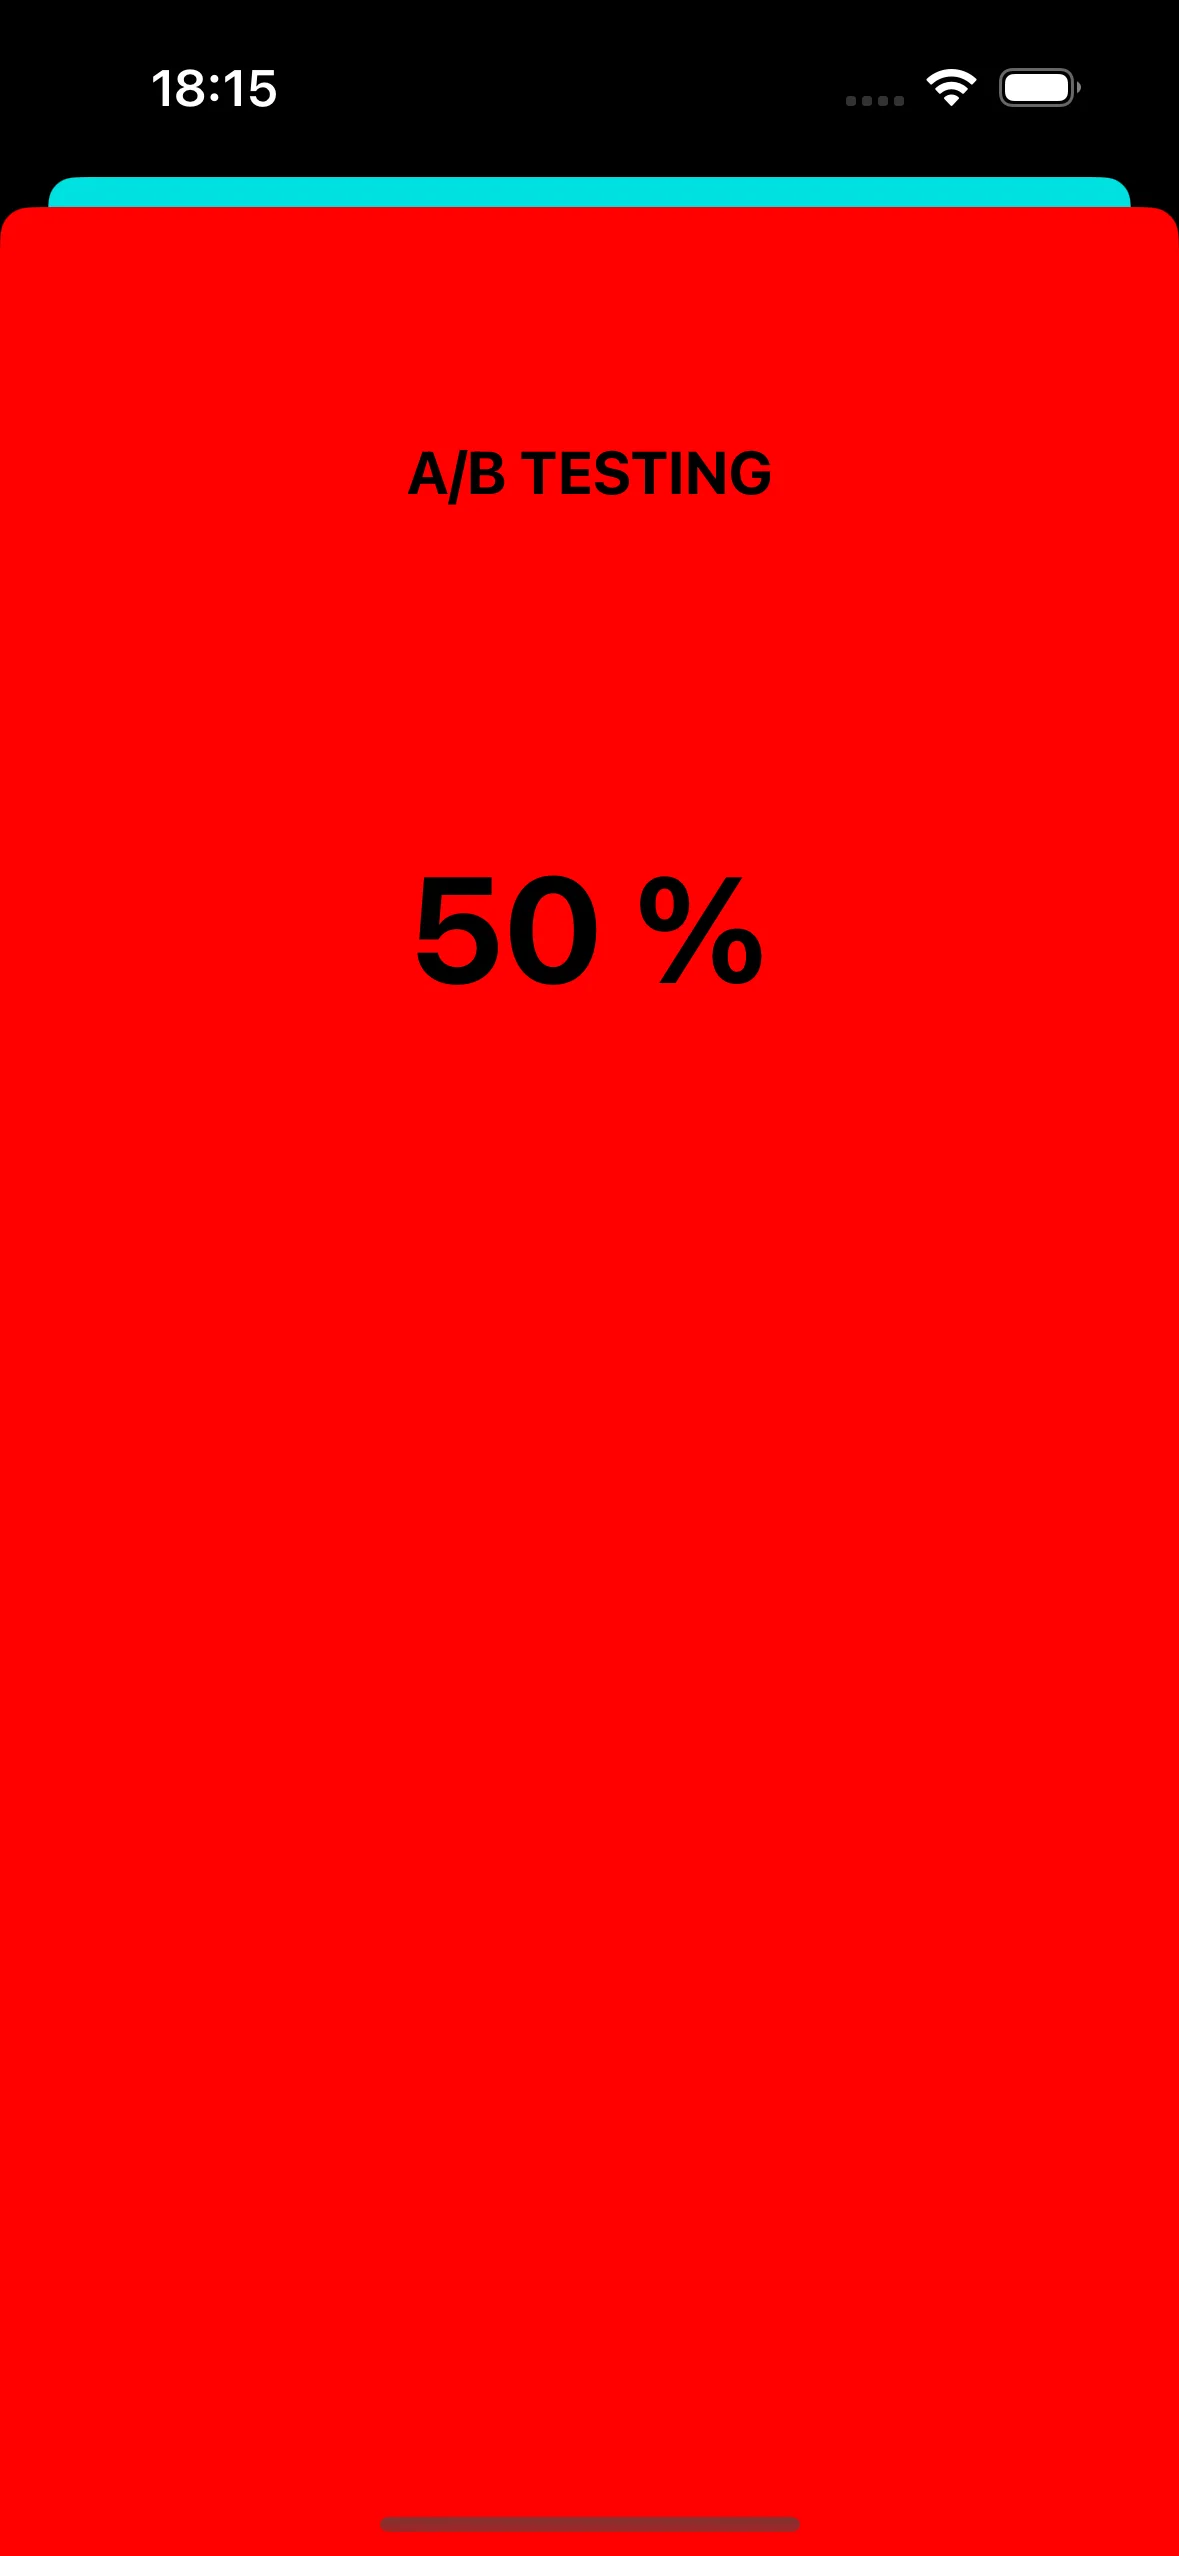
Let's consider another use case for custom data in a push notification. For instance, we need to open one view controller for one user segment and another view controller for a different user segment. Simply put, we can use custom data for A/B testing in your application.
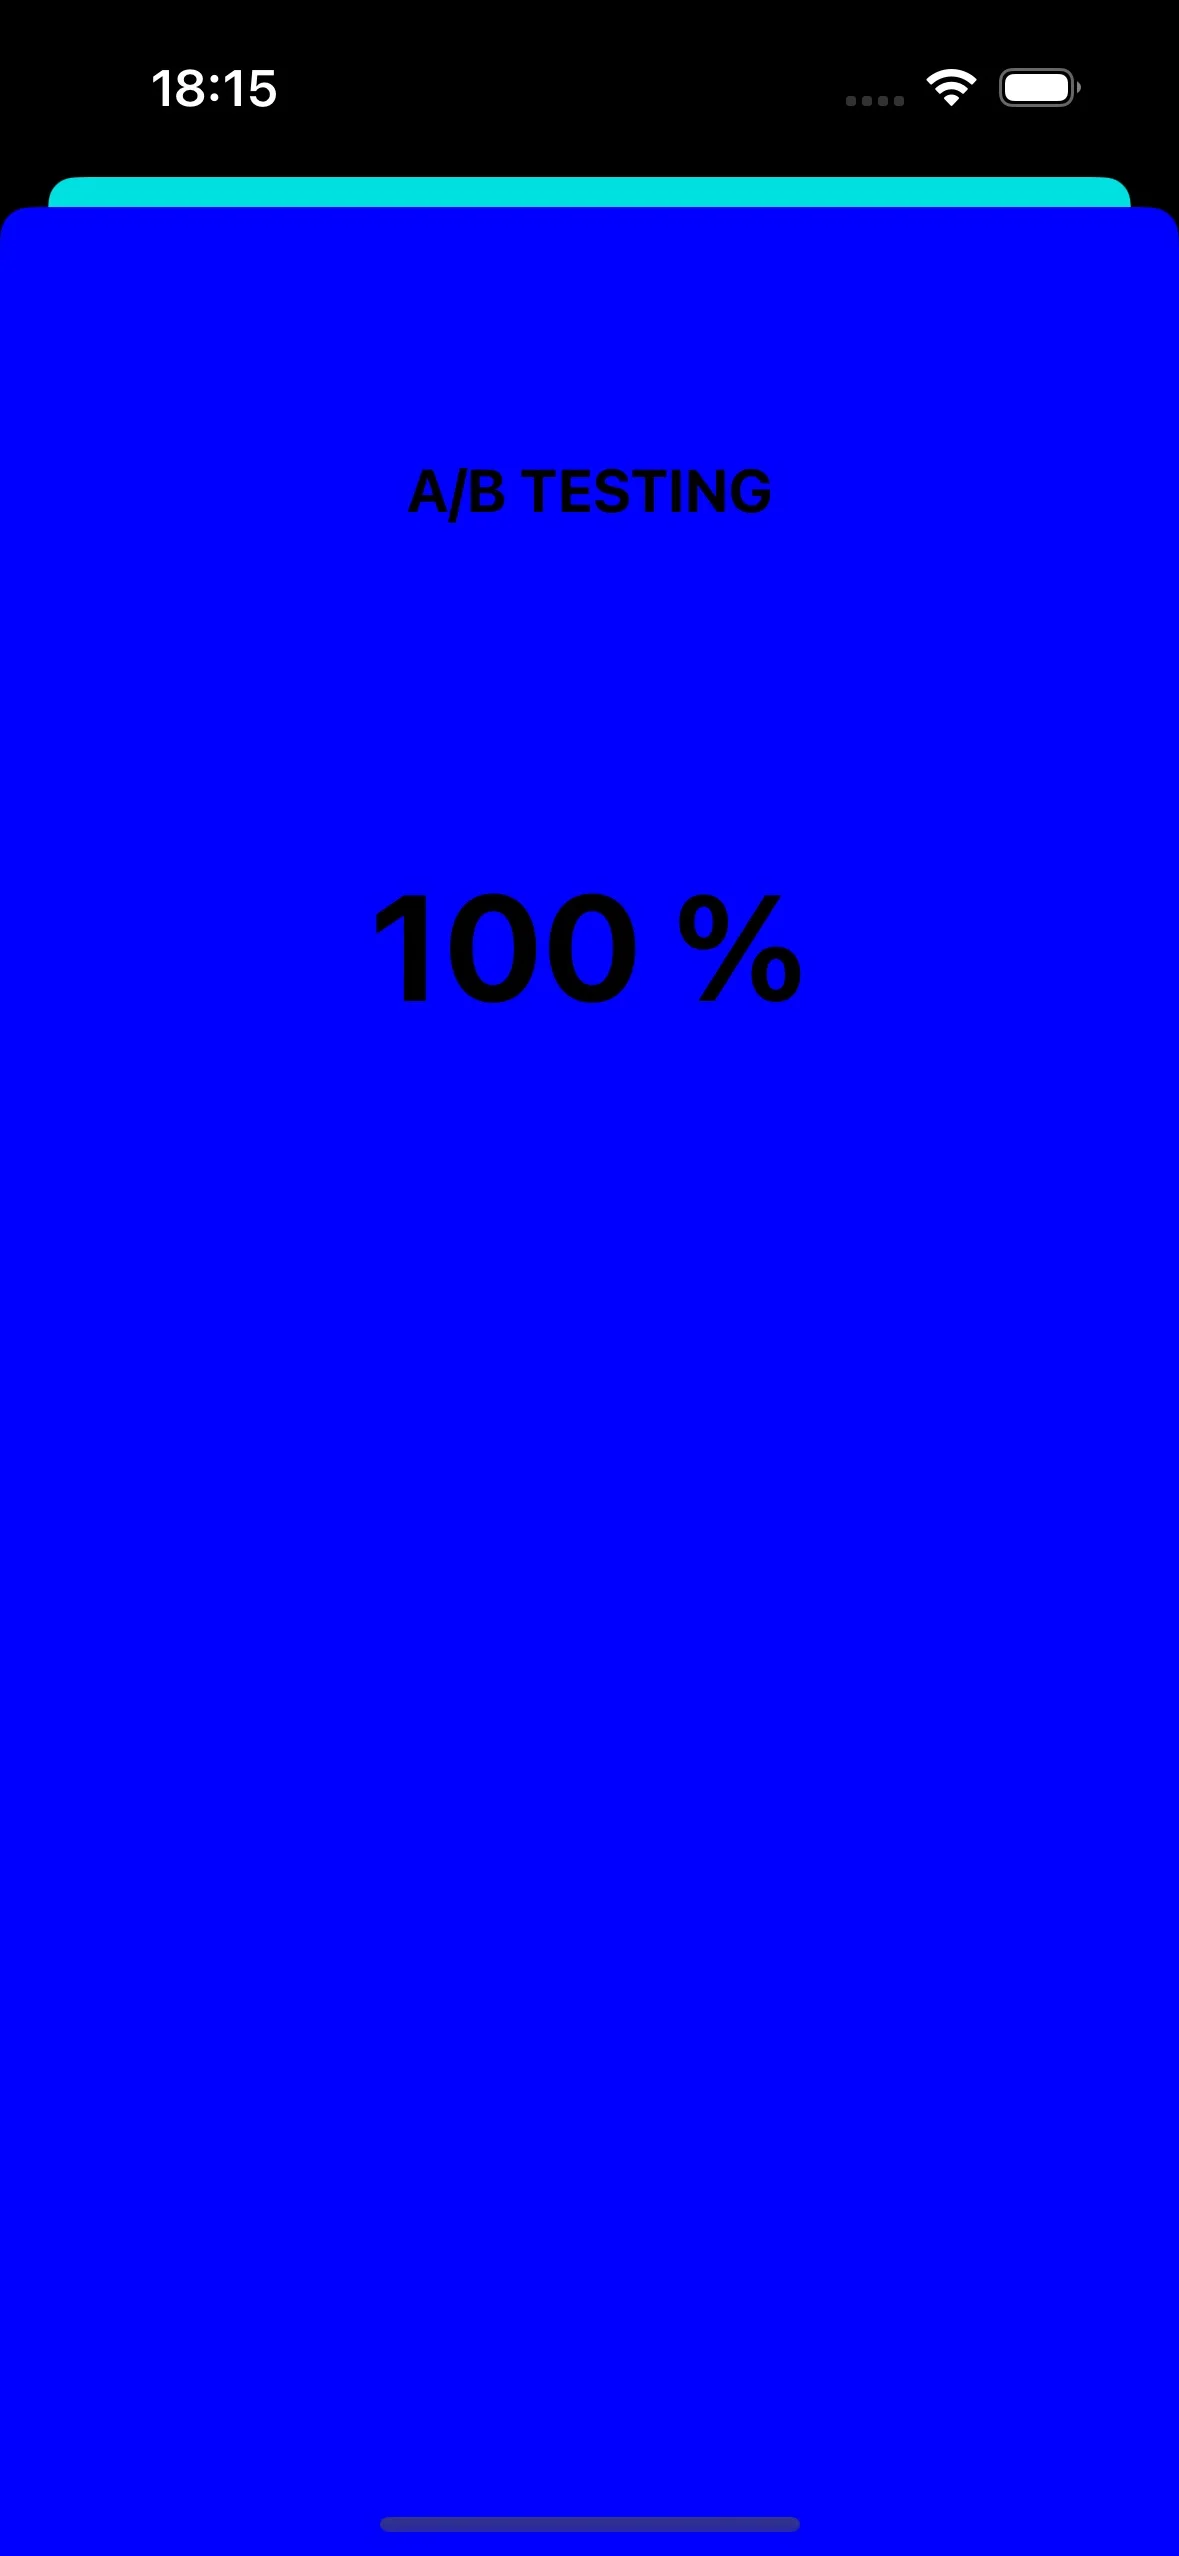
Let's create two view controllers. One controller (A) will open with a discount value, and the second controller (B) will open with a different discount parameter.
Now let's write the code that will open the appropriate view controller based on the push notification payload:
```swift
func pushwoosh(_ pushwoosh: Pushwoosh, onMessageOpened message: PWMessage) {
// MARK: - A/B Testing via Custom Data
guard let customDataJson = message.customData,
let viewController = customDataJson["vc"] as? String else {
return
}
if viewController == "A" {
setControllerA()
} else if viewController == "B" {
setControllerB()
}
}
func setControllerA() {
if let topController = UIApplication.shared.topMostController() {
let storyboard = UIStoryboard(name: "Main", bundle: nil)
if let customViewController = storyboard.instantiateViewController(withIdentifier: "a_vc") as? AViewController {
customViewController.discountA = "50"
topController.present(customViewController, animated: true, completion: nil)
}
}
}
func setControllerB() {
if let topController = UIApplication.shared.topMostController() {
let storyboard = UIStoryboard(name: "Main", bundle: nil)
if let customViewController = storyboard.instantiateViewController(withIdentifier: "b_vc") as? BViewController {
customViewController.discountB = "100"
topController.present(customViewController, animated: true, completion: nil)
}
}
}
```
Add your JSON to the Custom data field.
```
{
"vc": "A"
}
// Choose your Custom Data (A or B)
{
"vc": "B"
}
```
Depending on the custom data you sent in the push payload, either `'vc': 'A'` or `'vc': 'B'`, one segment of users will open one controller, while another segment of users will open a different controller.
#### View Controller "A"
CustomPageViewController Code:
```swift
class CustomPageViewController: UIViewController {
var bgColor: UIColor?
var discount: String?
@IBOutlet weak var titleLabel: UILabel!
override func viewDidLoad() {
super.viewDidLoad()
self.view.backgroundColor = self.bgColor
if self.discount != nil {
self.titleLabel?.text = "ONLY TODAY GET \(self.discount!)% DISCOUNT!"
}
}
func showPromoPage(discount: String) {
let vc = CustomPageViewController()
vc.bgColor = self.view.backgroundColor
vc.discount = discount
vc.modalTransitionStyle = UIModalTransitionStyle.crossDissolve
if self.presentedViewController != nil {
self.dismiss(animated: true, completion: {
self.present(vc, animated: true, completion: nil)
})
} else {
self.present(vc, animated: true, completion: nil)
}
}
@IBAction func closeButtonAction(_ sender: Any) {
self.dismiss(animated: true)
}
}
```
We assume that the discount value will come as `"d"` parameter in the JSON of the push notification payload. As push notification payloads are limited in size, you’d rather use short names for the parameters.
```swift
guard let customDataJson = message.customData,
let redString = customDataJson["r"] as? String,
let greenString = customDataJson["g"] as? String,
let blueString = customDataJson["b"] as? String,
let discount = customDataJson["d"] as? String else {
return
}
```
You can write code to initialize and open different View Controllers depending on the parameters you pass in the push notification payload.
## Opening A/B testing view controller
Let's consider another use case for custom data in a push notification. For instance, we need to open one view controller for one user segment and another view controller for a different user segment. Simply put, we can use custom data for A/B testing in your application.
Let's create two view controllers. One controller (A) will open with a discount value, and the second controller (B) will open with a different discount parameter.
Now let's write the code that will open the appropriate view controller based on the push notification payload:
```swift
func pushwoosh(_ pushwoosh: Pushwoosh, onMessageOpened message: PWMessage) {
// MARK: - A/B Testing via Custom Data
guard let customDataJson = message.customData,
let viewController = customDataJson["vc"] as? String else {
return
}
if viewController == "A" {
setControllerA()
} else if viewController == "B" {
setControllerB()
}
}
func setControllerA() {
if let topController = UIApplication.shared.topMostController() {
let storyboard = UIStoryboard(name: "Main", bundle: nil)
if let customViewController = storyboard.instantiateViewController(withIdentifier: "a_vc") as? AViewController {
customViewController.discountA = "50"
topController.present(customViewController, animated: true, completion: nil)
}
}
}
func setControllerB() {
if let topController = UIApplication.shared.topMostController() {
let storyboard = UIStoryboard(name: "Main", bundle: nil)
if let customViewController = storyboard.instantiateViewController(withIdentifier: "b_vc") as? BViewController {
customViewController.discountB = "100"
topController.present(customViewController, animated: true, completion: nil)
}
}
}
```
Add your JSON to the Custom data field.
```
{
"vc": "A"
}
// Choose your Custom Data (A or B)
{
"vc": "B"
}
```
Depending on the custom data you sent in the push payload, either `'vc': 'A'` or `'vc': 'B'`, one segment of users will open one controller, while another segment of users will open a different controller.
#### View Controller "A"
 #### View Controller "B"
 ## Changing app icon via push notification
Another example of how we can use push notifications in iOS is to change the app icon.
First, let's add three different icons to the assets. One will be used as the default app icon, while the other two will change based on the custom data in the push notification.
## Changing app icon via push notification
Another example of how we can use push notifications in iOS is to change the app icon.
First, let's add three different icons to the assets. One will be used as the default app icon, while the other two will change based on the custom data in the push notification.
 To enable alternate app icons in your iOS application, you need to add the necessary configuration in the `Info.plist` file. Here are the steps to do that:
```xml
CFBundleIcons
CFBundleAlternateIcons
AppIcon-2
CFBundleIconFiles
Icon-2
UIPrerenderedIcon
AppIcon-3
CFBundleIconFiles
Icon-3
UIPrerenderedIcon
CFBundlePrimaryIcon
CFBundleIconFiles
Icon-1
UIPrerenderedIcon
```
In the `pushwoosh(_ pushwoosh: Pushwoosh, onMessageOpened message: PWMessage)` callback, you can add the code to change the app icon based on the custom data received in the push notification. Here’s how you can implement this:
```swift
func pushwoosh(_ pushwoosh: Pushwoosh, onMessageOpened message: PWMessage) {
// MARK: - Change the app icon dynamically
guard let customDataJson = message.customData,
let appIcon = customDataJson["i"] as? String else {
return
}
UIApplication.shared.setAlternateIconName(appIcon) { error in
if let error = error {
print(error.localizedDescription)
} else {
print("Success!")
}
}
}
```
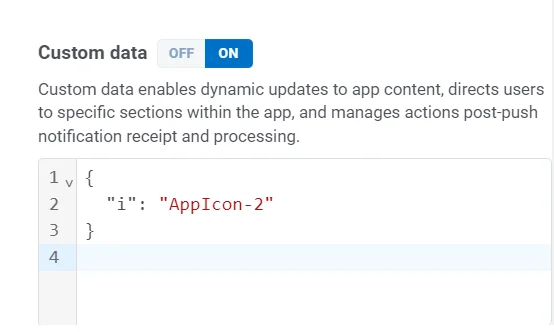
Add the JSON code:
```
{
"i": "AppIcon-2"
}
```
To enable alternate app icons in your iOS application, you need to add the necessary configuration in the `Info.plist` file. Here are the steps to do that:
```xml
CFBundleIcons
CFBundleAlternateIcons
AppIcon-2
CFBundleIconFiles
Icon-2
UIPrerenderedIcon
AppIcon-3
CFBundleIconFiles
Icon-3
UIPrerenderedIcon
CFBundlePrimaryIcon
CFBundleIconFiles
Icon-1
UIPrerenderedIcon
```
In the `pushwoosh(_ pushwoosh: Pushwoosh, onMessageOpened message: PWMessage)` callback, you can add the code to change the app icon based on the custom data received in the push notification. Here’s how you can implement this:
```swift
func pushwoosh(_ pushwoosh: Pushwoosh, onMessageOpened message: PWMessage) {
// MARK: - Change the app icon dynamically
guard let customDataJson = message.customData,
let appIcon = customDataJson["i"] as? String else {
return
}
UIApplication.shared.setAlternateIconName(appIcon) { error in
if let error = error {
print(error.localizedDescription)
} else {
print("Success!")
}
}
}
```
Add the JSON code:
```
{
"i": "AppIcon-2"
}
```
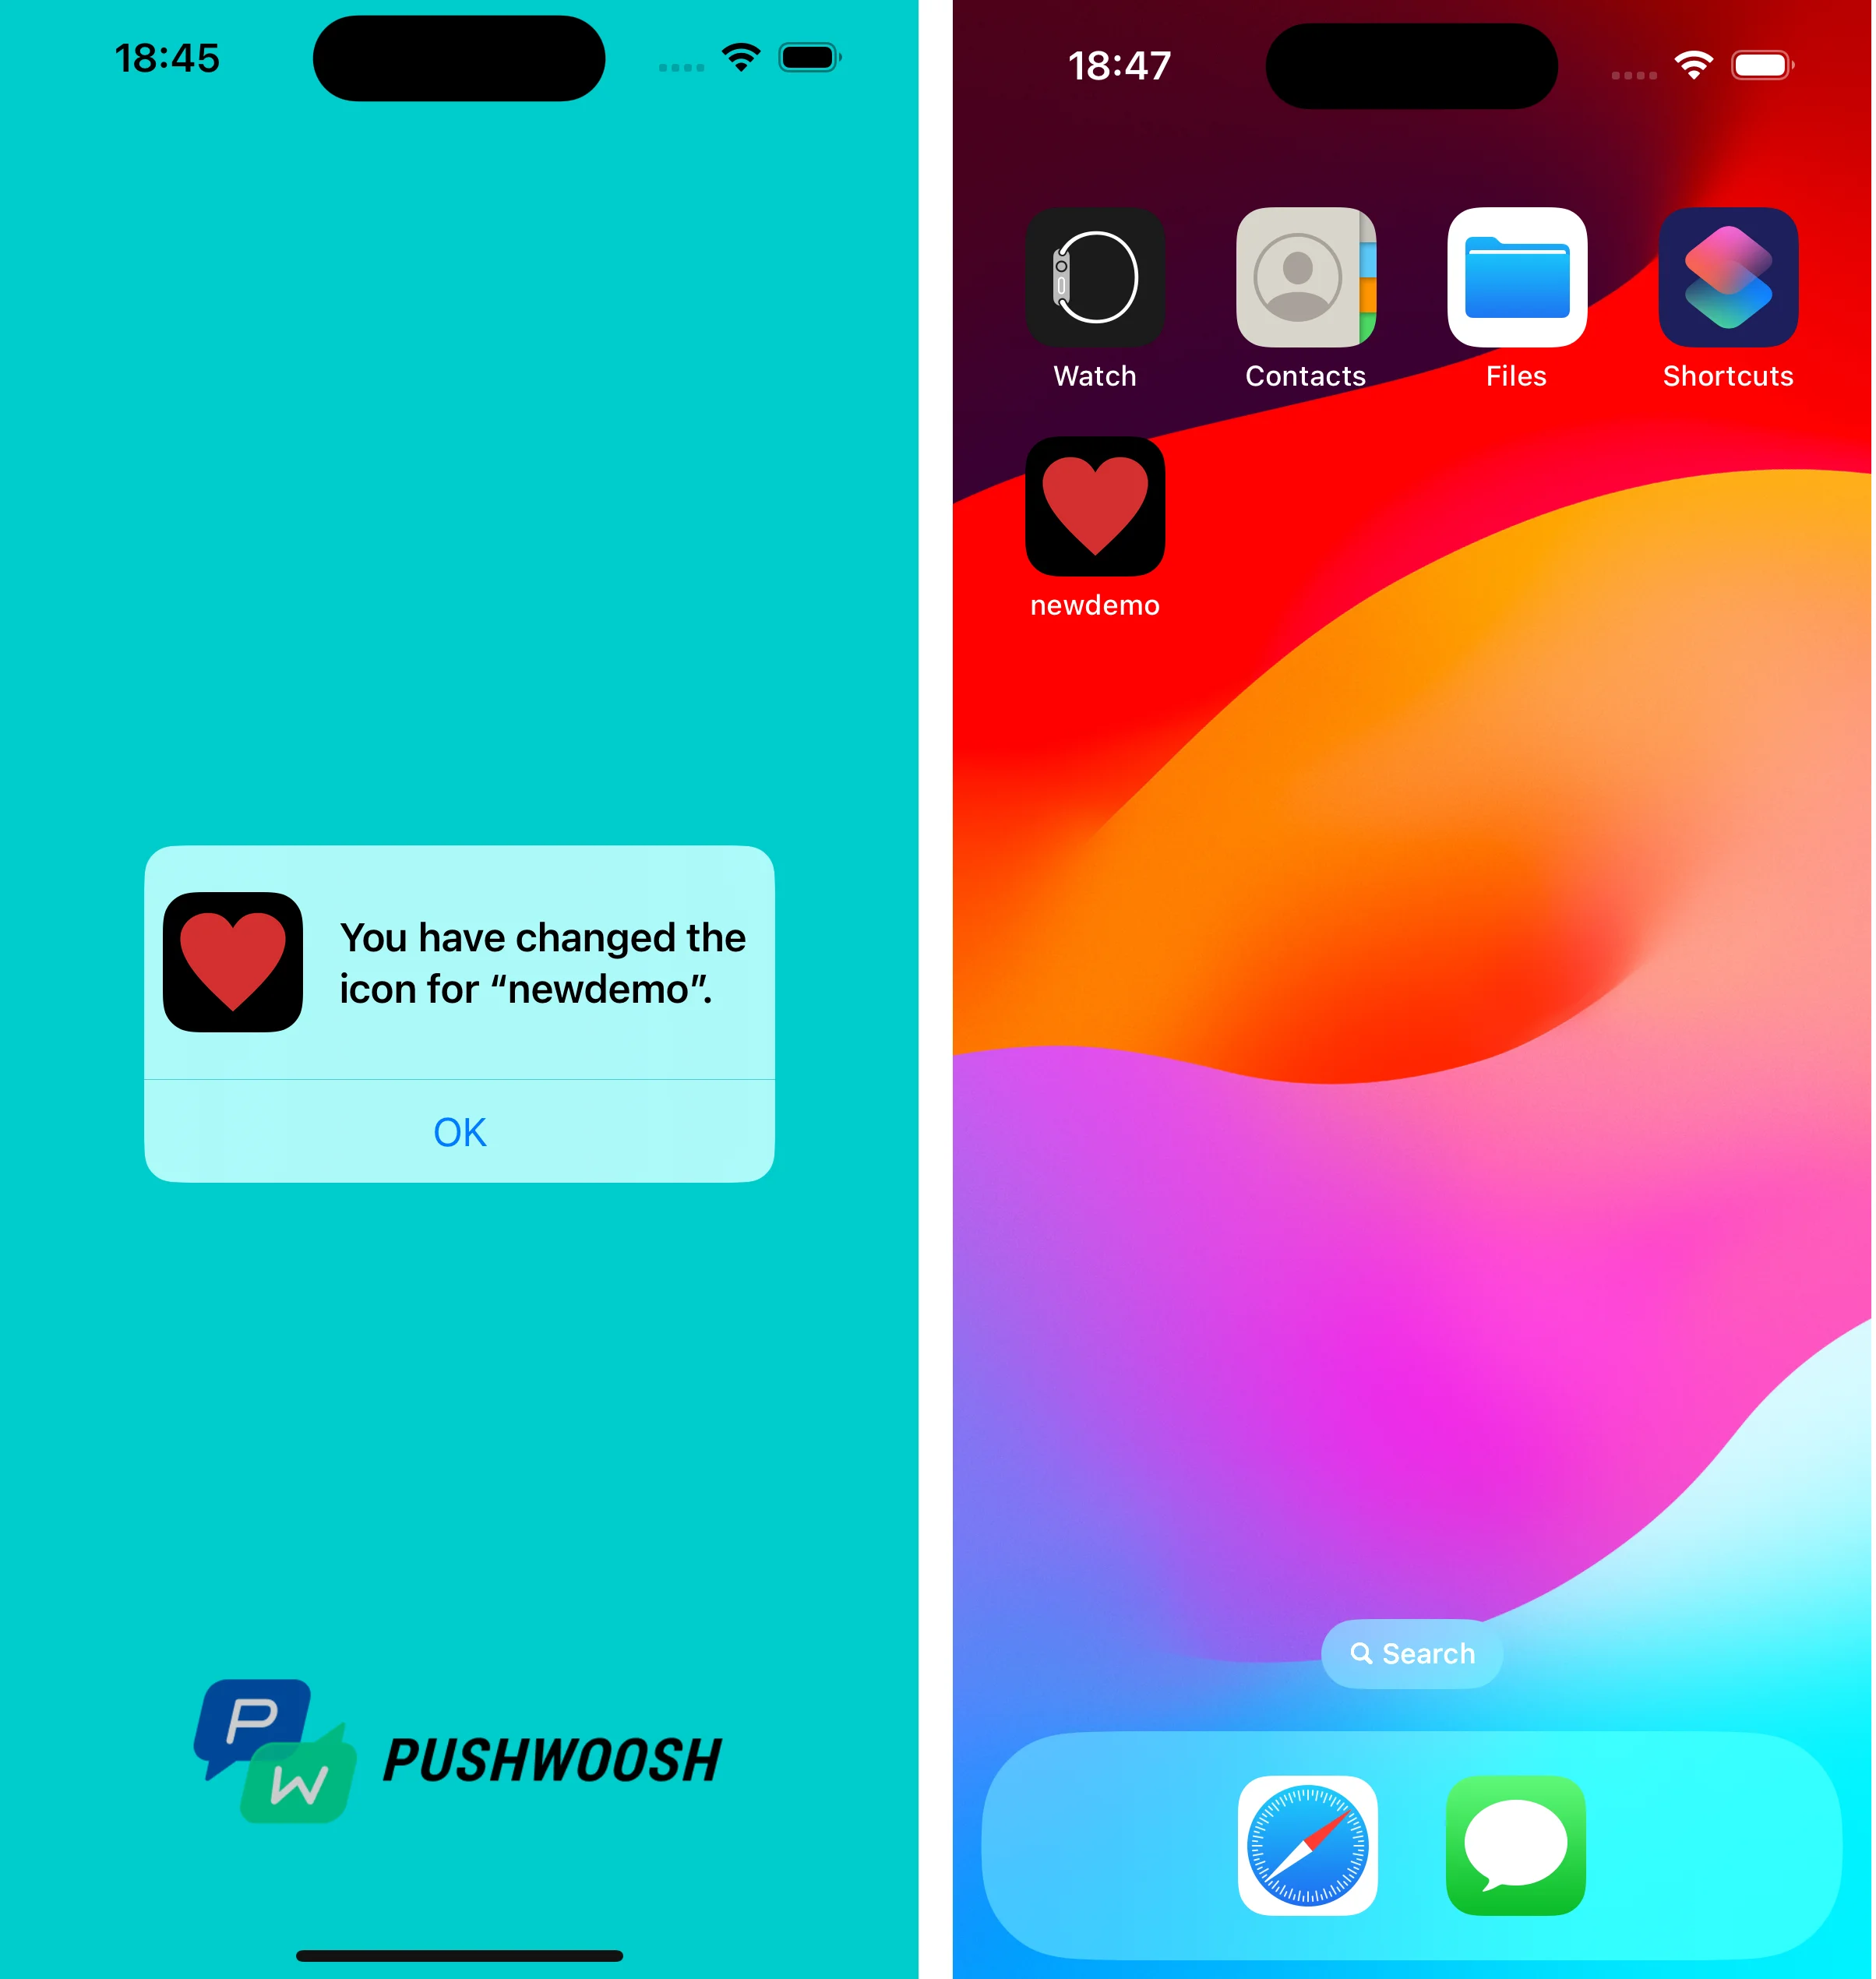
 When tapping on the push notification, the system will prompt you to change the app icon on the device.
 You can find the project utilizing custom data on [GitHub](https://github.com/Pushwoosh/pushwoosh-quickstart-ios/tree/main/customdata/newdemo).