# Apple Wallet pass configuration for iOS
Configure your **Pass Type ID signing certificate** so Pushwoosh can sign and update [Apple Wallet passes](/product/messaging-channels/apple-wallet-passes/) (`.pkpass`) for your app. This is a one-time setup. Once a valid certificate is in place, the Apple Wallet [pass builder](/product/messaging-channels/apple-wallet-passes/pass-builder/) unlocks for the application.
## Create the certificate
1. **Register a Pass Type ID.** In the [Apple Developer Portal](https://developer.apple.com/account/resources/identifiers/list),
go to **Certificates, Identifiers & Profiles → Identifiers**, click **+**, select **Pass Type IDs**,
and enter a reverse-DNS identifier such as `pass.com.yourcompany.passtype`.
2. [**Generate a certificate signing request (CSR)**](https://developer.apple.com/help/account/certificates/create-a-certificate-signing-request)
in Keychain Access. You will upload this file in the next step.
3. **Create the certificate.** Open your Pass Type ID in the Apple Developer Portal and click
**Create Certificate**. Select **Pass Type ID Certificate**, upload your CSR file, and download
the resulting `.cer` file. Double-click it to add it to Keychain Access.
See [Create a certificate](https://developer.apple.com/help/account/capabilities/create-wallet-identifiers-and-certificates) in Apple documentation.
4. **Export the certificate as .p12** from Keychain Access. In the **My Certificates** section,
find your Pass Type ID certificate, right-click it, and select **Export**. Choose `.p12` format
and set an export password. You need this file and password in Pushwoosh.
## Configure the certificate in the Control Panel
1. Go to **Settings → Configure platforms** in the Control Panel.
2. Under **MOBILE PLATFORMS**, find **iOS** and click **SET UP PASSKIT**.
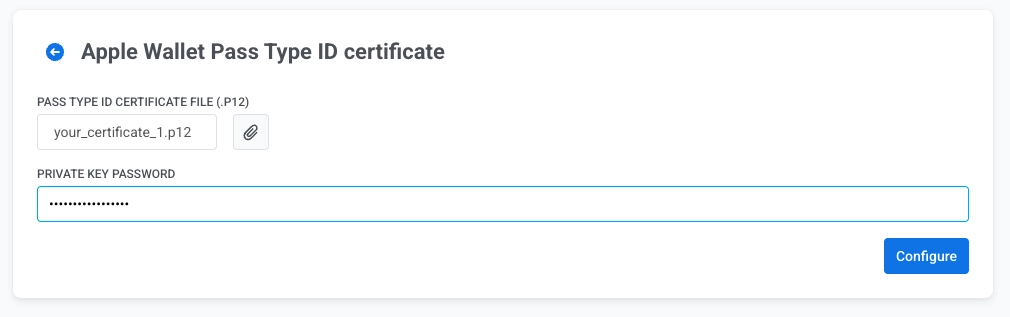
3. Click the attachment icon next to **PASS TYPE ID CERTIFICATE FILE (.P12)** and select your `.p12` file.
4. In **PRIVATE KEY PASSWORD**, enter the password you set when you exported the `.p12` file from Keychain Access.
5. Click **Configure**.
 3. Click the attachment icon next to **PASS TYPE ID CERTIFICATE FILE (.P12)** and select your `.p12` file.
4. In **PRIVATE KEY PASSWORD**, enter the password you set when you exported the `.p12` file from Keychain Access.
5. Click **Configure**.
3. Click the attachment icon next to **PASS TYPE ID CERTIFICATE FILE (.P12)** and select your `.p12` file.
4. In **PRIVATE KEY PASSWORD**, enter the password you set when you exported the `.p12` file from Keychain Access.
5. Click **Configure**.