# iOS certificate-based configuration
Follow this guide to configure the iOS platform manually.
## Generating a certificate request file
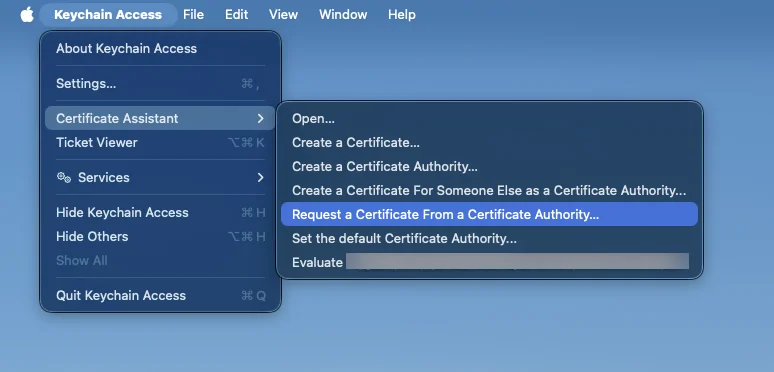
1. Launch **Keychain Access,** go to **Certificate Assistant** and click **Request a Certificate From a Certificate Authority**:
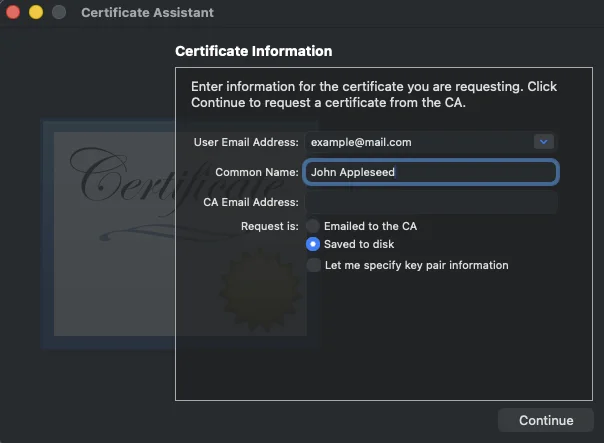
2. Enter the required information and choose **Saved to disk**. You should leave the CA email field blank. Click **Continue** and **Save** the certificate request using the suggested name.
## Creating an APNs certificate in Apple Developer Portal
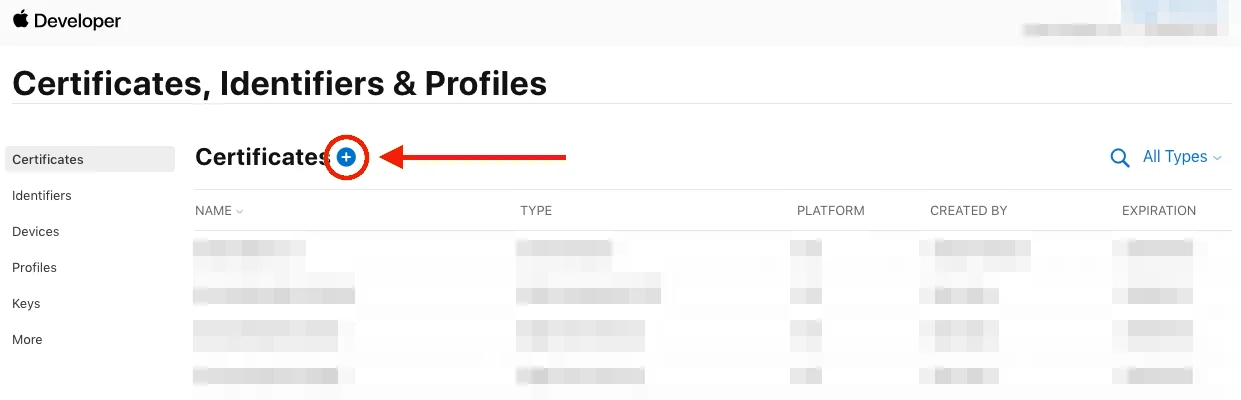
1. Sign in to the [Apple Developer Portal](https://developer.apple.com/account/) and open **Certificates, Identifiers & Profiles** in the **Account** tab. Click **Add**:
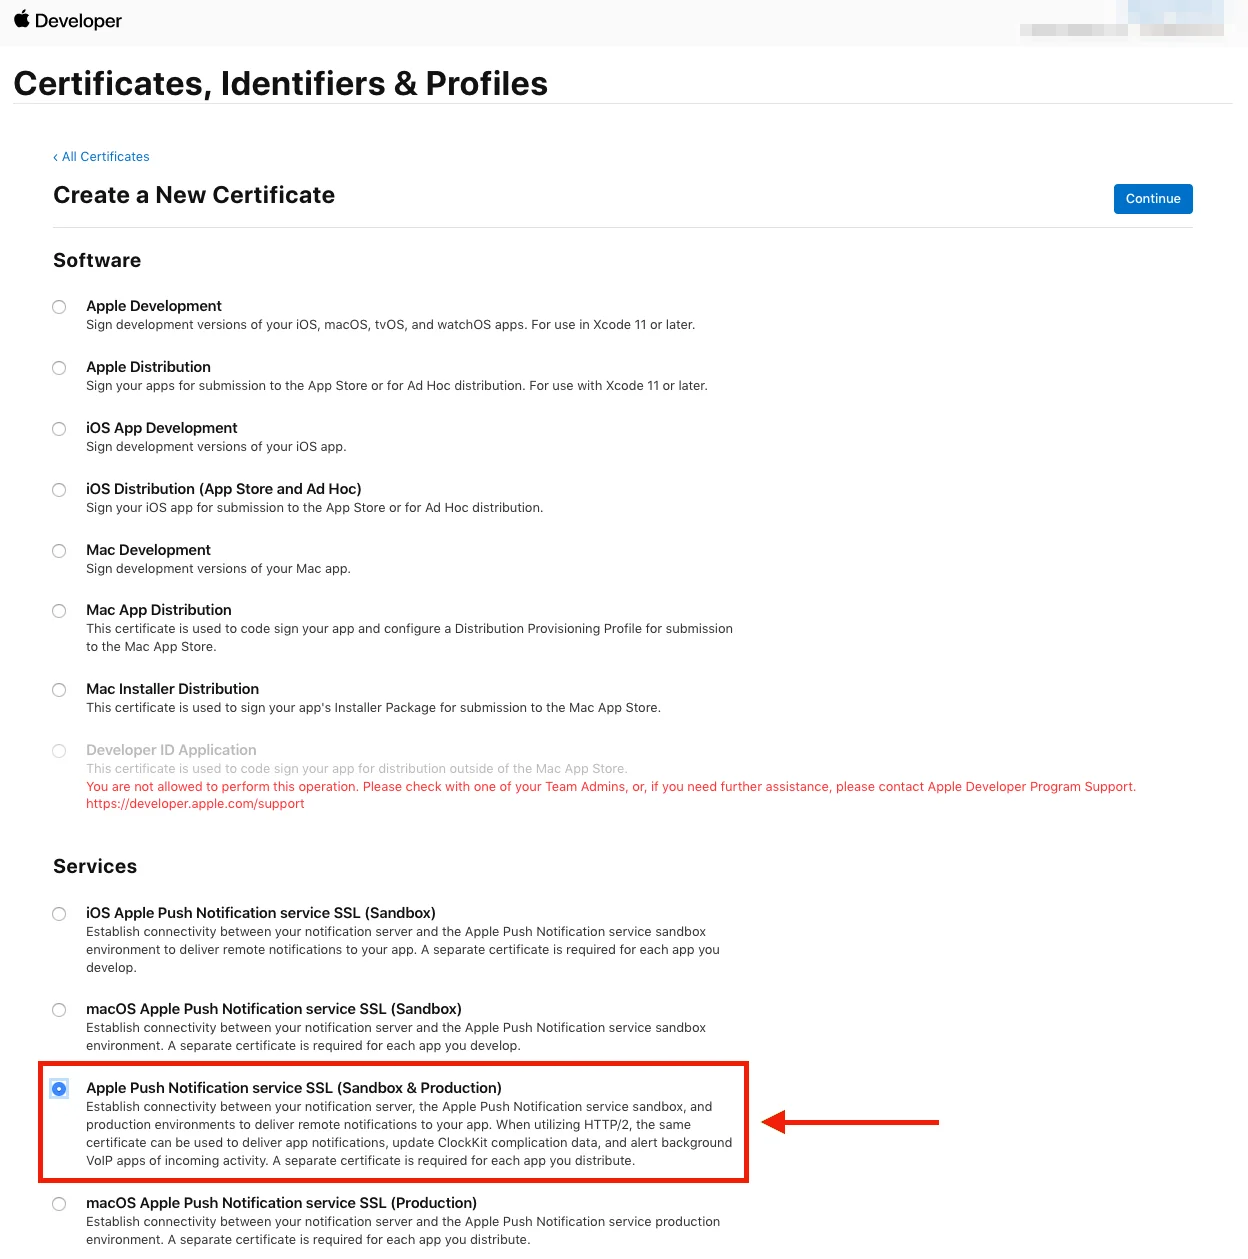
2. Choose the certificate type you need and click **Continue** at the bottom of the page.
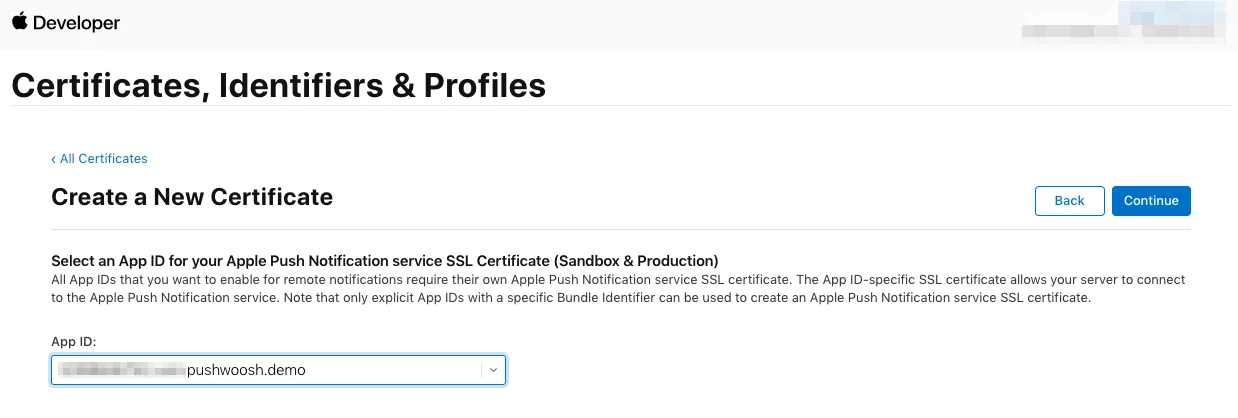
3. Select your project’s **App ID** on the next page, then click **Continue**.
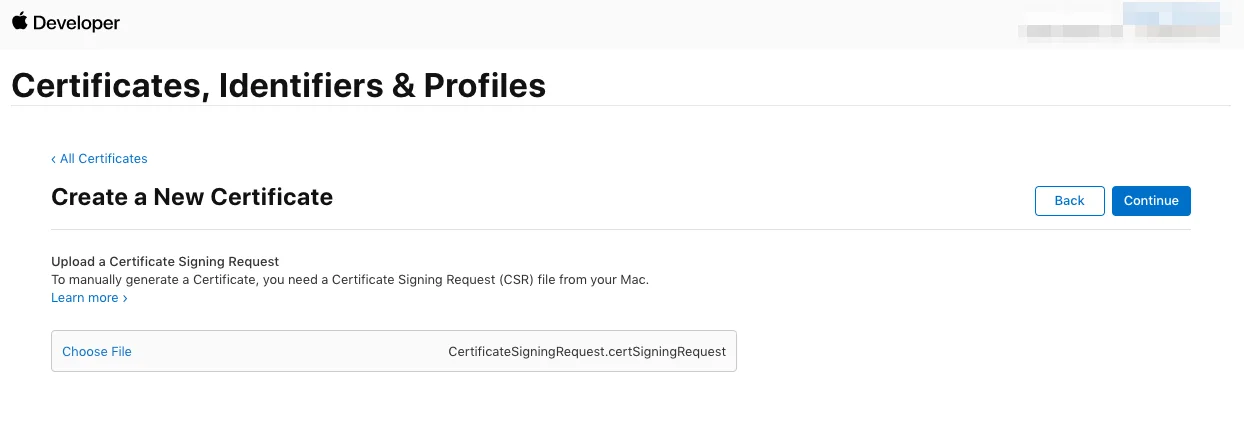
4. Choose the **Certificate Signing Request** you created previously.
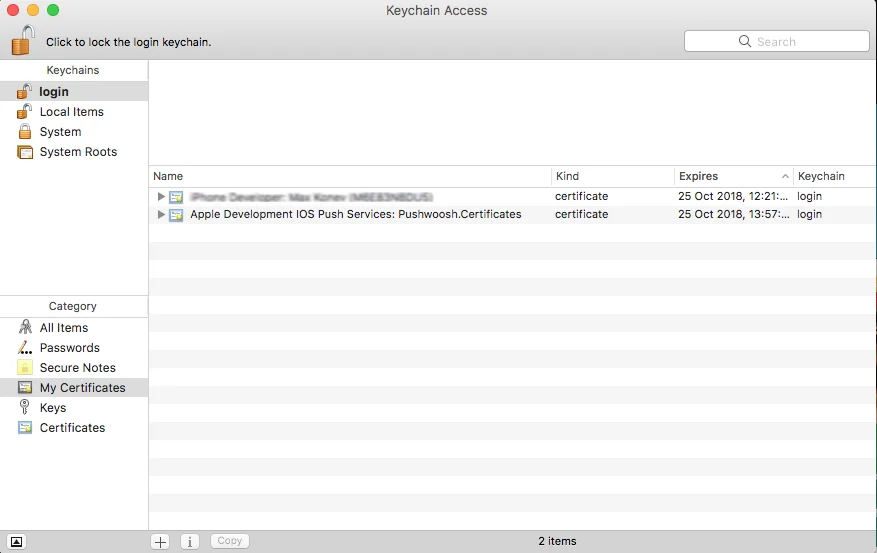
5. Download the certificate and add it to the **Keychain Access**. Once you click on the certificate, **Keychain Access** will be launched.
## Exporting the private key (.p12)
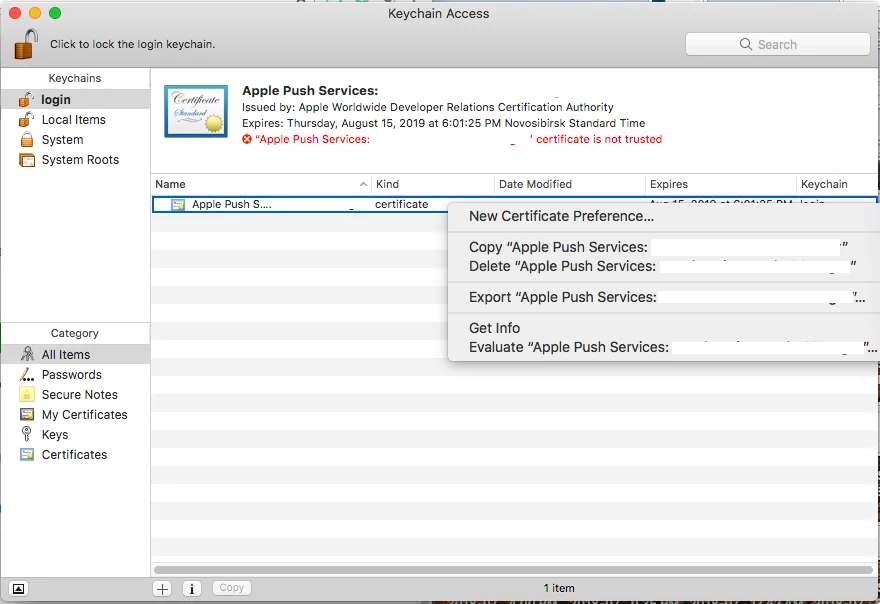
In **Keychain Access**, right-click the certificate you just added and choose Export.
Save the **Personal Information Exchange (.p12)** file. You will be prompted to set up a password.
After you type in your password, click **Allow** to finish exporting the Private Key.
## Configuring the iOS platform in Pushwoosh
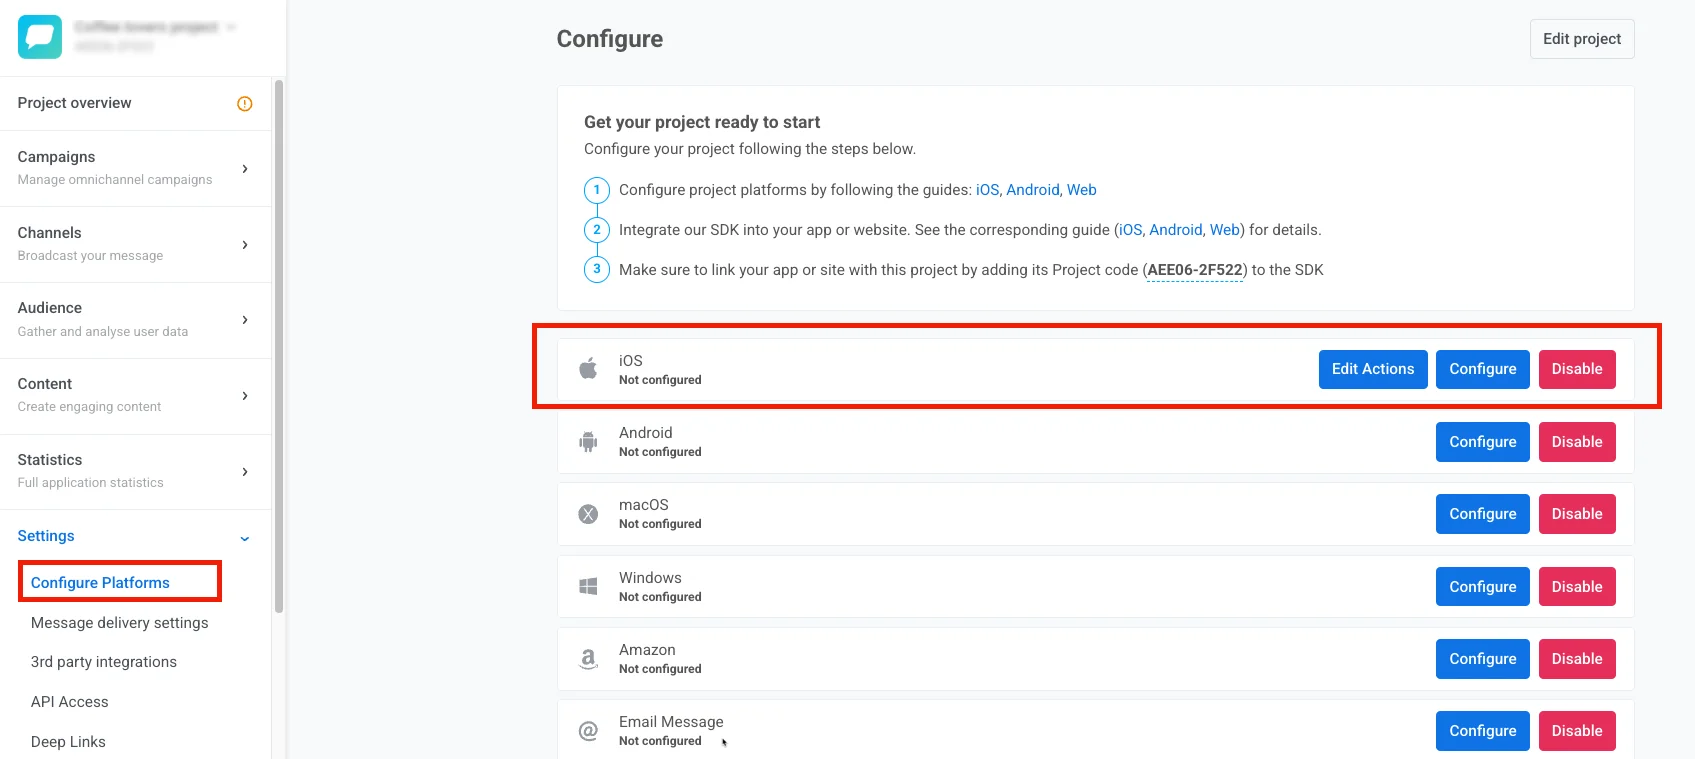
In your Pushwoosh project, go to the **Configure Platforms** section and click **Configure** in the iOS row:
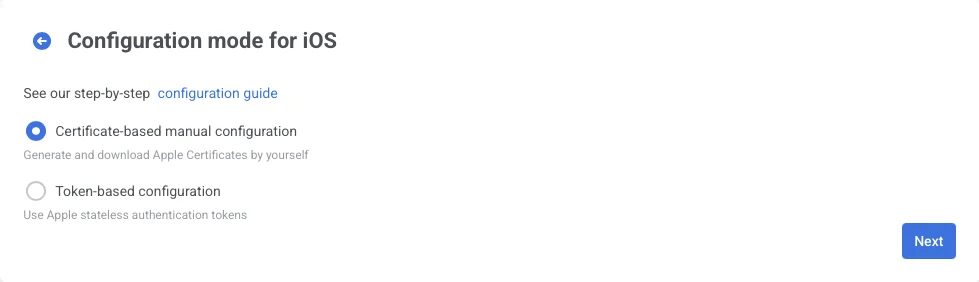
In the opened form, choose **certificate-based manual configuration** and click **Next**:
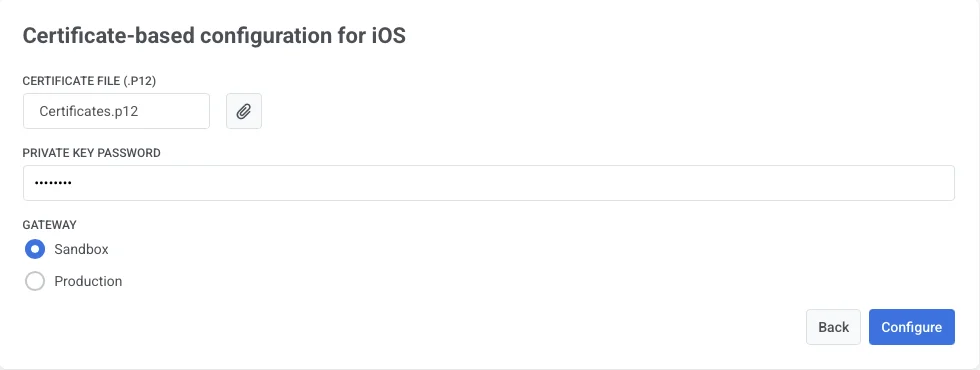
In the opened window, do the following:
* Upload the certificate file (.p12)
* Enter the **Private key password**
* Choose the **Gateway**
Click **Configure** to complete the setup.
 2. Enter the required information and choose **Saved to disk**. You should leave the CA email field blank. Click **Continue** and **Save** the certificate request using the suggested name.
 ## Creating an APNs certificate in Apple Developer Portal
1. Sign in to the [Apple Developer Portal](https://developer.apple.com/account/) and open **Certificates, Identifiers & Profiles** in the **Account** tab. Click **Add**:
## Creating an APNs certificate in Apple Developer Portal
1. Sign in to the [Apple Developer Portal](https://developer.apple.com/account/) and open **Certificates, Identifiers & Profiles** in the **Account** tab. Click **Add**:
 2. Choose the certificate type you need and click **Continue** at the bottom of the page.
 3. Select your project’s **App ID** on the next page, then click **Continue**.
 4. Choose the **Certificate Signing Request** you created previously.
 5. Download the certificate and add it to the **Keychain Access**. Once you click on the certificate, **Keychain Access** will be launched.
 ## Exporting the private key (.p12)
In **Keychain Access**, right-click the certificate you just added and choose Export.
## Exporting the private key (.p12)
In **Keychain Access**, right-click the certificate you just added and choose Export.
 Save the **Personal Information Exchange (.p12)** file. You will be prompted to set up a password.
After you type in your password, click **Allow** to finish exporting the Private Key.
## Configuring the iOS platform in Pushwoosh
In your Pushwoosh project, go to the **Configure Platforms** section and click **Configure** in the iOS row:
Save the **Personal Information Exchange (.p12)** file. You will be prompted to set up a password.
After you type in your password, click **Allow** to finish exporting the Private Key.
## Configuring the iOS platform in Pushwoosh
In your Pushwoosh project, go to the **Configure Platforms** section and click **Configure** in the iOS row:
 In the opened form, choose **certificate-based manual configuration** and click **Next**:
 In the opened window, do the following:
* Upload the certificate file (.p12)
* Enter the **Private key password**
* Choose the **Gateway**
In the opened window, do the following:
* Upload the certificate file (.p12)
* Enter the **Private key password**
* Choose the **Gateway**
 Click **Configure** to complete the setup.