iOS certificate-based configuration
Follow this guide to configure the iOS platform manually.
Generating a certificate request file
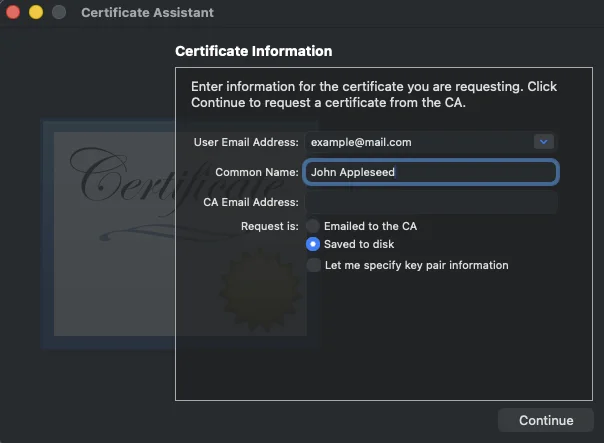
Anchor link to- Launch Keychain Access, go to Certificate Assistant and click Request a Certificate From a Certificate Authority:

- Enter the required information and choose Saved to disk. You should leave the CA email field blank. Click Continue and Save the certificate request using the suggested name.
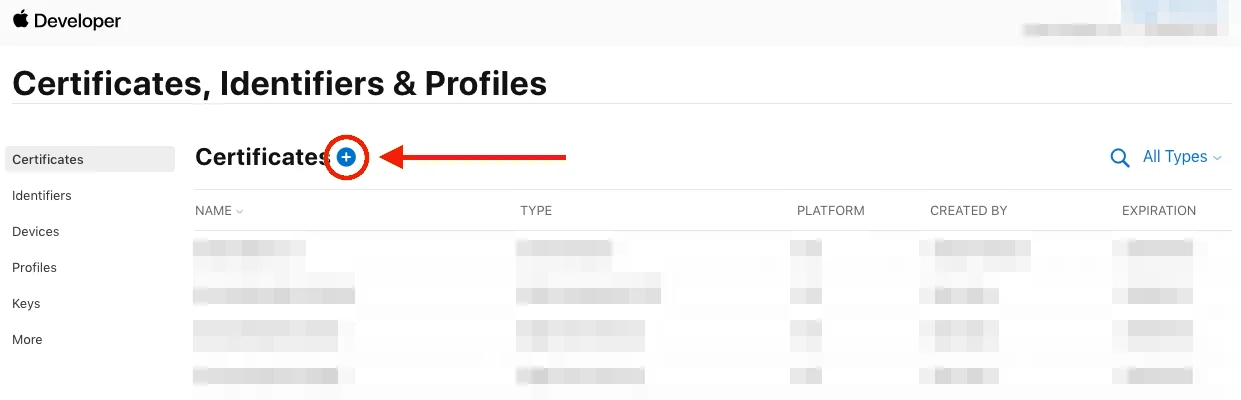
Creating an APNs certificate in Apple Developer Portal
Anchor link to- Sign in to the Apple Developer Portal and open Certificates, Identifiers & Profiles in the Account tab. Click Add:
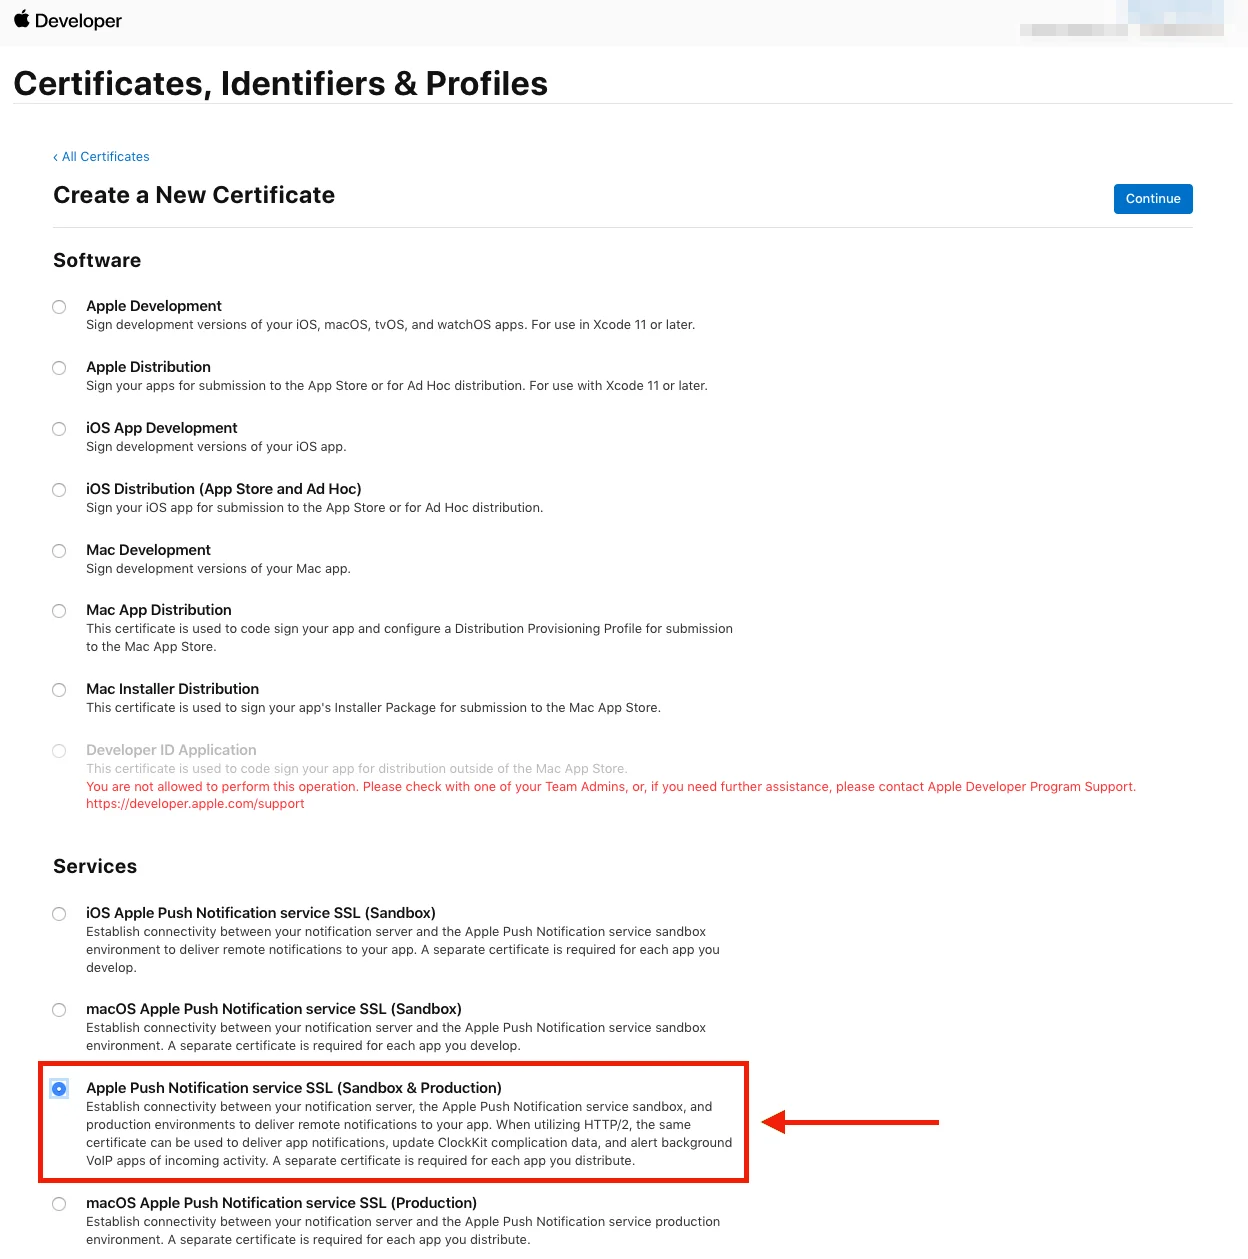
- Choose the certificate type you need and click Continue at the bottom of the page.
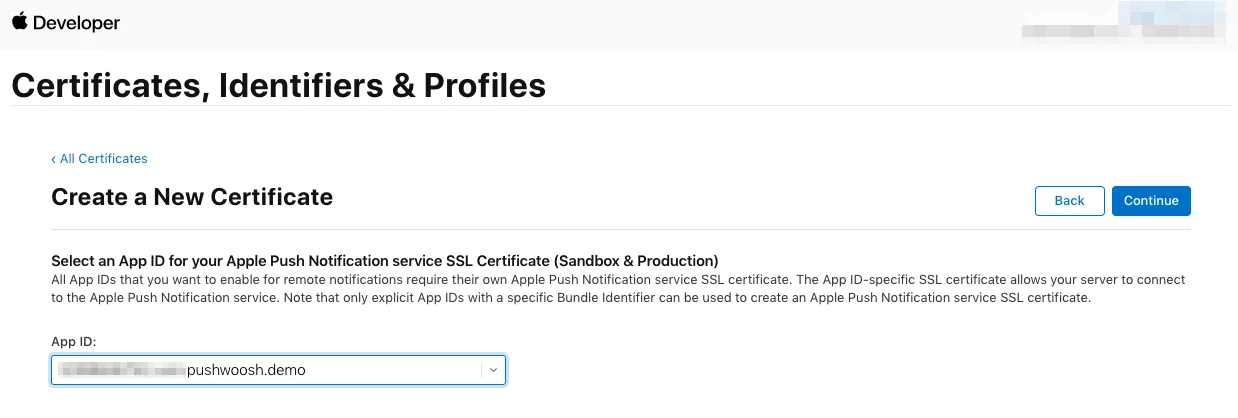
- Select your project’s App ID on the next page, then click Continue.
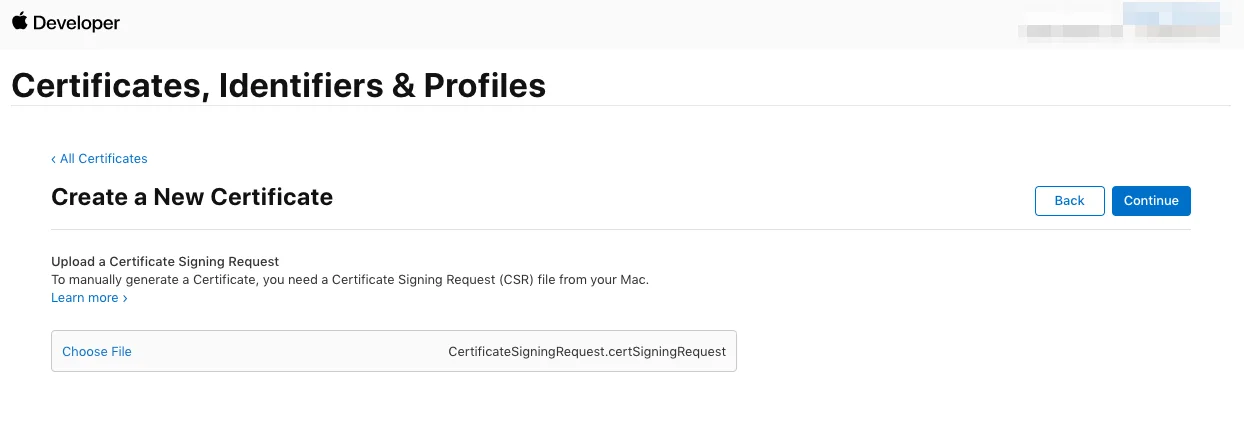
- Choose the Certificate Signing Request you created previously.
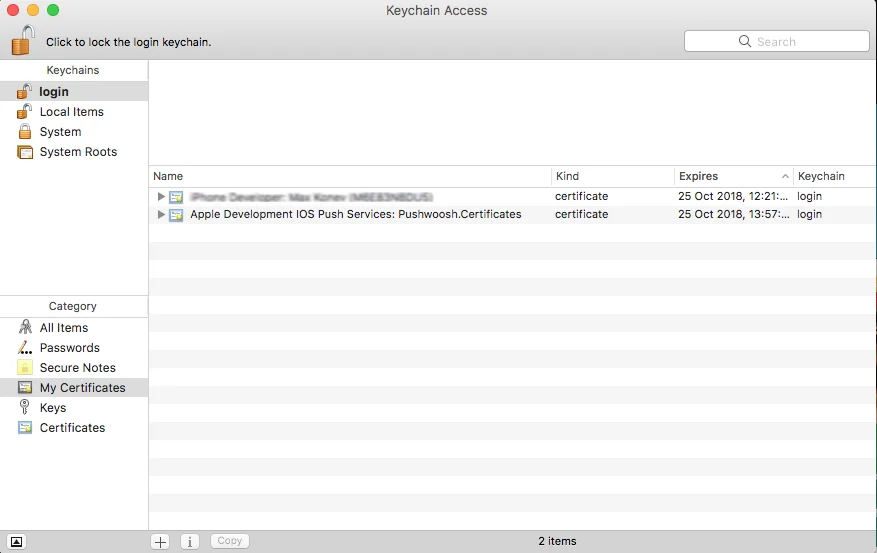
- Download the certificate and add it to the Keychain Access. Once you click on the certificate, Keychain Access will be launched.
Exporting the private key (.p12)
Anchor link toIn Keychain Access, right-click the certificate you just added and choose Export.
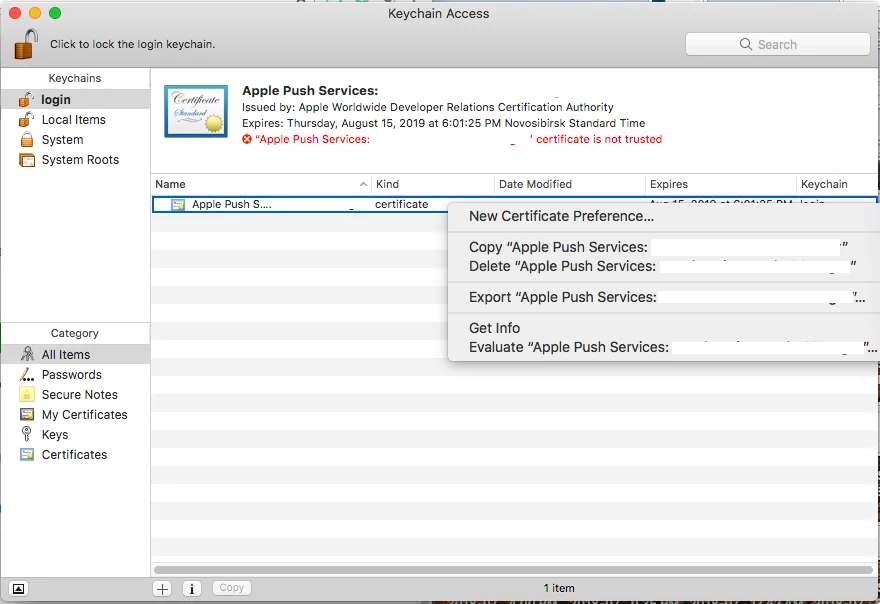
Save the Personal Information Exchange (.p12) file. You will be prompted to set up a password.
After you type in your password, click Allow to finish exporting the Private Key.
Configuring the iOS platform in Pushwoosh
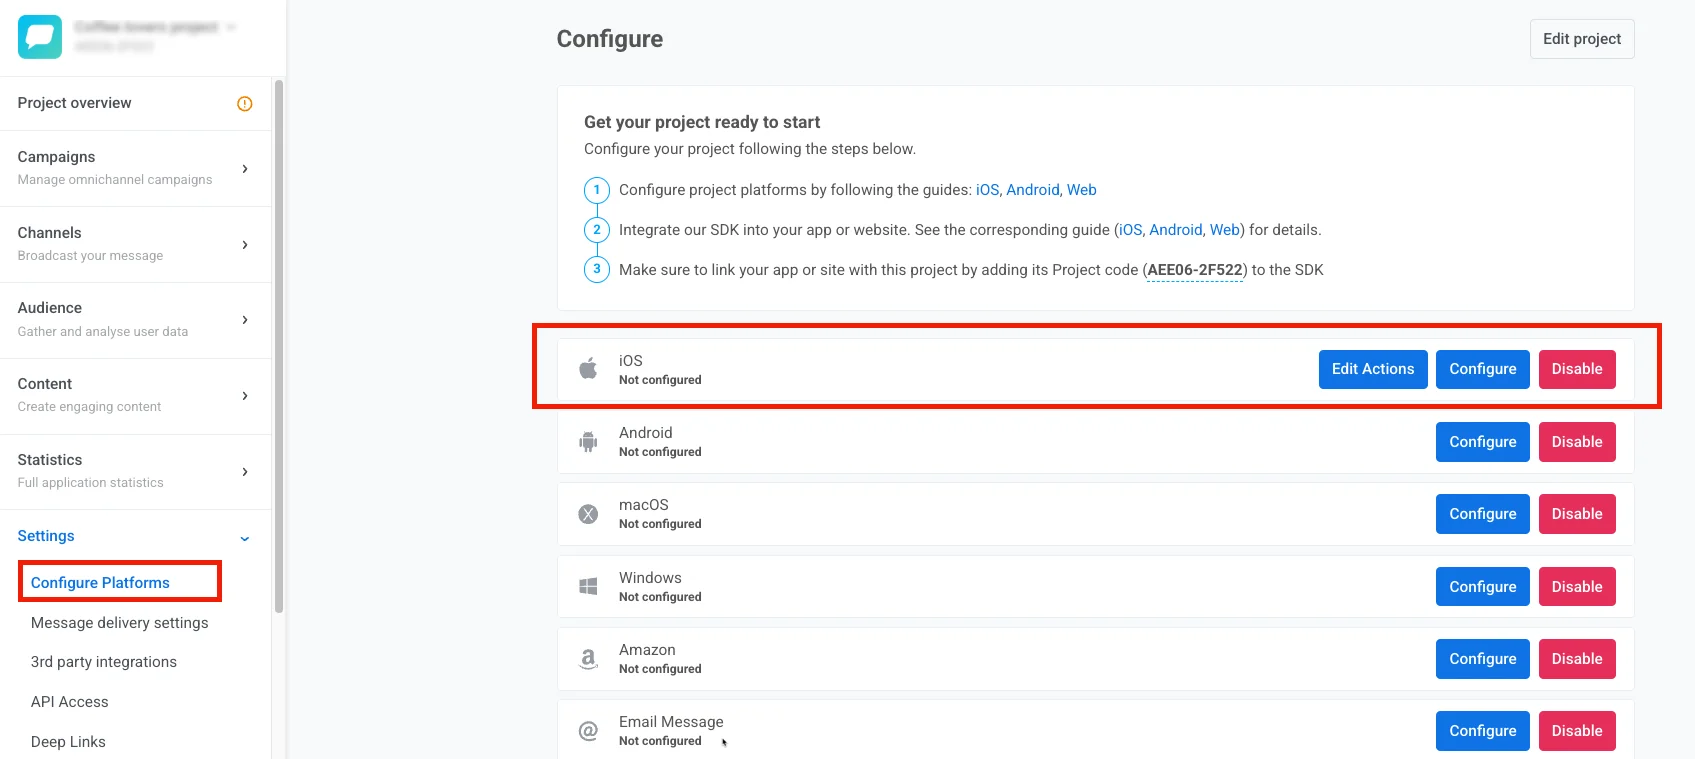
Anchor link toIn your Pushwoosh project, go to the Configure Platforms section and click Configure in the iOS row:
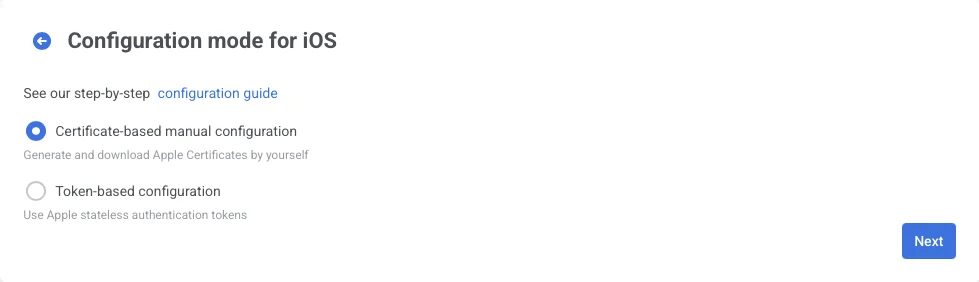
In the opened form, choose certificate-based manual configuration and click Next:
In the opened window, do the following:
- Upload the certificate file (.p12)
- Enter the Private key password
- Choose the Gateway
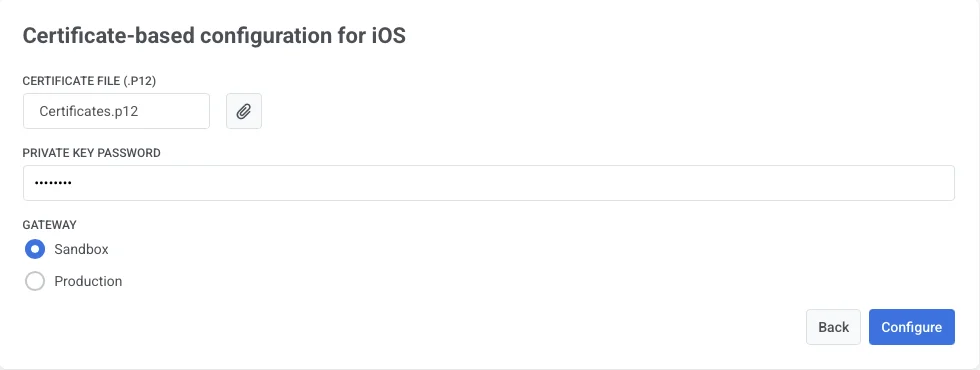
Click Configure to complete the setup.