# iOS Bildkarussell Push-Benachrichtigungen
Das Protokoll `UNNotificationContentExtension` stellt den Einstiegspunkt für eine App-Erweiterung für Benachrichtigungsinhalte bereit, die eine benutzerdefinierte Oberfläche für die Benachrichtigungen Ihrer App anzeigt.
## 1. Notification Content Extension hinzufügen
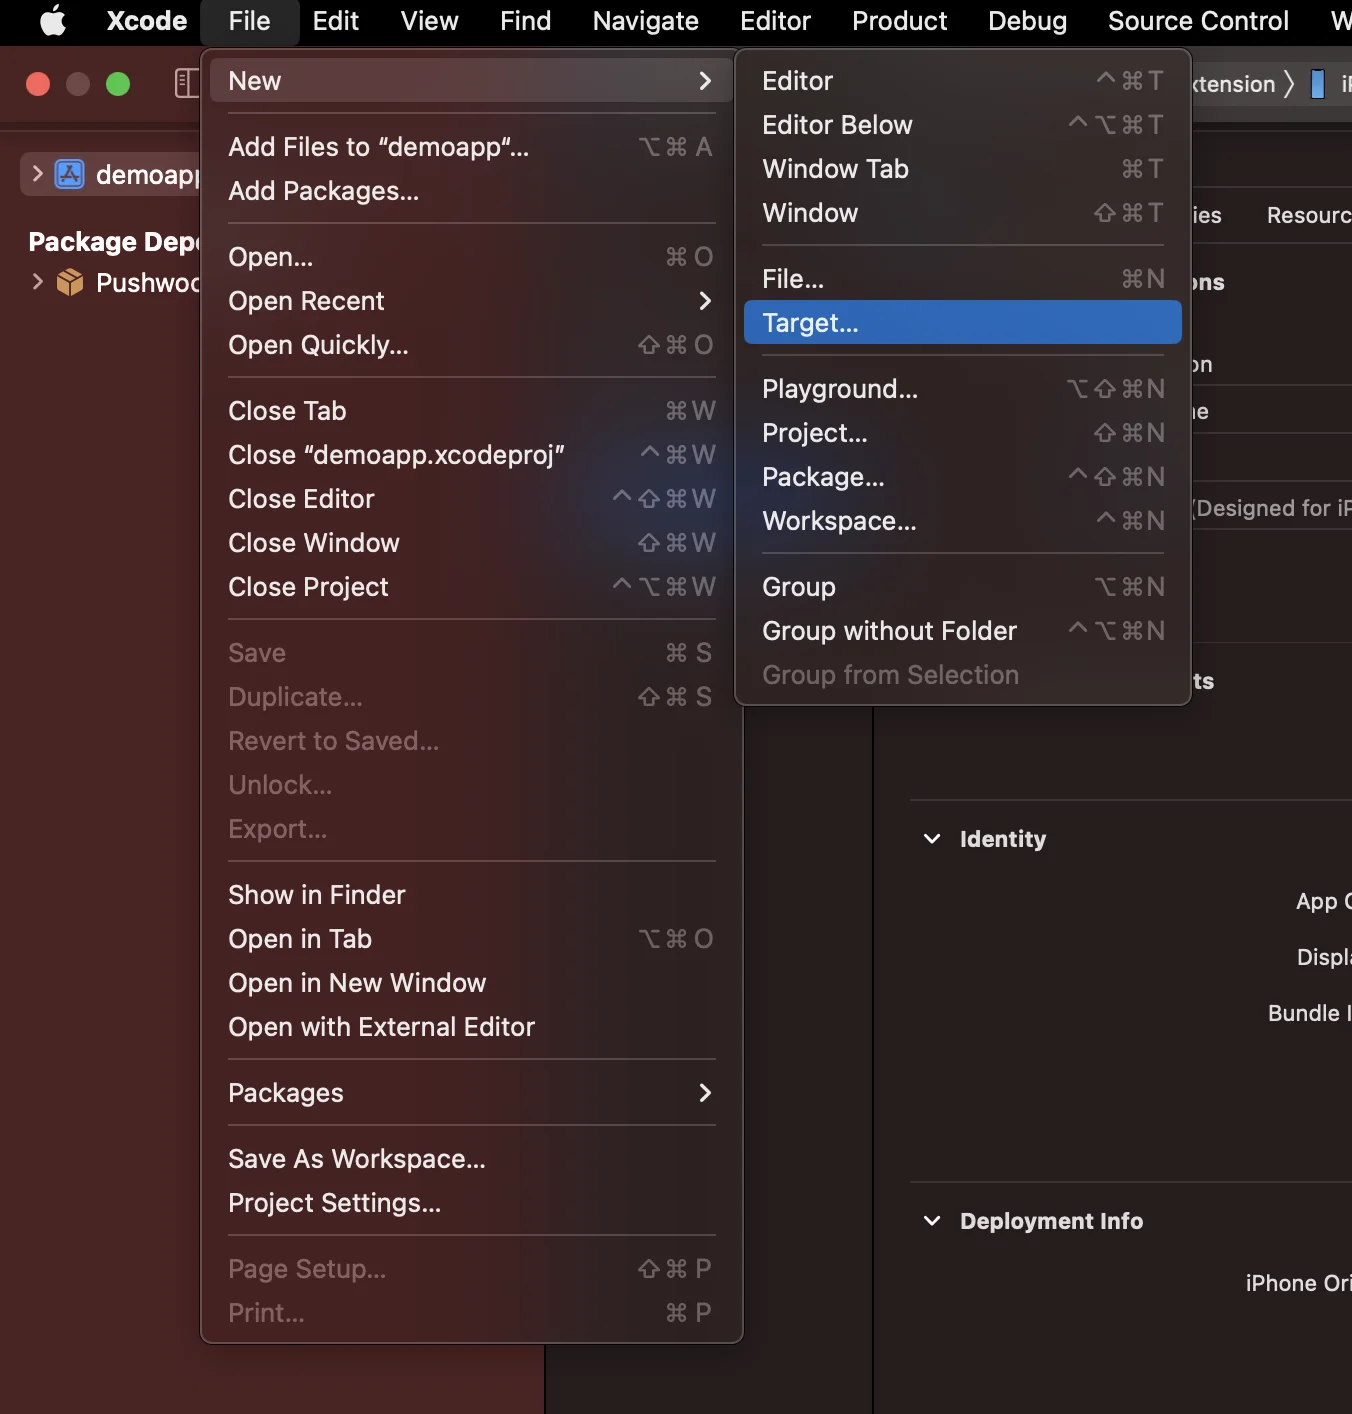
Wählen Sie in Xcode Datei > Neu > Ziel...
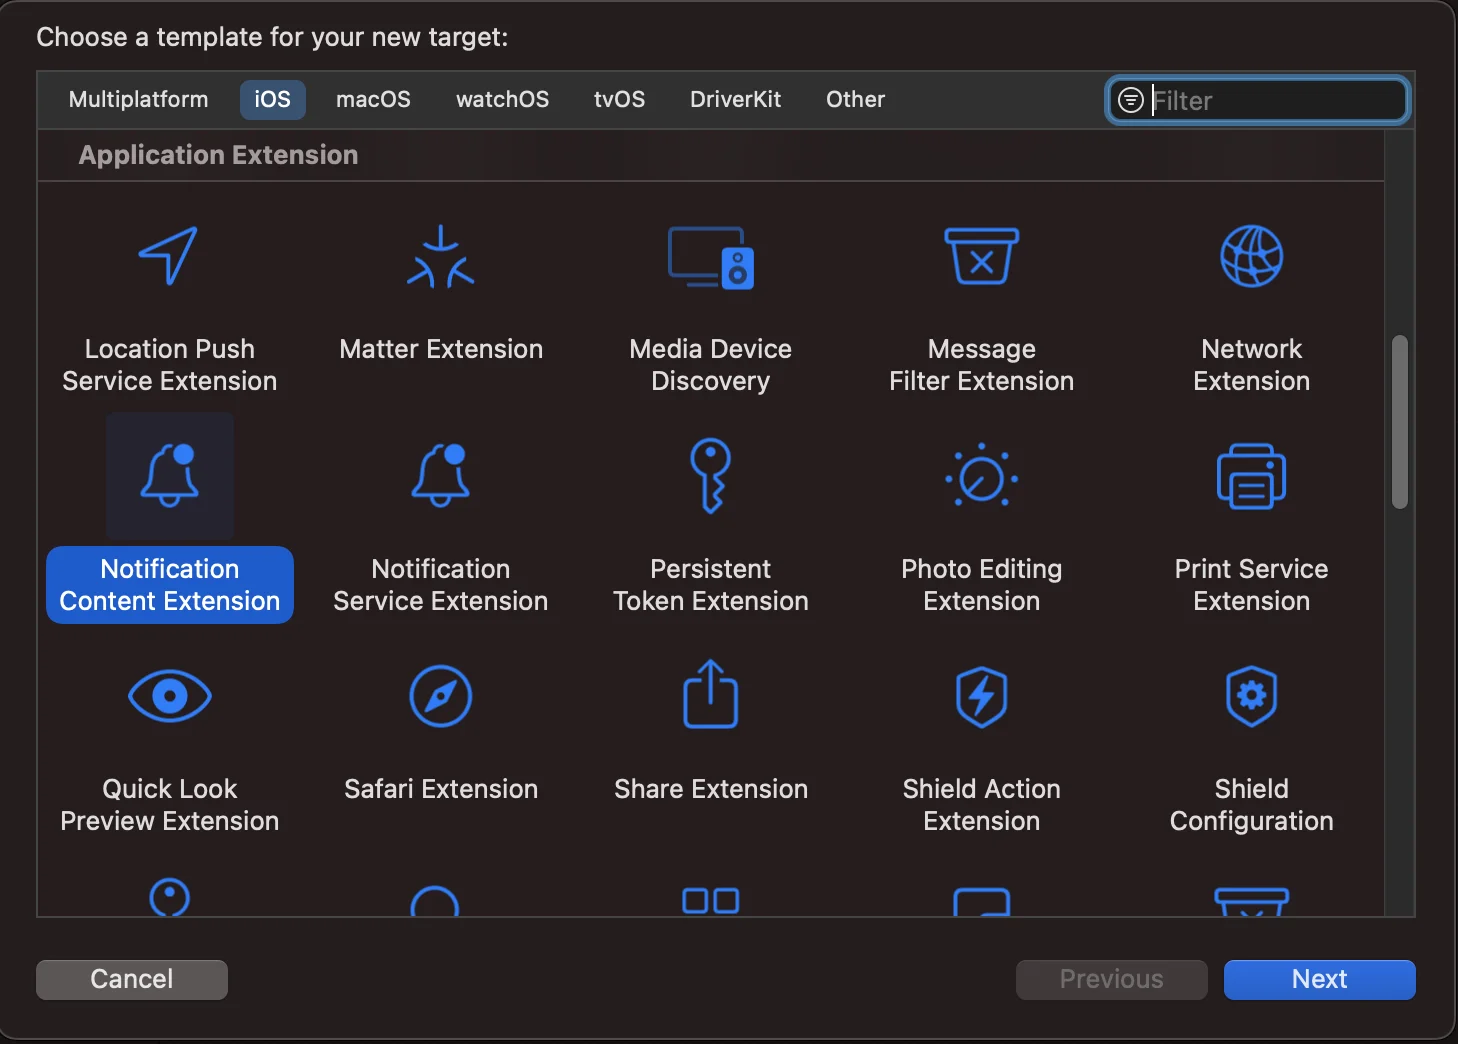
 Wählen Sie die Notification Content Extension
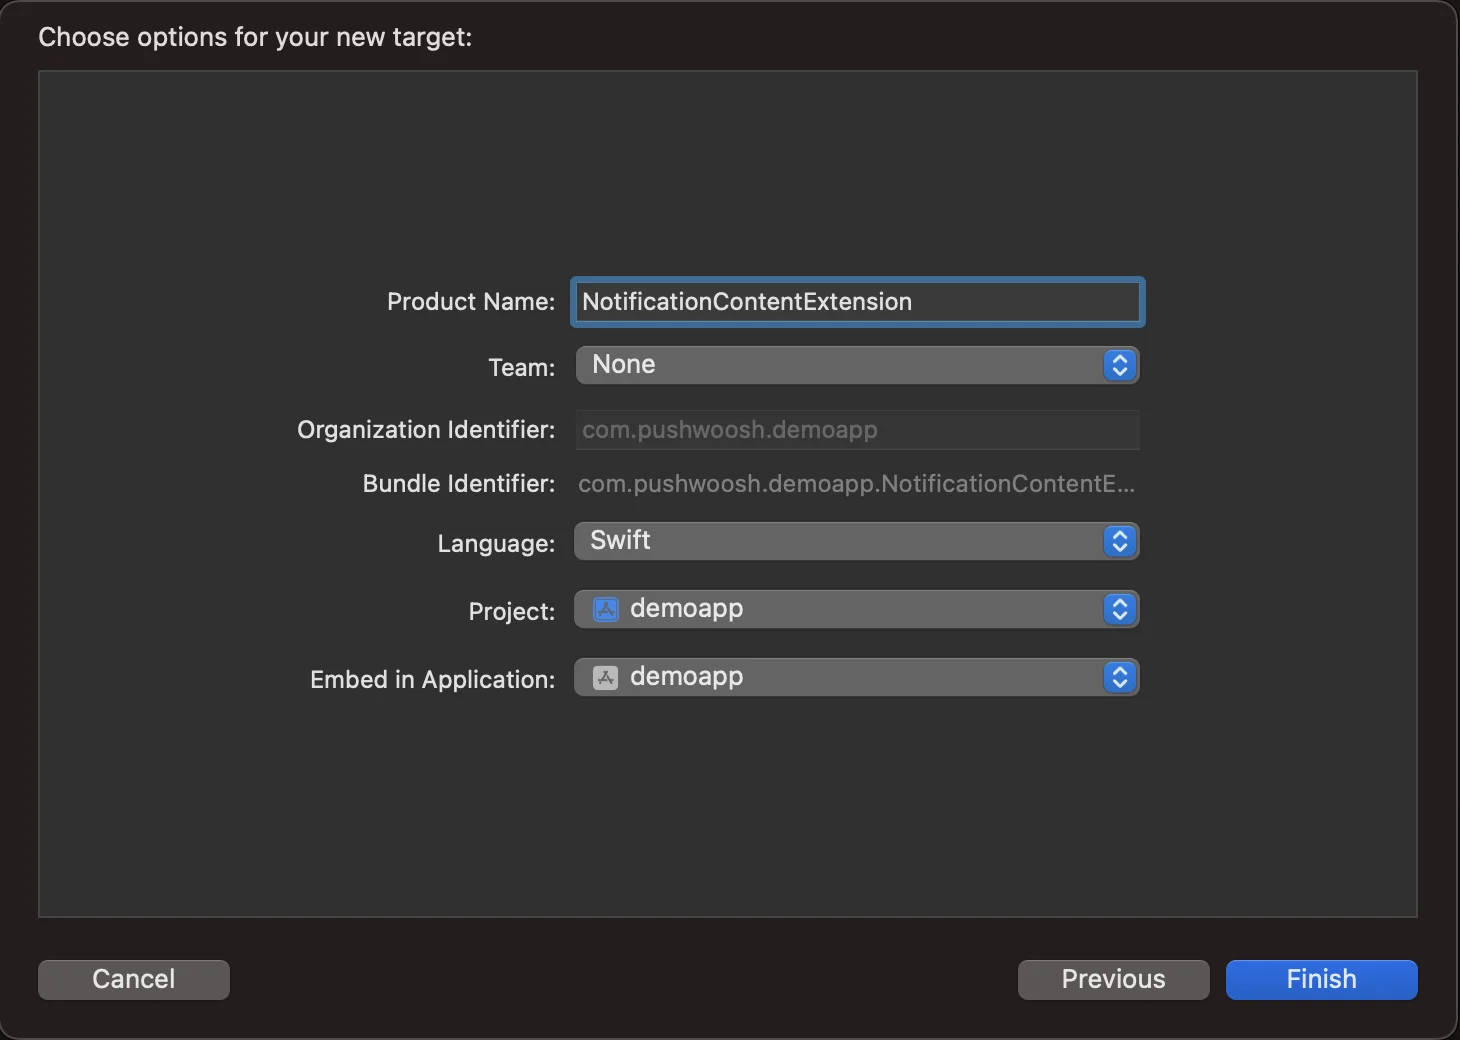
 Nennen Sie es **NotificationContentExtension**
 ## 2. Code zu Ihrer App hinzufügen
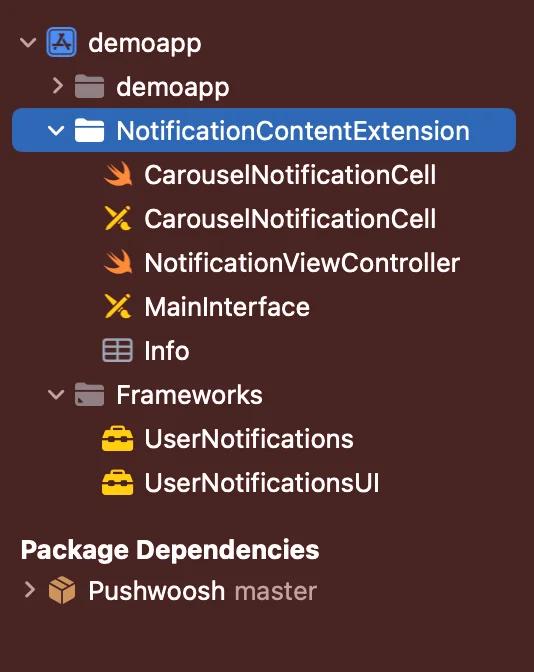
[Laden Sie PWNotificationExtension von Github herunter](https://github.com/Pushwoosh/PWNotificationContentExtension) und ersetzen Sie die **`PWNotificationContentExtension`** in Ihrem Xcode-Projekt durch dieselbe Datei von Github.
## 2. Code zu Ihrer App hinzufügen
[Laden Sie PWNotificationExtension von Github herunter](https://github.com/Pushwoosh/PWNotificationContentExtension) und ersetzen Sie die **`PWNotificationContentExtension`** in Ihrem Xcode-Projekt durch dieselbe Datei von Github.
 ## 3. Benachrichtigungskategorie
Fügen Sie den folgenden Code zu Ihrer Datei **AppDelegate.swift** hinzu
```swift
func application(_ application: UIApplication, didFinishLaunchingWithOptions launchOptions: [UIApplication.LaunchOptionsKey: Any]?) -> Bool {
if #available(iOS 10.0, *) {
let options: UNAuthorizationOptions = [.alert]
UNUserNotificationCenter.current().requestAuthorization(options: options) { (authorized, error) in
if authorized {
let categoryIdentifier = "PWNotificationCarousel"
let carouselNext = UNNotificationAction(identifier: "PWNotificationCarousel.next", title: "➡️ RIGHT", options: [])
let carouselPrevious = UNNotificationAction(identifier: "PWNotificationCarousel.previous", title: "⬅️ LEFT", options: [])
let carouselCategory = UNNotificationCategory(identifier: categoryIdentifier, actions: [carouselNext, carouselPrevious], intentIdentifiers: [], options: [])
UNUserNotificationCenter.current().setNotificationCategories([carouselCategory])
}
}
}
return true
}
```
## 4. Eine Push-Benachrichtigung senden
**iOS-Kategorie:**
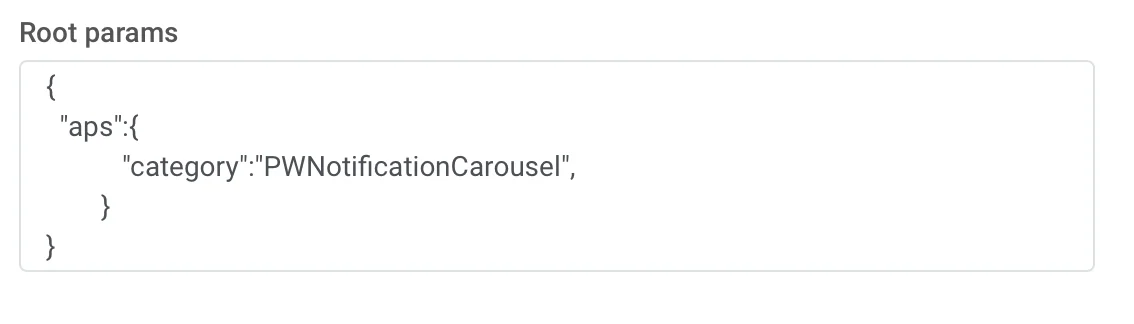
Senden Sie eine Push-Benachrichtigung mit APS-JSON:
## 3. Benachrichtigungskategorie
Fügen Sie den folgenden Code zu Ihrer Datei **AppDelegate.swift** hinzu
```swift
func application(_ application: UIApplication, didFinishLaunchingWithOptions launchOptions: [UIApplication.LaunchOptionsKey: Any]?) -> Bool {
if #available(iOS 10.0, *) {
let options: UNAuthorizationOptions = [.alert]
UNUserNotificationCenter.current().requestAuthorization(options: options) { (authorized, error) in
if authorized {
let categoryIdentifier = "PWNotificationCarousel"
let carouselNext = UNNotificationAction(identifier: "PWNotificationCarousel.next", title: "➡️ RIGHT", options: [])
let carouselPrevious = UNNotificationAction(identifier: "PWNotificationCarousel.previous", title: "⬅️ LEFT", options: [])
let carouselCategory = UNNotificationCategory(identifier: categoryIdentifier, actions: [carouselNext, carouselPrevious], intentIdentifiers: [], options: [])
UNUserNotificationCenter.current().setNotificationCategories([carouselCategory])
}
}
}
return true
}
```
## 4. Eine Push-Benachrichtigung senden
**iOS-Kategorie:**
Senden Sie eine Push-Benachrichtigung mit APS-JSON:
 ```json
{
"aps":{
"category":"PWNotificationCarousel"
}
}
```
**Benutzerdefinierte Daten**
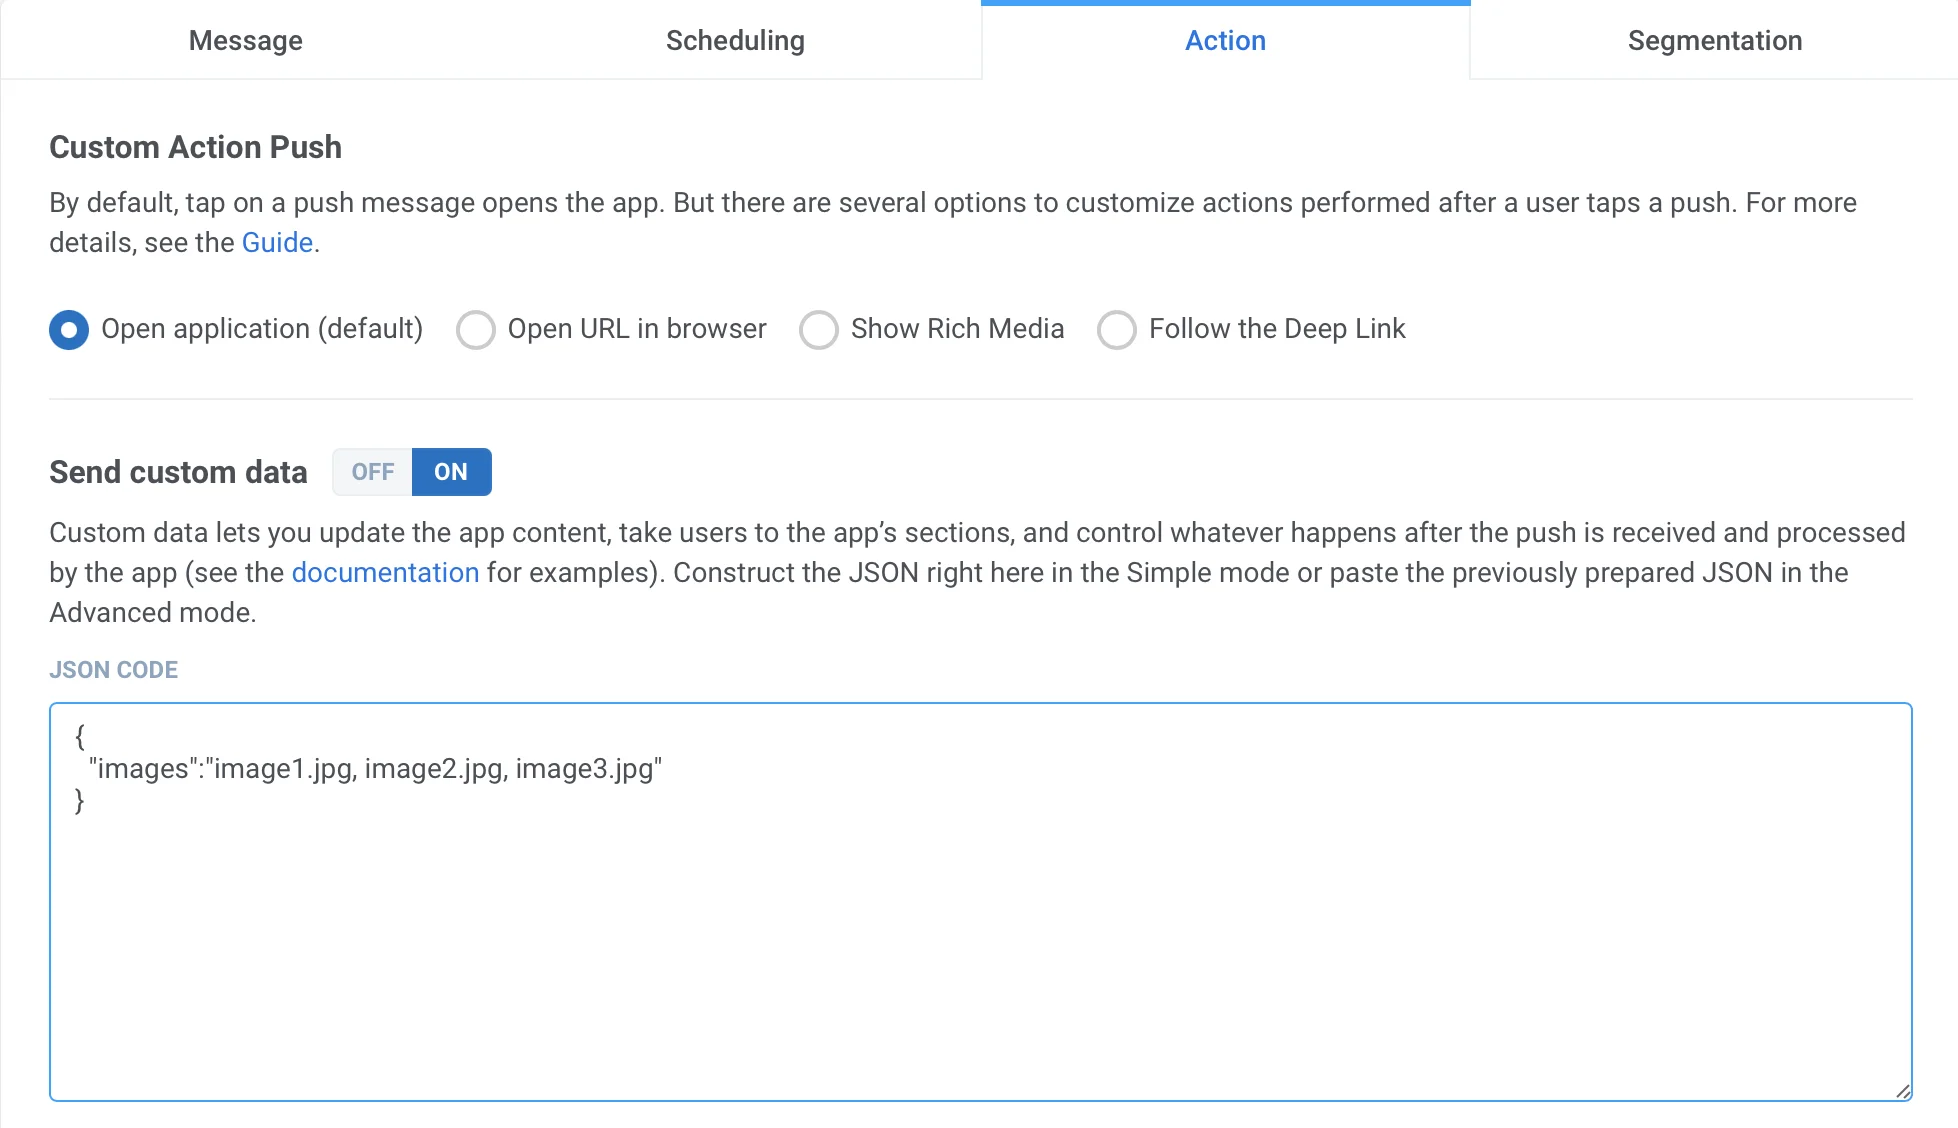
Sie müssen die Bild-URLs durch ein Komma `,` getrennt auflisten
```json
{
"aps":{
"category":"PWNotificationCarousel"
}
}
```
**Benutzerdefinierte Daten**
Sie müssen die Bild-URLs durch ein Komma `,` getrennt auflisten
 ```json
{
"images":"image1.jpg, image2.jpg, image3.jpg"
}
```
Sobald Sie die Push-Benachrichtigung erhalten, müssen Sie je nach iOS-Version lange darauf drücken oder nach links wischen und auf „Anzeigen“ klicken, um die Benachrichtigung zu erweitern.
```json
{
"images":"image1.jpg, image2.jpg, image3.jpg"
}
```
Sobald Sie die Push-Benachrichtigung erhalten, müssen Sie je nach iOS-Version lange darauf drücken oder nach links wischen und auf „Anzeigen“ klicken, um die Benachrichtigung zu erweitern.