# إعداد الشارات لـ React Native
نظرًا لأن إضافة React Native لا تحتوي على رأس PWNotificationExtensionManager، يجب عليك تنفيذ عدة خطوات إضافية لتطبيق الشارات لمشروع React Native الخاص بك.
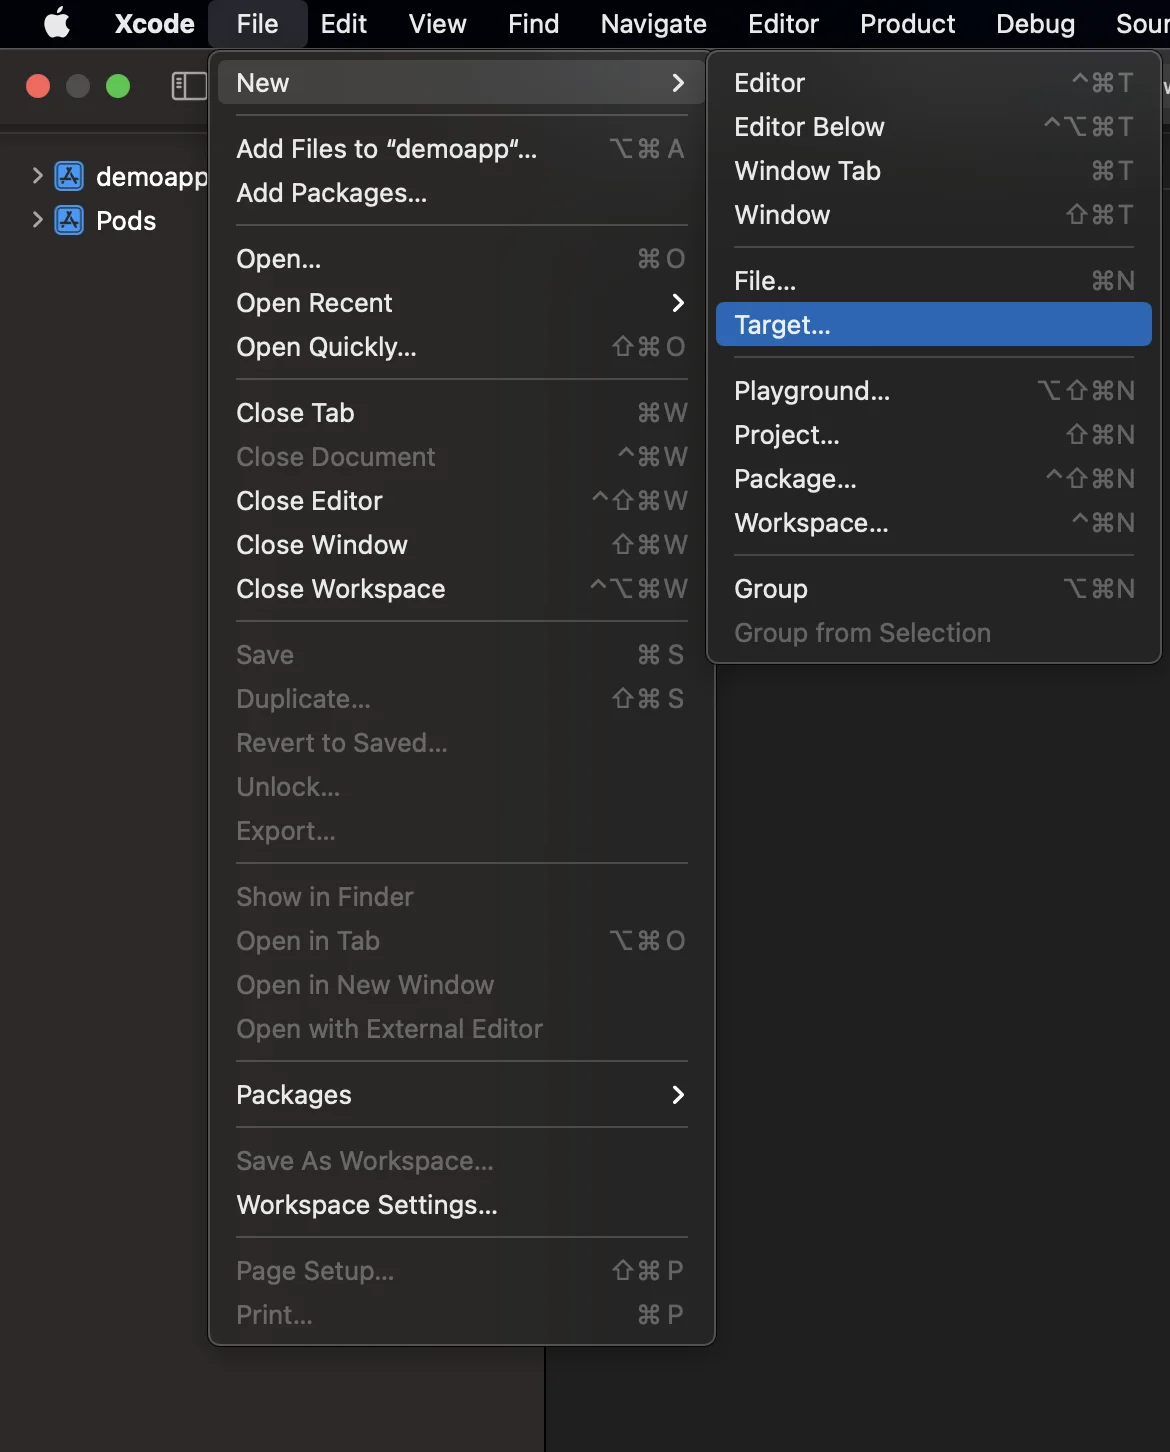
#### 1. أضف Notification Service Extension (File -> New -> Target...)
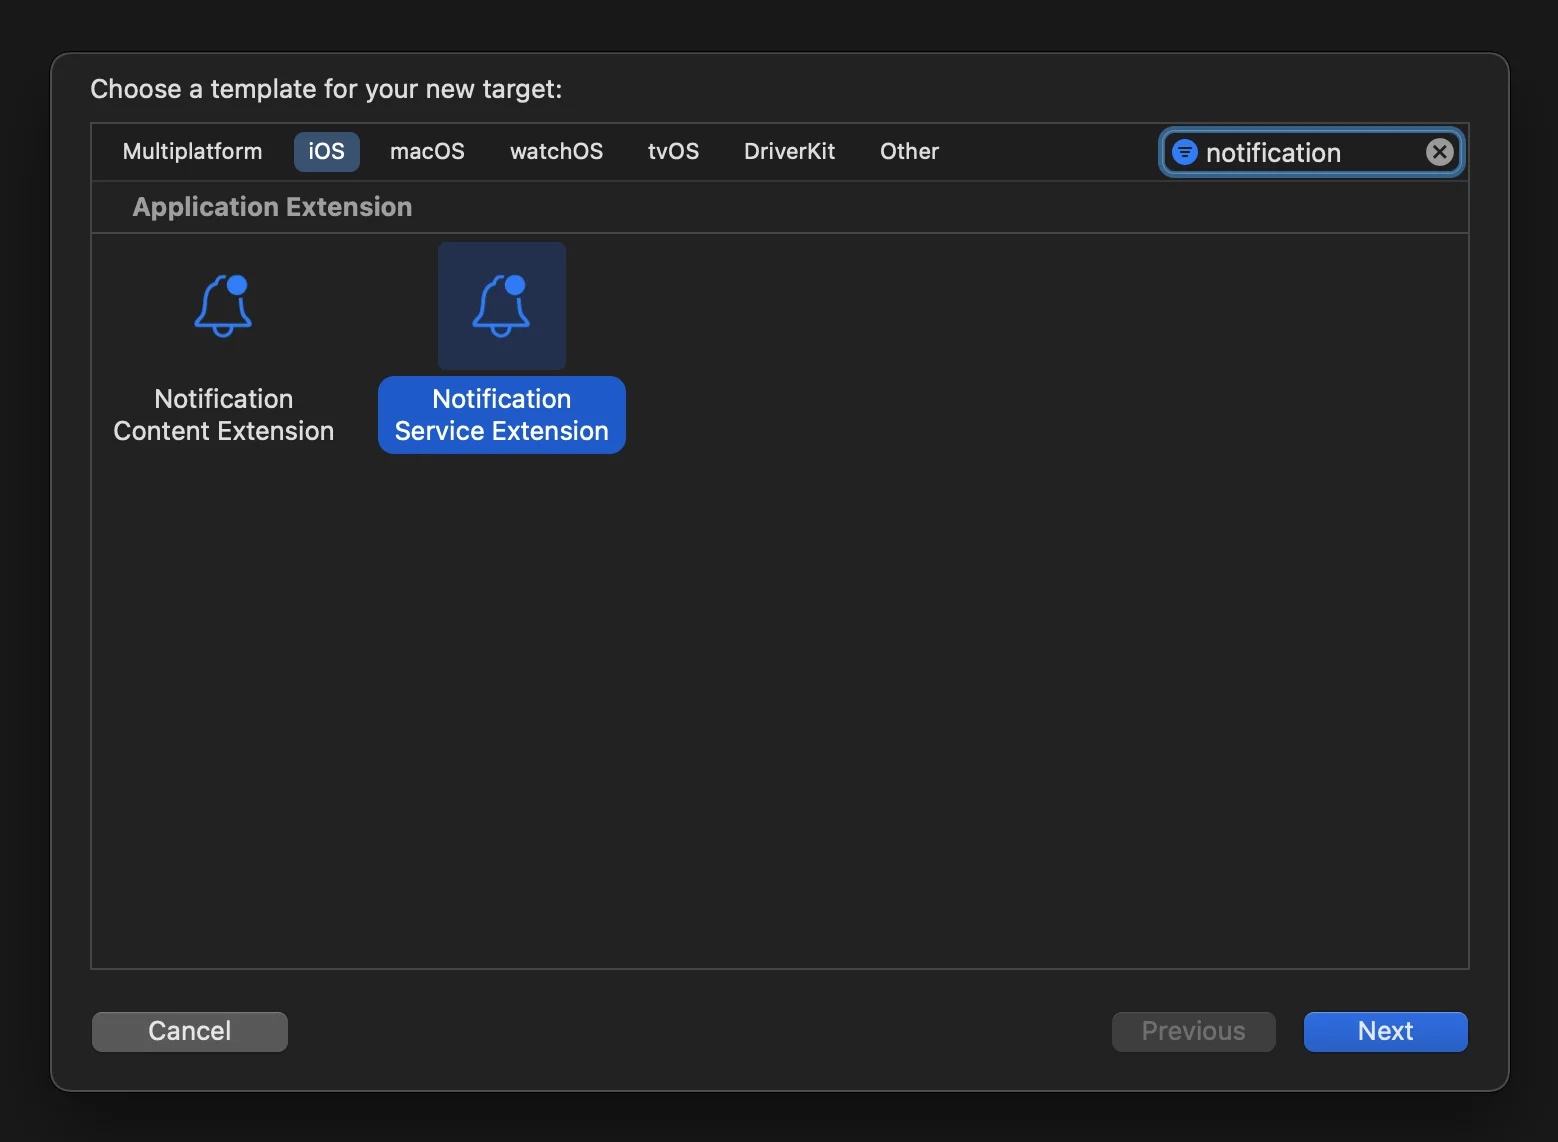
#### 2. حدد "Notification Service Extension"
#### 3. قم بتحديث كود Notification Service Extension كما يلي:
```
#import "NotificationService.h"
#import
@interface NotificationService ()
@property (nonatomic, strong) void (^contentHandler)(UNNotificationContent *contentToDeliver);
@property (nonatomic, strong) UNMutableNotificationContent *bestAttemptContent;
@end
@implementation NotificationService
- (void)didReceiveNotificationRequest:(UNNotificationRequest *)request withContentHandler:(void (^)(UNNotificationContent * _Nonnull))contentHandler {
self.contentHandler = contentHandler;
self.bestAttemptContent = [request.content mutableCopy];
[[PWNotificationExtensionManager sharedManager] handleNotificationRequest:request contentHandler:contentHandler];
}
- (void)serviceExtensionTimeWillExpire {
// Called just before the extension will be terminated by the system.
// Use this as an opportunity to deliver your "best attempt" at modified content, otherwise the original push payload will be used.
self.contentHandler(self.bestAttemptContent);
}
@end
```
#### 4. ربط التبعيات بالهدف (target)
لا يقوم React Native بربط جميع التبعيات المطلوبة تلقائيًا بالهدف (target) الذي تم إنشاؤه يدويًا، لذا يجب عليك تحديث **Build Phases** للهدف وتقديم المعلومات اللازمة:
فقط انقر على علامة **+** تحت **Compile Sources** و **Link Binary With Libraries** وابحث عن المكتبات/الأطر المطلوبة.
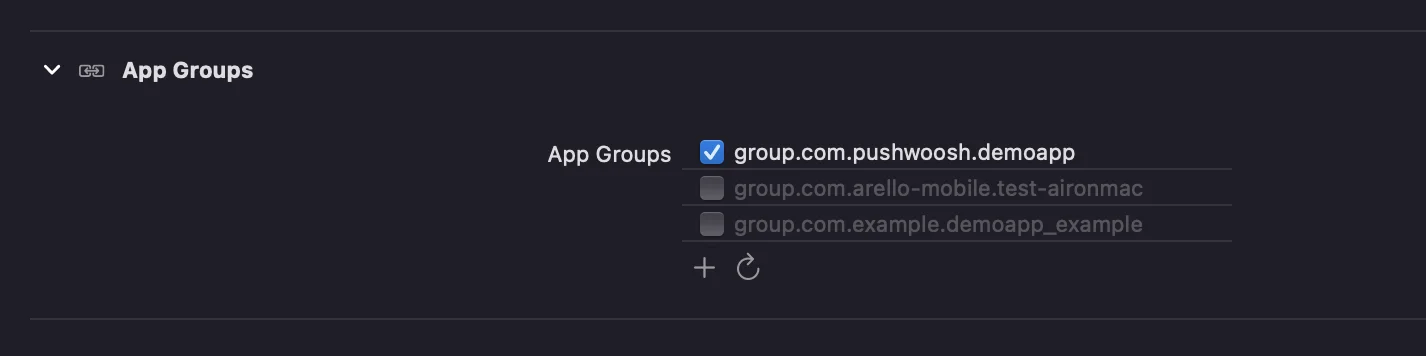
#### 5. أضف إمكانية **App Groups** إلى كلا الهدفين في Xcode وقم بتعيين نفس المجموعة **لكل من التطبيق والامتداد**:
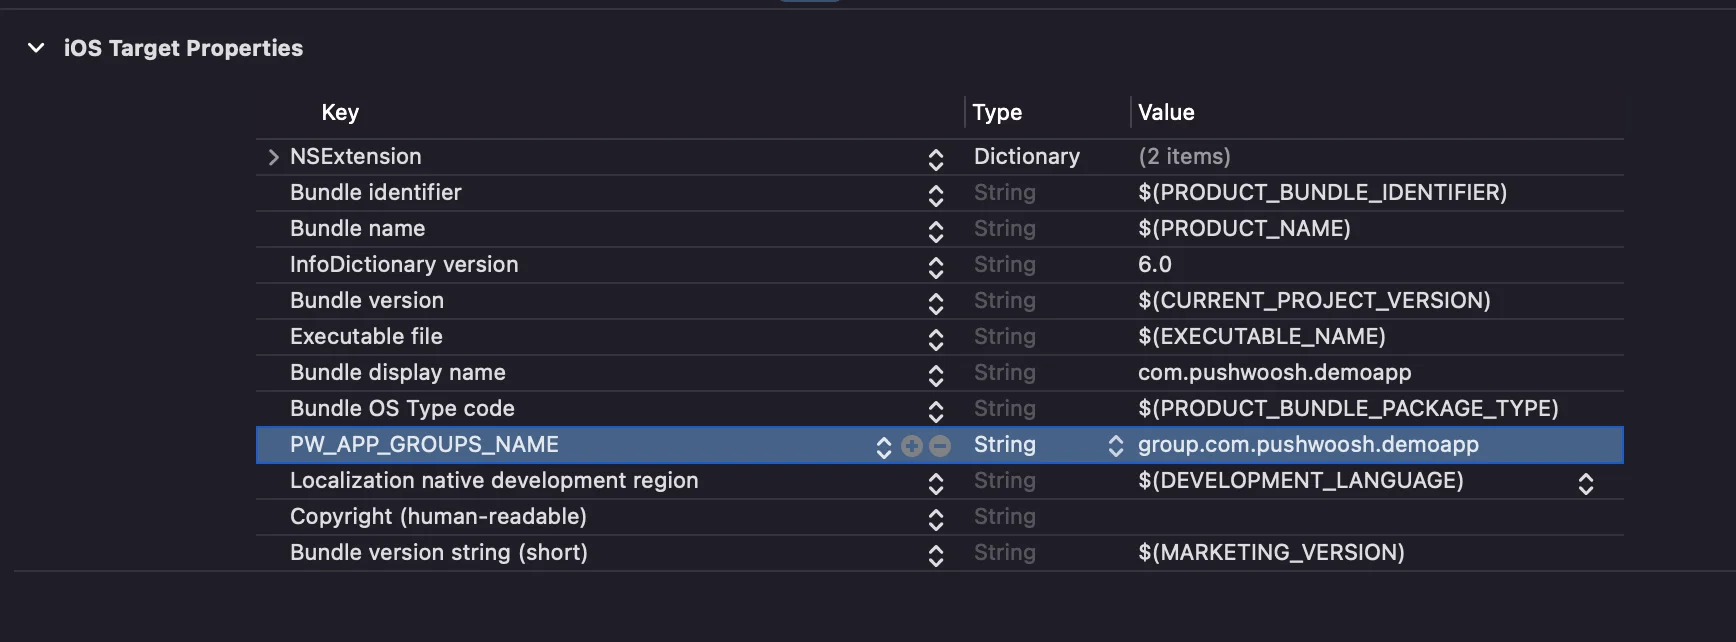
#### 6. أضف مفتاح **PW\_APP\_GROUPS\_NAME** إلى ملفات info.plists لكلا الهدفين. القيمة هي اسم مجموعة التطبيق الخاصة بك:
 #### 2. حدد "Notification Service Extension"
 #### 3. قم بتحديث كود Notification Service Extension كما يلي:
```
#import "NotificationService.h"
#import
#### 3. قم بتحديث كود Notification Service Extension كما يلي:
```
#import "NotificationService.h"
#import 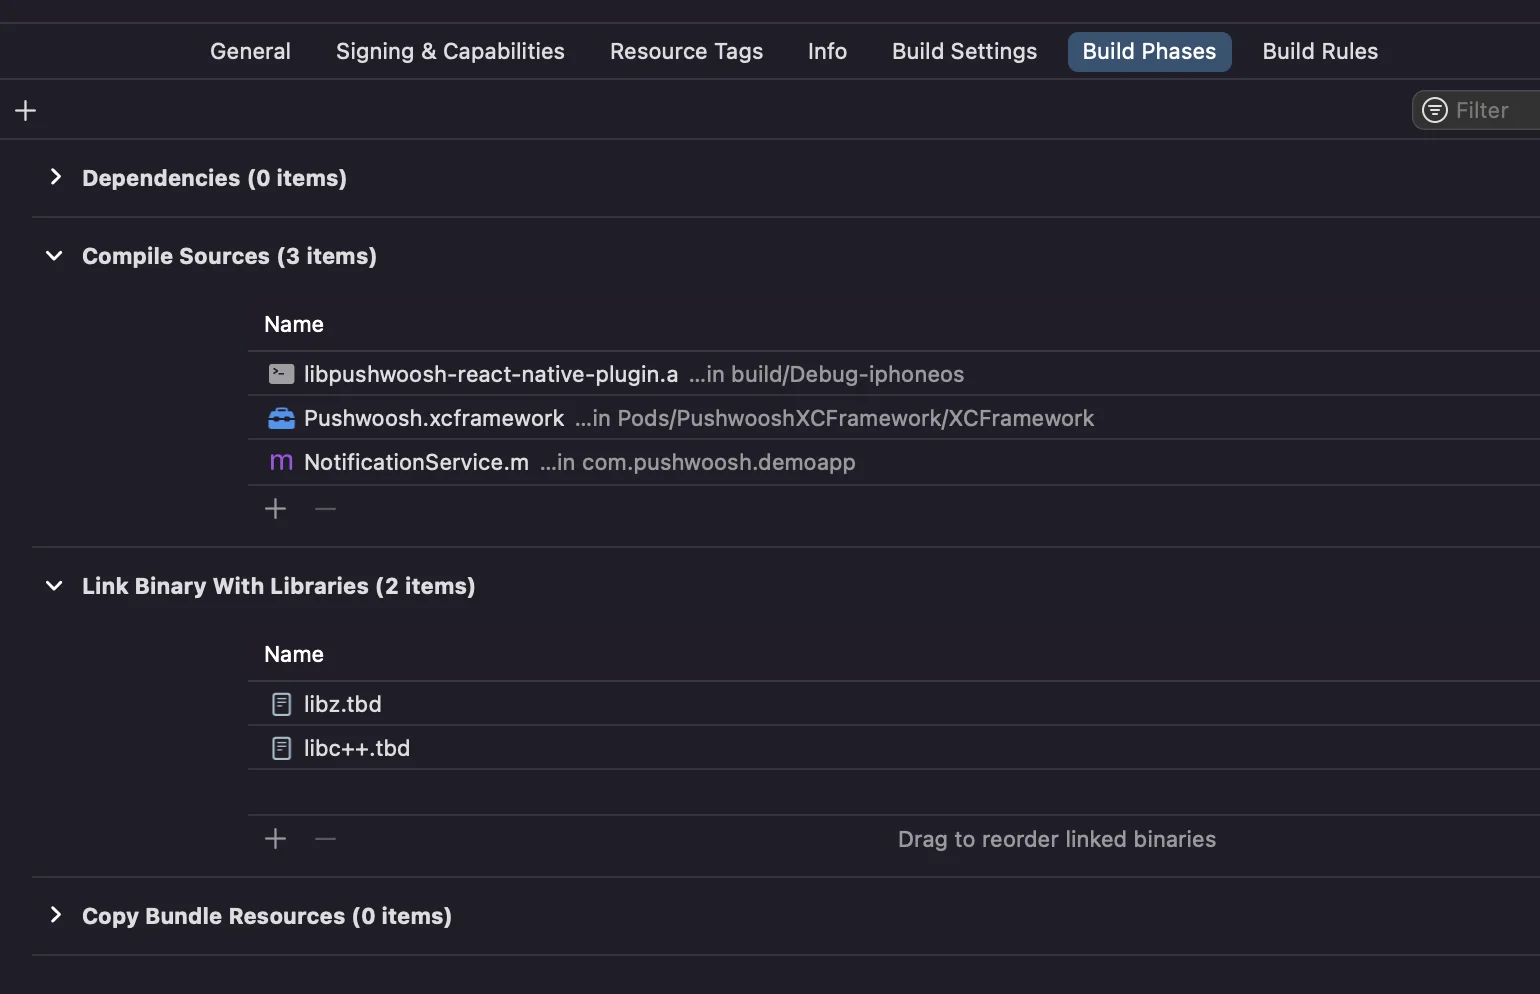 فقط انقر على علامة **+** تحت **Compile Sources** و **Link Binary With Libraries** وابحث عن المكتبات/الأطر المطلوبة.
#### 5. أضف إمكانية **App Groups** إلى كلا الهدفين في Xcode وقم بتعيين نفس المجموعة **لكل من التطبيق والامتداد**:
فقط انقر على علامة **+** تحت **Compile Sources** و **Link Binary With Libraries** وابحث عن المكتبات/الأطر المطلوبة.
#### 5. أضف إمكانية **App Groups** إلى كلا الهدفين في Xcode وقم بتعيين نفس المجموعة **لكل من التطبيق والامتداد**:
 #### 6. أضف مفتاح **PW\_APP\_GROUPS\_NAME** إلى ملفات info.plists لكلا الهدفين. القيمة هي اسم مجموعة التطبيق الخاصة بك: